
Débloquer le pouvoir du Bitcoin grâce à ses effets de réseau
Bitcoin est une nouvelle monnaie révolutionnaire qui a récemment gagné en popularité. C’est une monnaie incroyablement polyvalente, utilisée pour des
4479 Desserte Nord Autoroute 440, Laval, QC H7P 6E2
Bitcoin mining has swiftly ascended to the spotlight, capturing the attention of technology enthusiasts, crypto believers, and investment veterans alike. This modern-day digital gold rush represents a unique opportunity to generate cryptocurrency, specifically Bitcoin, the pioneering and most esteemed among its peers. It’s no surprise, therefore, that Bitcoin mining is becoming increasingly popular.
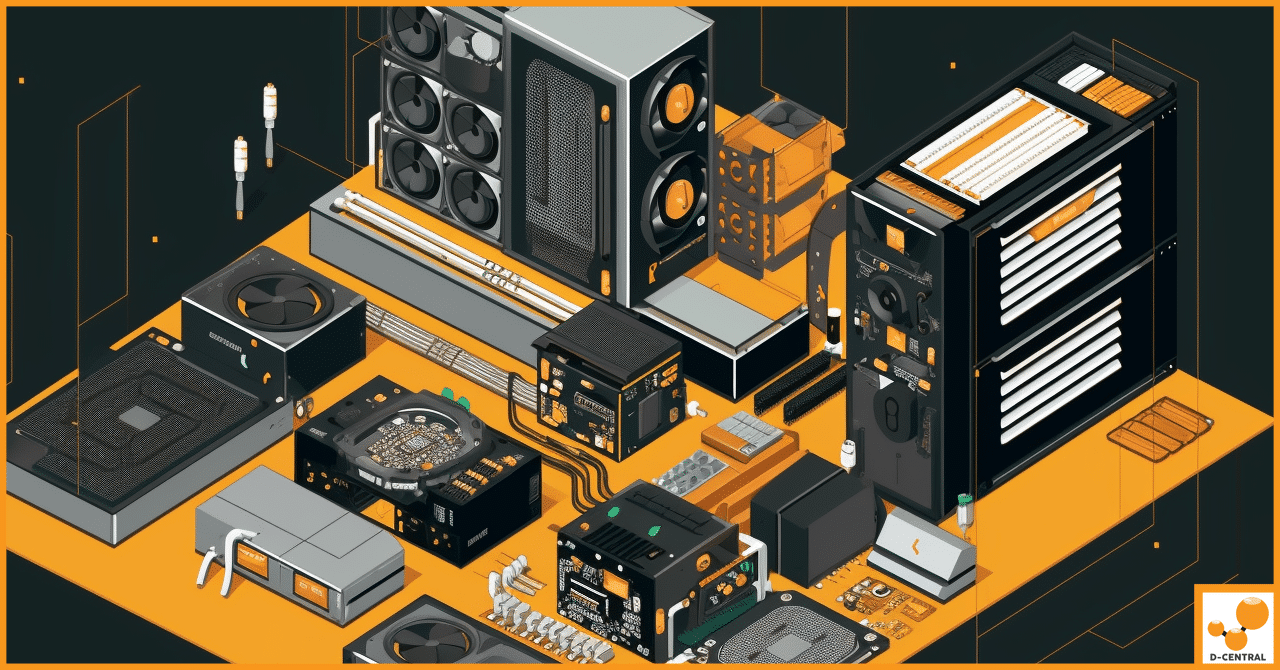
At the heart of this activity is the need for powerful and efficient hardware. Among the myriad of options available, the Antminer S17 stands out as a compelling choice. Built for purpose, it boasts an impressive hash rate and consumes less power than many of its rivals, making it a highly sought-after machine in the realm of Bitcoin mining.
However, the potency of the Antminer S17 isn’t solely in its hardware. To truly harness its potential, it’s crucial to set up the machine correctly. An efficient setup is essential to maximize your mining output and, ultimately, your return on investment. This means ensuring the proper connection of equipment, correctly configuring settings, and taking adequate measures to troubleshoot and avoid common setup issues.
The subsequent sections of this guide will provide you with a comprehensive, step-by-step approach to setting up your Antminer S17 efficiently. Whether you’re a novice miner or an experienced veteran, this guide is designed to help you make the most of your Bitcoin mining venture with the Antminer S17.
To set up your Antminer S17, you’ll need the following essential equipment:
The compatibility of your mining machine and PSU cannot be overstated. An incompatible PSU can lead to inefficient mining, and in the worst cases, it could potentially harm your Antminer S17. Always ensure your PSU is compatible with your mining machine and capable of providing the power it needs.
Moreover, attention must be given to your power source. Make sure it can handle the load of your mining operation. A power source that falls short could lead to intermittent mining or potentially dangerous conditions, such as electrical fires.
Safety should be your foremost consideration. Always use surge protectors and never overload your power circuits. Keep your setup in a well-ventilated, cool area to avoid overheating, and always have fire safety equipment like a fire extinguisher nearby as a precaution.
Having all of the necessary equipment and understanding the importance of each item, their compatibility, and the safety measures associated with them are the first steps towards a successful Antminer S17 setup.
The first step towards making your Antminer S17 operational is to establish its connection to your network. This connection allows your miner to join a mining pool and begin its Bitcoin mining journey.
By following these steps, your Antminer S17 will be connected to your network and ready for configuration through its web interface. Always ensure that your miner’s network connection is stable and reliable, as interruptions can affect mining performance and efficiency.
Once your Antminer S17 is connected to the network, the next step is to access its web interface, which allows you to configure your miner’s settings. Follow the steps below:
Make sure to select a strong, unique password. Consider using a combination of uppercase and lowercase letters, numbers, and symbols for enhanced security. Be sure to keep your new login credentials in a safe and secure place as you’ll need them to access your Antminer S17’s web interface in the future.
By successfully accessing the web interface, you’re one step closer to getting your Antminer S17 up and running. Remember, security is paramount. Always ensure your miner’s settings are protected by strong, unique login credentials.
Now that you’ve accessed the Antminer S17 web interface, you’re ready to configure your miner’s settings. These settings include selecting your mining pool and adjusting your mining parameters like frequency, fan speed, and voltage.
Choosing a Mining Pool: A mining pool is a collective group of cryptocurrency miners who combine their computational resources over a network, to enhance their chances of adding a block to the blockchain. Mining in a pool enhances stability and reduces variance in miner income. Several factors should be considered when choosing a pool, such as fees, payment method, reliability, reputation, and size. Researching these aspects will help you make an informed decision that best suits your needs.
Entering Pool Information: Once you’ve chosen a mining pool, you’ll need to enter its information in your Antminer S17 settings. Navigate to the ‘Miner Configuration’ tab and input your pool’s URL, your worker name, and password in the designated fields. Your worker name and password are typically set when you create an account with your chosen mining pool.
Configuring Mining Settings: Next, you can configure your Antminer S17’s mining parameters. These include:
Warning about Overclocking: While it might be tempting to boost your Antminer S17’s mining performance by increasing its frequency (a process known as overclocking), be wary. Overclocking can cause excessive heat, increase the risk of hardware damage and void your warranty. It’s generally advisable to operate your Antminer S17 at its factory settings unless you’re an experienced miner and are comfortable with the associated risks.
Proper configuration of your Antminer S17 is crucial for efficient and successful Bitcoin mining. Always remember to consider the factors mentioned above when adjusting your settings. The goal is to strike a balance between mining performance and hardware longevity.
Once you’ve configured your Antminer S17’s settings, you’re almost ready to begin your Bitcoin mining journey. Here’s what you need to do next:
Saving Your Settings: After entering all the required information and adjusting your settings, don’t forget to save them. You can do this by clicking the « Save & Apply » button at the bottom of the page. Your Antminer S17 will now start using these settings for its operation.
Starting to Mine Bitcoin: Following the successful saving and application of your settings, your Antminer S17 should automatically begin its mining operation. If not, navigate to the ‘Miner Status’ page and confirm that your Antminer S17 is connected to the pool and that it has started mining.
Monitoring Your Mining Progress: The web interface also provides a way for you to monitor your Antminer S17’s mining progress. Navigate to the ‘Miner Status’ page, where you can view important information such as your hash rate, accepted shares, rejected shares, hardware errors, and more. This page will help you track your miner’s performance and promptly detect any issues that may arise.
With these steps, your Antminer S17 is now fully set up and has begun its Bitcoin mining operation. Remember, consistent monitoring and regular checks can ensure smooth operation and maximize your mining output.
While setting up your Antminer S17, you might encounter a few common issues. Here are some potential problems you may face, along with their solutions and best practices to avoid them:
1. No Power or Miner Won’t Start: This issue could be due to a faulty or incompatible power supply unit (PSU), power cord, or miner. Check to ensure all equipment is in working condition and that your PSU is compatible with your miner. If the miner is new, reach out to the manufacturer or supplier for technical support or warranty claims.
2. Cannot Connect to the Network: If your miner doesn’t connect to the network, ensure the Ethernet cable is connected properly and is in good condition. Also, verify that your router has DHCP enabled or that you have manually assigned a valid IP address to your miner.
3. Cannot Access the Web Interface: Ensure you’ve entered the correct IP address assigned to your Antminer S17. If you’re unable to access the interface with the default credentials, perform a factory reset and try again.
4. Miner Overheating: Overheating can be caused by high ambient temperatures, insufficient airflow, or high mining frequency settings. Keep your miner in a cool and well-ventilated environment and monitor the frequency settings to prevent overheating.
5. Mining Pool Connection Issues: If you can’t connect to your mining pool, double-check the pool address, worker name, and password. Also, check your internet connection and ensure that your network firewall or internet service provider (ISP) is not blocking the connection.
6. Decreased Mining Performance: This can occur due to several reasons, including network issues, overheating, or issues with the mining pool. Regularly monitor your mining performance, network stability, and temperature to prevent this.
By being aware of these common issues and knowing how to troubleshoot them, you can ensure a smoother Antminer S17 setup process and a more stable mining operation. Don’t be discouraged by these challenges; they’re common in the world of Bitcoin mining and can be resolved with a little patience and perseverance.
Setting up your Antminer S17 correctly is pivotal to your success in Bitcoin mining. This comprehensive guide has walked you through each step of the process, from gathering the necessary equipment to configuring your miner’s settings, starting the mining process, and troubleshooting common issues. With these guidelines at your disposal, you are now better prepared to venture into the world of Bitcoin mining.
Whether you’re a seasoned miner looking to optimize your setup or a newcomer stepping into the Bitcoin mining sphere, understanding the ins and outs of your Antminer S17 is essential. This knowledge not only empowers you to maximize your mining efficiency but also contributes to a longer lifespan for your hardware.
It’s now time to put these instructions into action. As you embark on this exciting journey, remember to be patient, observant, and proactive in managing your miner. Bitcoin mining is a rewarding endeavor that can become even more fruitful with the right setup and maintenance.
So go ahead, set up your Antminer S17, and start mining like a professional! Welcome to the thrilling world of Bitcoin mining.
Avis de non-responsabilité : les informations fournies sur ce blog sont fournies à titre informatif uniquement et ne doivent en aucun cas être considérées comme une forme de conseil.
Articles Similaires
Bitcoin est une nouvelle monnaie révolutionnaire qui a récemment gagné en popularité. C’est une monnaie incroyablement polyvalente, utilisée pour des

Il existe plusieurs façons de s’impliquer dans le monde du Bitcoin, et ce monde ne cesse de croître rapidement. L’une
Bitcoin mining has swiftly ascended to the spotlight, capturing the attention of technology enthusiasts, crypto believers, and investment veterans alike.