Your ASIC miner is a precision instrument. It runs SHA-256 computations billions of times per second, converting electricity into hashrate that secures the most resilient monetary network ever built. With Bitcoin’s network difficulty now exceeding 110 trillion and total hashrate surpassing 800 EH/s, every terahash you contribute matters. But that hashrate only stays consistent if your hardware stays clean and cool.
This is not optional maintenance — this is operational discipline. Dust buildup and thermal degradation are the two most common reasons miners lose hashrate, burn through components prematurely, and end up shipping machines to our ASIC repair bench. Most of those repairs were preventable. The founder of D-Central has said it many times: the best repair is the one you never need.
Whether you are running a single Antminer S19 in your garage, a fleet of S21s in a dedicated room, or a Bitcoin space heater warming your living space, the principles are the same. Keep it clean. Keep it cool. Keep it hashing.
Why Cleaning and Cooling Are Non-Negotiable
ASIC miners are not computers in the traditional sense. They are single-purpose hashing machines engineered to run at maximum throughput 24 hours a day, 7 days a week. A modern Antminer S21 Hydro pushes over 300 TH/s while consuming north of 5,000 watts. That energy density creates serious thermal challenges.
When dust accumulates on heatsinks and fan blades, it acts as an insulating blanket. Thermal transfer drops. Chip junction temperatures rise. The firmware responds by throttling — reducing clock speeds to prevent damage. You see it as declining hashrate on your pool dashboard. What you do not see is the accelerated degradation of ASIC chips running above their rated thermal envelope.
The Real Cost of Neglect
Here is what happens when maintenance falls off the schedule:
- Hashrate loss: A 10-15% hashrate drop from thermal throttling is common on neglected machines. With the block reward at 3.125 BTC, every hash genuinely counts.
- Fan failure: Dust-clogged fans draw more current, overheat their bearings, and fail. A single dead fan on a dual-fan miner can cause immediate shutdown or, worse, let the machine cook itself.
- Hashboard death: Sustained high temperatures degrade solder joints and ASIC chip packages. Hashboard replacement is expensive — if replacement boards are even available for your model.
- Increased power consumption: Thermal throttling and fan strain both increase watt-per-terahash ratios. You pay more electricity for less work.
- Shortened lifespan: A well-maintained S19 can run for 5+ years. A neglected one might not survive 2.
At D-Central, we have repaired thousands of ASIC miners since 2016. The pattern is unmistakable: the machines that come in for major repairs are overwhelmingly the ones that never got regular maintenance.
Tools and Materials You Need
Before you touch your miner, gather everything. You do not want to be hunting for supplies with a disassembled hashboard on your workbench.
Essential Toolkit
- Compressed air (electric blower preferred): Canned air works for light duty, but an electric air blower (like a DataVac) is the better long-term investment. No moisture risk, unlimited supply, stronger airflow.
- Isopropyl alcohol (99% concentration): The universal electronics cleaning solvent. 99% IPA evaporates fast and leaves zero residue. Do not use 70% — the water content can cause problems on PCBs.
- Anti-static brush set: Soft-bristle brushes rated for ESD-safe work. Standard paintbrushes can carry static charges that damage ASIC chips.
- Microfiber cloths: Lint-free, non-abrasive. Use them for wiping down heatsinks and enclosures.
- Thermal paste (high quality): If you are pulling heatsinks, you must reapply thermal compound. Use a reputable brand — Arctic MX-6, Thermal Grizzly Kryonaut, or Noctua NT-H1. Cheap thermal paste defeats the purpose.
- Screwdriver set: Phillips and hex drivers matching your miner model. Antminers typically use Phillips #2 and hex 2.5mm.
- ESD wrist strap: Ground yourself. One static discharge can kill an ASIC chip instantly.
Nice-to-Have Additions
- Thermal camera or IR thermometer: Lets you identify hotspots before and after cleaning. Invaluable for diagnosing uneven cooling.
- Multimeter: For checking fan voltages, PSU output, and verifying connections after reassembly.
- Parts trays with labels: Keep screws organized by hashboard. They are not all identical on every model.
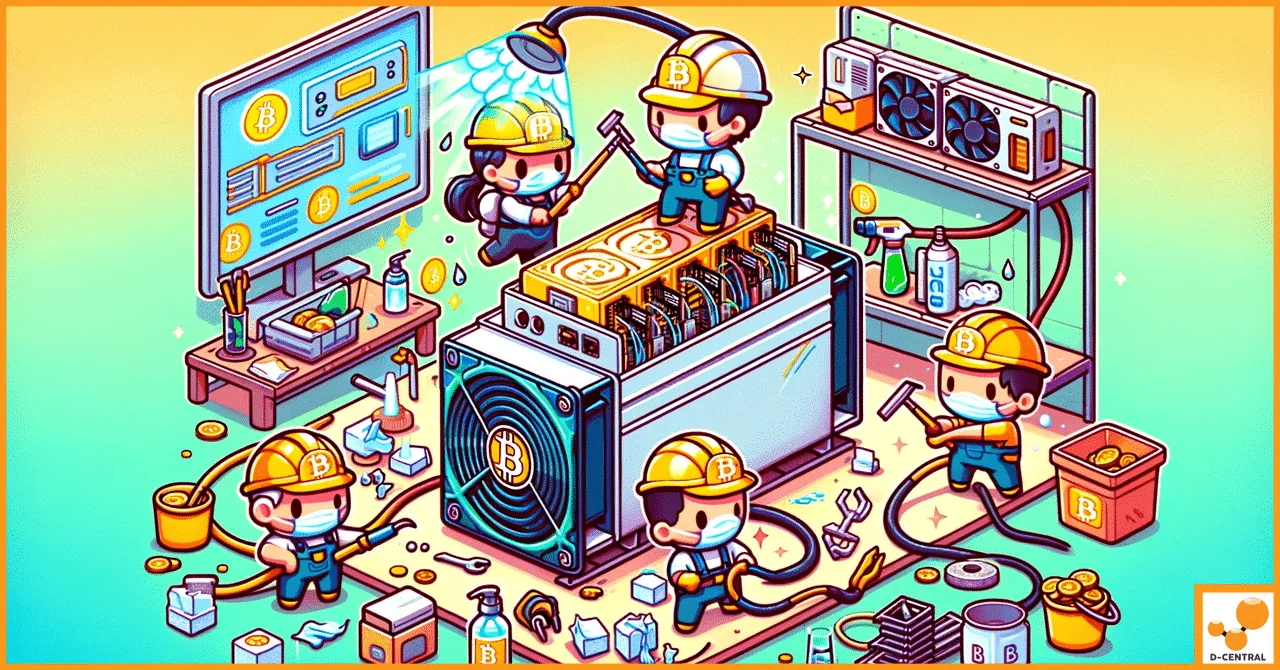
Step-by-Step: Cleaning Your ASIC Miner
Phase 1 — Shutdown and Preparation
- Stop mining gracefully. Log into your miner’s web interface and stop the mining process before powering down. This prevents abrupt shutdowns that can corrupt firmware settings.
- Power off and unplug. Disconnect the PSU from the wall, then disconnect all power cables from the miner. Wait at least 60 seconds for capacitors to discharge.
- Ground yourself. Attach your ESD wrist strap to a grounded metal surface. This is not paranoia — it is basic electronics discipline.
- Move to a clean workspace. Work on a non-conductive surface (wood table, ESD mat) with good lighting and ventilation. You are about to kick up a lot of dust.
Phase 2 — External Cleaning
- Blast the exterior. Use compressed air to blow dust off all external surfaces, paying special attention to fan grilles and intake/exhaust openings. Work from top to bottom.
- Clean fan blades. Hold each fan in place (prevent it from spinning freely from the airflow — free-spinning fans can generate back-EMF that damages the control board) and blast between the blades.
- Wipe the enclosure. Use a microfiber cloth lightly dampened with IPA to wipe down the metal casing. Remove any grime, mineral deposits, or sticky residue.
Phase 3 — Internal Cleaning
- Remove the top cover. On most Antminer models, this requires removing 4-6 Phillips screws along the top panel. Set screws aside in a labeled tray.
- Photograph the interior. Before touching anything, take photos of cable routing and connector positions. This saves headaches during reassembly.
- Blow out the interior. Direct compressed air across the hashboards, control board, and heatsink fins. Work methodically from one end to the other, blowing dust toward the exhaust side.
- Brush heatsink fins. Use an anti-static brush to dislodge caked dust from between heatsink fins. This is where the worst buildup occurs and where cleaning makes the biggest thermal difference.
- Clean the control board. Gently blow dust off the control board and its connectors. Inspect for any signs of corrosion, burned components, or swollen capacitors while you are here.
- Inspect fan connectors. Check that all fan cables are seated firmly. Loose connections cause intermittent fan failures that lead to overheating events.
Phase 4 — Deep Clean (Thermal Paste Replacement)
This step is required annually or whenever you notice persistent thermal issues after a standard cleaning. It involves removing heatsinks from ASIC chips — do not attempt this if you are not comfortable with precision hardware work. If in doubt, send it to us.
- Remove the hashboard. Disconnect power and data ribbons, then unscrew the hashboard from the chassis. Handle by the edges only.
- Remove the heatsink. Carefully unclip or unscrew the heatsink from the hashboard. Some models use spring-loaded screws; others use clips. Do not force anything.
- Clean off old thermal paste. Use a microfiber cloth dampened with 99% IPA to wipe the old thermal compound from both the chip surfaces and the heatsink base. Get it spotless — any old residue creates air gaps.
- Apply fresh thermal paste. Place a small dot (roughly the size of a grain of rice) on each ASIC chip. For larger heatsinks covering multiple chips, apply a thin line across the contact area. Less is more — excess paste squeezes out and can bridge components.
- Reassemble. Reattach the heatsink with even pressure. Reinstall the hashboard, reconnect all cables, and verify your photos match the reassembled state.
Cooling Strategies That Actually Work
Cleaning removes the obstacles to heat dissipation. Cooling strategy determines how much heat you can remove in the first place. The two work together — neither compensates for the absence of the other.
Airflow Management
Every ASIC miner is designed with a specific airflow path: intake on one side, exhaust on the other. Your job is to ensure this airflow path is unobstructed and well-supported by the room environment.
- Intake/exhaust separation: Never let hot exhaust air recirculate to the intake side. This is the single most common cooling mistake in home mining setups. If your miner exhausts into the same room it intakes from, room temperature rises continuously until the miner throttles.
- Ducting: Use shrouds or duct adapters to channel exhaust air out of the room — through a window, into ductwork, or into a space where you want the heat (hello, space heater mining). D-Central sells universal ASIC shrouds designed exactly for this purpose.
- Spacing: If running multiple miners, maintain at least 6 inches of clearance on intake and exhaust sides. Stacking miners directly against each other creates dead zones where heat accumulates.
- Fresh air supply: The room needs a source of cool intake air. In Canada, this is one of our natural advantages — cold outside air is free and abundant for most of the year.
Ambient Temperature Control
Your miner does not care about the room’s thermostat reading. It cares about the temperature of the air hitting its intake fans. Target 15-25C (59-77F) at the intake for optimal performance. Above 35C, most miners begin throttling aggressively.
- Basement installations: Naturally cooler, often 5-10C below ambient house temperature. Ideal for home miners.
- Garage or shed setups: Great in winter, potentially dangerous in summer without additional ventilation. Monitor aggressively during warm months.
- Dedicated mining rooms: If you have the space, a room with an intake vent on one wall and an exhaust vent on the opposite wall creates a natural wind-tunnel effect. Your miners become the fan system.
Advanced Cooling Options
When air cooling reaches its limits, these solutions provide additional headroom:
- Immersion cooling: Submerging miners in dielectric fluid eliminates dust entirely and provides superior heat transfer. It is the gold standard for cooling — but requires specialized tanks, fluid, and pumps. Overkill for most home miners, transformative for larger operations.
- Upgraded fans: Aftermarket fans with higher CFM ratings can improve cooling significantly. Just verify voltage and connector compatibility with your specific miner model before swapping.
- Underclocking/undervolting: Sometimes the best cooling strategy is to reduce heat at the source. Running a miner at 80% power often yields 85-90% of the hashrate with dramatically lower temperatures. Custom firmware like Braiins OS+ makes this trivially easy to configure.
Leveraging Canadian Climate
If you are mining in Canada, you have a cooling advantage that miners in warmer climates would kill for. Winter ambient temperatures regularly drop below -20C in many regions. The challenge is not cooling your miner — it is managing the cold air so you do not get condensation when warm, humid exhaust air meets freezing surfaces.
The smart play: use your miners as space heaters during the cold months and scale back during summer. This is the dual-purpose mining philosophy at the heart of D-Central’s Bitcoin space heater line. You are not just mining — you are heating your home and offsetting energy costs simultaneously.
Building a Maintenance Schedule
Consistency beats intensity. A miner that gets light maintenance every month will outlast one that gets a heroic deep clean once a year after things go wrong.
Monthly Tasks (15 minutes)
- Visual inspection of fan operation and LED indicators
- Check hashrate and temperature readings in the web interface
- Quick exterior blow-down with compressed air
- Verify ambient room temperature is within range
Quarterly Tasks (1 hour)
- Full external and internal compressed air cleaning
- Brush heatsink fins and clean fan blades
- Inspect all cable connections for seating and corrosion
- Check for firmware updates from the manufacturer
- Clean or replace intake air filters if installed
Annual Tasks (2-3 hours)
- Full disassembly and deep clean
- Thermal paste replacement on all hashboards
- Fan replacement if bearings show signs of wear (grinding noise, wobble)
- PSU inspection — check for dust buildup, capacitor swelling, fan operation
- Full performance benchmark: compare current hashrate to factory spec
Monitoring: Know Before It Breaks
The best miners are the ones that tell you when something is wrong before it becomes catastrophic. Modern ASIC firmware provides a wealth of diagnostic data. Use it.
Key Metrics to Watch
- Chip temperature: Most miners report per-chip or per-board temperatures. Know your model’s safe range. For Antminer S19 series, keep chips below 80C. For S21 series, target below 75C.
- Fan RPM: If fan speed drops while temperature rises, the fan is failing. If fan speed maxes out while temperature still climbs, your cooling is insufficient.
- Hashrate vs. expected: Track actual hashrate against the manufacturer’s rated hashrate. A sustained drop of more than 5% indicates a problem — thermal, electrical, or chip degradation.
- Hardware errors (HW): A small number of HW errors is normal. A sudden spike often indicates a thermal issue or a failing chip.
- Power consumption: If wattage increases without a corresponding hashrate increase, something is wrong. Inefficiency is a symptom.
Monitoring Tools
The miner’s built-in web interface is your first stop. For more sophisticated monitoring across multiple machines, tools like Foreman, Awesome Miner, or simple Grafana dashboards pulling from the miner’s API can give you fleet-wide visibility. Set up alerts for temperature thresholds and hashrate drops — do not rely on checking dashboards manually.
When to Call in the Professionals
There is no shame in knowing your limits. Some maintenance tasks require specialized equipment, firmware-level diagnostics, or component-level soldering skills that take years to develop.
Send your miner for professional ASIC repair when you encounter:
- Dead hashboards: If a hashboard stops producing any hashrate, the issue is likely a failed ASIC chip, blown voltage regulator, or broken trace. This requires component-level diagnosis and BGA rework equipment.
- Persistent overheating after cleaning: If temperatures remain high after a thorough cleaning and thermal paste replacement, there may be a failed thermal pad, warped heatsink, or damaged chip generating excessive heat.
- Error codes you cannot resolve: Firmware error codes that persist after power cycling and configuration reset typically indicate hardware-level faults.
- Physical damage: Water exposure, power surge damage, or physical impact damage all require professional assessment.
- Firmware issues: Bricked control boards, failed firmware updates, or SD card corruption need careful recovery.
D-Central has been repairing ASIC miners since 2016 with dedicated repair pages for 38+ specific miner models. We operate a full repair facility in Laval, Quebec and serve miners across Canada and internationally. For operations that need more than a home setup can provide, we also offer Bitcoin mining hosting in Canada with professional cooling infrastructure already in place. Every repair starts with a thorough diagnostic — we tell you exactly what is wrong and what it costs before we touch a soldering iron.
The Bigger Picture: Maintenance as Sovereignty
Here is the thing most guides will not tell you: maintaining your own mining hardware is an act of sovereignty. When you know how to clean, cool, diagnose, and maintain your miners, you are not dependent on anyone. You control your means of production in the most important network in human history.
Bitcoin’s security depends on a decentralized network of miners. With hashrate exceeding 800 EH/s and the block reward at 3.125 BTC, the incentives are clear — but so is the need for every miner to run as efficiently as possible. A home miner in Canada running well-maintained hardware, powered by cheap hydroelectric energy, using waste heat to warm their home — that is the vision D-Central was founded on. That is the Mining Hacker way.
Take care of your machines. They are taking care of the network.
Frequently Asked Questions
How often should I clean my ASIC miner?
Light cleaning (compressed air blow-down) should happen monthly. Full internal cleaning with heatsink brushing should happen quarterly. Deep cleaning with thermal paste replacement should happen annually. If your environment is particularly dusty — a garage, basement with exposed insulation, or a room near a woodshop — increase frequency accordingly.
Can I use a regular vacuum cleaner instead of compressed air?
No. Standard vacuum cleaners generate significant static electricity that can destroy ASIC chips on contact. Use compressed air, an electric blower designed for electronics (like a DataVac), or an ESD-safe vacuum specifically rated for electronics work. Never use a household vacuum on circuit boards.
What is the ideal operating temperature for an ASIC miner?
Most modern Bitcoin ASIC miners perform optimally with chip temperatures between 60-80C. Ambient intake air temperature should ideally be 15-25C. Above 35C ambient, most miners begin thermal throttling. Below 5C, you risk condensation issues. Check your specific model’s documentation for rated operating ranges — they vary by manufacturer and generation.
Do I need to replace thermal paste, or is cleaning the heatsinks enough?
Thermal paste degrades over time — it dries out, cracks, and loses its ability to transfer heat effectively. Even if your heatsinks look clean, old thermal paste can be the hidden cause of elevated temperatures. We recommend replacing thermal paste annually, or sooner if you notice chip temperatures creeping up despite clean heatsinks and functioning fans.
Is immersion cooling worth it for home miners?
For most home miners running 1-3 machines, immersion cooling is overkill. The cost of the tank, dielectric fluid, pumps, and heat exchangers typically exceeds the value of the improved efficiency. Air cooling with proper ducting and maintenance is sufficient. Immersion cooling becomes attractive at 10+ machines or in environments where noise and heat are serious constraints. It also eliminates dust entirely, which reduces maintenance to near-zero.
My miner’s fans are loud. Is that a sign of a problem?
ASIC miners are inherently loud — stock fan noise ranges from 65-85 dB depending on the model. However, if the noise has increased noticeably or changed pitch (grinding, clicking, whining), the fan bearings are likely failing and the fans should be replaced. Also check that nothing is physically obstructing the fan blades and that intake air is cool enough — fans ramp up speed as temperatures rise.
Can dust actually cause permanent damage, or does it just reduce performance?
Dust absolutely causes permanent damage. Severe dust accumulation insulates heat around ASIC chips, causing sustained operation above rated temperatures. This accelerates electromigration within the chip die, degrades solder joints, and can ultimately kill individual chips or entire hashboards. D-Central’s repair team sees this regularly — hashboards with failed chips that show clear signs of chronic overheating from dust buildup. Prevention through cleaning is always cheaper than repair.
Should I clean my Bitcoin space heater differently than a standard ASIC miner?
The core cleaning process is identical — compressed air, brush heatsinks, check fans. The difference is that Bitcoin space heaters are often installed in living spaces where dust profiles differ (pet hair, carpet fibers, cooking particulates). If your space heater is in a high-traffic living area, increase your cleaning frequency to monthly internal inspections. Also ensure the intake and exhaust ducting remains clear and properly sealed.
 Bitaxe Heatsink — High-Performance Aluminum Cooler for Bitaxe & Nerdaxe Gamma / Supra / Ultra — Silent Operation & Stable Overclocking" width="80" height="80" loading="lazy" style="width:80px;height:80px;object-fit:contain;border-radius:6px;background:#1A1A1A;flex-shrink:0;">
Shop Heatsinks
Bitaxe Heatsink — High-Performance Aluminum Cooler for Bitaxe & Nerdaxe Gamma / Supra / Ultra — Silent Operation & Stable Overclocking" width="80" height="80" loading="lazy" style="width:80px;height:80px;object-fit:contain;border-radius:6px;background:#1A1A1A;flex-shrink:0;">
Shop Heatsinks