Every ASIC miner that rolls into our repair bay at D-Central Technologies tells a story. Burn marks on a hashboard capacitor. A control board that smells like ozone. Fan bearings seized from two years of 24/7 operation in a dusty basement. The question is: are you capturing that story, or are you just swapping parts and hoping for the best?
After nearly a decade of hands-on ASIC repair work — thousands of Antminers, Whatsminers, Avalons, and everything in between — we can tell you with absolute certainty: documentation is the difference between a repair shop and a guessing game. Proper documentation doesn’t just protect your investment. It builds institutional knowledge, prevents repeat failures, accelerates future diagnostics, and gives you the receipts when manufacturers try to deny warranty claims.
This guide breaks down exactly how to document ASIC repairs the right way — the same methodology we use on every unit that comes through our ASIC repair service. Whether you’re a home miner maintaining your own fleet, a small repair shop getting started, or an operations manager overseeing hundreds of machines, these practices will save you time, money, and headaches.
Why Most Miners Skip Documentation (And Why That’s a Costly Mistake)
Let’s be honest. When your S19j Pro drops three hashboards at 2 AM and you’re hemorrhaging sats, the last thing on your mind is filling out a repair log. You want that machine back online yesterday. We get it. But skipping documentation is a form of technical debt that compounds ruthlessly.
Here’s what happens without documentation:
- You fix the same failure twice. Three months later, the same hashboard fails the same way. Without records, you’re starting from scratch — re-diagnosing an issue you already solved.
- You lose warranty leverage. In 2026, with new-generation machines like the S21 series costing thousands, a denied warranty claim because you can’t prove the failure was a manufacturing defect — not operator error — is an expensive lesson.
- Pattern recognition dies. That specific batch of BM1397 chips with the known thermal compound adhesion issue? You’d only catch that pattern if you’re tracking serial numbers, failure modes, and repair outcomes across your fleet.
- Knowledge walks out the door. When the one technician who “just knows” how your machines behave leaves, all that tribal knowledge goes with them.
- Resale value drops. A documented maintenance history on a used ASIC miner is like a carfax report. Buyers pay premiums for machines with verified repair records.
The Bitcoin network doesn’t care about your excuses. With difficulty above 110T and network hashrate pushing past 800 EH/s in 2026, every hour of downtime is real money evaporating. Documentation is how you minimize those hours.
The Anatomy of a Proper ASIC Repair Record
A complete repair record isn’t a sticky note that says “replaced fan.” It’s a structured document that captures the full context of a repair event. Here’s what every record should contain:
1. Device Identification
| Field | Example | Why It Matters |
|---|---|---|
| Manufacturer & Model | Bitmain Antminer S19j Pro+ | Determines repair procedures, firmware, and compatible parts |
| Serial Number | MAC-based or chassis SN | Unique device tracking across its entire lifecycle |
| Firmware Version | Stock / Braiins OS+ / Vnish | Firmware affects behavior, error codes, and tuning parameters |
| Purchase Date / Warranty Status | 2024-03-15 / 180-day warranty active | Determines warranty eligibility for parts and labor |
| Operating Environment | Home setup, ambient 25°C, 240V | Environmental context explains many failure modes |
This baseline data goes on every ticket before a single screw gets turned. At D-Central, we photograph every incoming unit with its serial number visible and log it against the customer’s account immediately.
2. Symptom Documentation
Capture exactly what the operator reported and what you observed. These are often different — and both matter.
- Operator-reported symptoms: “Machine shows 0 TH/s on pool dashboard” or “Fan error on web interface” or “Smells like burning”
- Technician-observed symptoms: Specific error codes from the miner’s web interface, LED status patterns, audible abnormalities, physical damage visible on inspection
- Timestamp of failure: When did the issue first appear? Sudden failure vs. gradual degradation tells you completely different stories
3. Diagnostic Testing Results
This is where most documentation falls apart. People jump from “it’s broken” to “I replaced the part” without capturing the diagnostic data that justifies the repair decision.
A proper diagnostic record includes:
- Visual inspection findings: Burn marks, swollen capacitors, corrosion, thermal paste condition, dust accumulation levels, physical damage to connectors
- Hashboard test results: Per-domain voltage readings, ASIC count, temperature differentials across the board, frequency response at various clock settings
- Power supply testing: Output voltage under load, ripple measurement, connector condition, fan operation
- Control board diagnostics: Network connectivity, firmware integrity, GPIO pin status, EEPROM health
- Thermal imaging: If available, infrared scans of hashboards under load are invaluable for identifying failing chips or cold solder joints before they become complete failures
Document this with photos. A smartphone photo of a burned MOSFET takes 5 seconds and saves 20 minutes of written description. At D-Central, our technicians photograph key diagnostic findings as standard procedure — it’s part of the repair workflow, not an afterthought.
4. Repair Actions Performed
This is the core of the record. Every repair action gets logged with specifics:
| Data Point | Good Example | Bad Example |
|---|---|---|
| Component replaced | BM1397AD ASIC chip, position U35, hashboard #2 | “Replaced chip” |
| Reason for replacement | Chip shorted — 0V domain voltage, thermal hotspot confirmed via IR | “Was bad” |
| Part source | New BM1397AD from D-Central inventory, lot #2025-Q3 | (not recorded) |
| Soldering details | BGA rework at 245°C peak, leaded solder paste, 3-zone profile | “Soldered it” |
| Firmware action | Flashed Braiins OS+ 24.12, configured autotuning at 3200W target | “Updated firmware” |
Notice the difference? The “good” column gives any future technician — including yourself six months from now — everything they need to understand what was done and why. The “bad” column is functionally useless.
5. Post-Repair Verification
Never close a repair ticket without documented proof that the machine works. This means:
- Burn-in test results: Minimum 24-hour run at target hashrate. Record average hashrate, temperature per hashboard, fan speeds, power consumption, and error rates
- Pool-side verification: Confirm the machine is submitting valid shares to a pool. Hashrate on the miner’s web interface and hashrate reported by the pool should align within normal variance
- Before/after comparison: If the machine was partially operational before repair, compare pre-repair and post-repair metrics side by side
- Customer sign-off: For professional repair services, the customer should acknowledge the repair outcome and receive a copy of the complete repair record
Building Your Documentation System
You don’t need enterprise software to document repairs properly. You need a system — any system — that you’ll actually use consistently. Here are three tiers:
Tier 1: Solo Home Miner (1–5 machines)
A spreadsheet is fine. Create columns for date, machine ID, symptom, diagnosis, action taken, parts used, cost, and result. Add a notes column for anything unusual. Store photos in a folder organized by machine serial number. The key is consistency — log every repair, every time, even if it’s just a fan swap or a firmware reflash.
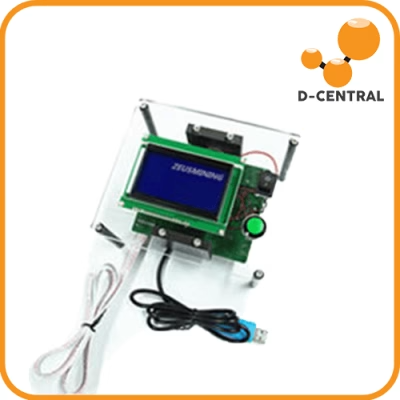
If you’re running a few Bitaxe units for solo mining alongside a larger ASIC, the documentation is simpler (fewer components, fewer failure modes) but equally important. Track firmware versions, overclocking settings, and any connectivity issues — these data points help you optimize performance over time.
Tier 2: Small Repair Shop or Medium Fleet (5–50 machines)
Graduate to a ticket-based system. This could be a self-hosted solution like osTicket, a project management tool like Notion or Trello configured for repair tracking, or purpose-built repair shop software like RepairDesk. The critical features you need:
- Unique ticket per repair event
- Photo attachment capability
- Searchable history per device serial number
- Parts inventory tracking
- Customer communication log
- Exportable reports
Tier 3: Large Operations (50+ machines)
At scale, you need integrated fleet management that ties repair documentation to operational monitoring. Your monitoring system (whether that’s Foreman, Hive OS, or a custom dashboard) should feed device telemetry into your repair management workflow. When a hashboard drops offline, the system should automatically create a diagnostic ticket with the relevant telemetry data pre-populated.
If you’re managing a fleet this large and need help optimizing your operations, D-Central’s mining consulting service can help you design monitoring and maintenance systems tailored to your scale.
Common ASIC Failures and What to Document for Each
Different failure modes require different documentation focus. Here are the most common failures we see at our repair facility and the specific data points you should capture for each:
Hashboard Failures
The most common and most complex repair category. Hashboard failures account for roughly 60% of all ASIC repairs we handle.
- Document: Which hashboard (numbered position), which chips are affected (position numbers), voltage domain readings, temperature map, error codes from miner interface, photo of any visible damage
- Track over time: If the same hashboard or chip position fails repeatedly, this indicates a design weakness or environmental issue, not just random component failure
- Parts detail: Log exact chip part numbers (BM1366, BM1370, etc.), replacement component source, and soldering parameters used
Power Supply Failures
PSU issues are the second most common category, often caused by voltage fluctuations, overloaded circuits, or simply component aging.
- Document: Input voltage measured at the wall, output voltage under load, ripple voltage if measurable, ambient temperature, age of PSU, whether a surge event preceded the failure
- Critical detail: Record your electrical setup — dedicated circuit? Shared circuit? Voltage regulator in place? This context prevents repeat failures
Fan and Cooling Failures
Seemingly trivial but catastrophic if unaddressed. A failed fan leads to thermal throttling, which leads to hashrate loss, which leads to revenue loss.
- Document: Fan position (intake vs. exhaust), RPM readings before failure, ambient temperature, dust accumulation level, whether the fan seized completely or degraded gradually
- Prevention insight: If you’re tracking fan lifespans across your fleet, you can predict replacements before they fail. A fan that ran 18,000 hours in a dusty environment has a different replacement schedule than one in a filtered facility
For home miners using Bitcoin space heaters in living spaces, fan noise degradation is often the first sign of a cooling issue. Document any changes in noise profile — it’s useful diagnostic data.
Control Board and Firmware Issues
Control board issues can mimic hashboard failures, leading to misdiagnosis if you’re not documenting carefully.
- Document: Firmware version at time of failure, error messages (screenshot or photo), network configuration, whether the issue persists after firmware reflash, EEPROM status
- Key distinction: Does the issue follow the control board when swapped to a different chassis, or does it stay with the hashboards? This simple test, when documented, prevents you from replacing the wrong component
Environmental and Electrical Failures
These are failures caused by the operating environment rather than the machine itself. Voltage sags, power surges, flooding, extreme temperatures, or corrosive environments.
- Document: Ambient temperature at time of failure, humidity levels, electrical panel configuration, recent weather events, facility changes (new equipment on same circuit, construction, etc.)
- Why it matters: If three machines on the same circuit fail within a week, the problem isn’t the machines. Without environmental documentation, you’ll keep replacing parts instead of fixing the root cause
Documentation as a Weapon for Warranty Claims
Here’s where documentation pays for itself in a single incident. Manufacturer warranty claims are adversarial by nature. The manufacturer’s incentive is to deny the claim. Your documentation is your evidence.
A strong warranty claim includes:
- Proof of purchase with date, serial number, and seller details
- Timeline of the failure showing the issue appeared within the warranty period
- Diagnostic evidence proving the failure is a manufacturing defect (not operator error, not environmental damage, not unauthorized modification)
- Photos showing the defect — solder joint cracks from factory, component placement errors, PCB delamination
- Operating conditions proving the machine was run within manufacturer specifications (ambient temperature, voltage, humidity)
Without this documentation, the manufacturer will default to “operating outside specifications” or “unauthorized modification” and deny the claim. With it, you have a paper trail that’s difficult to argue against.
We’ve helped countless customers successfully navigate warranty disputes through our repair service. Proper documentation was the decisive factor in virtually every successful claim.
The D-Central Repair Documentation Standard
Since 2016, D-Central Technologies has refined our repair documentation process through thousands of units serviced. Here’s what we’ve learned works:
Intake Protocol
Every machine entering our facility is:
- Photographed with serial number visible
- Logged into our repair management system with customer information and reported symptoms
- Visually inspected for external damage (documented with photos before any disassembly)
- Assigned a unique repair ticket that tracks the unit through every stage
Diagnostic Protocol
Our technicians follow a standardized diagnostic checklist specific to each manufacturer and model family. All readings, test results, and observations are recorded in the ticket. Thermal imaging and high-resolution macro photography capture details that text descriptions miss.
Repair Protocol
Every repair action is logged in real time — component replaced, position, reason, parameters used. Our parts inventory system automatically links replacement components to specific repair tickets, creating a complete chain of custody for every part.
Verification Protocol
Post-repair burn-in testing runs for a minimum period with full telemetry logging. The resulting data is attached to the repair record and included in the customer’s repair report. You get a complete picture of your machine’s health, not just a “fixed it” email.
This level of documentation is why D-Central has built a reputation as the go-to ASIC repair service for home miners and small operations across Canada. When you send us a machine, you get it back with a complete repair dossier — not a mystery.
Documentation Templates You Can Use Today
Here’s a minimum viable documentation template for a single repair event. Copy this, adapt it to your needs, and use it every time:
| Section | Fields to Record |
|---|---|
| Device Info | Make, model, serial number, firmware version, purchase date, warranty status |
| Environment | Location, ambient temp, humidity, electrical setup (voltage, dedicated circuit Y/N) |
| Symptoms | Operator-reported issue, date first noticed, technician-observed symptoms, error codes |
| Diagnostics | Visual inspection findings, hashboard readings, PSU test results, thermal scan notes, photos taken |
| Repair Actions | Each action: component, position, reason, replacement part details, soldering parameters, firmware changes |
| Parts Used | Part number, description, quantity, source, lot number if available |
| Verification | Burn-in duration, avg hashrate, per-board temps, fan speeds, power draw, pool share confirmation |
| Outcome | Status (resolved/partial/unresolvable), total repair time, total parts cost, technician name, date completed |
Print it, bookmark it, tattoo it on your arm — whatever it takes to make it part of your workflow.
Turning Documentation Into Operational Intelligence
Here’s where documentation graduates from defensive record-keeping to offensive strategic advantage. When you have months or years of structured repair data, you can:
- Predict failures before they happen. If BM1366 chips at position U12 on a specific hashboard revision fail at a 15% rate after 14 months, you can preemptively schedule replacements during planned maintenance windows instead of dealing with unscheduled downtime.
- Optimize purchasing decisions. Your repair data tells you which machine models have the highest total cost of ownership — not just the sticker price, but the real cost including parts, labor, and downtime. This informs your next hardware purchase.
- Negotiate with manufacturers. Armed with fleet-wide failure data that shows a systematic defect, you have leverage for bulk warranty claims or replacement negotiations that individual anecdotes can’t provide.
- Train faster. Documented repair cases become training material. New technicians learn from real examples rather than abstract theory. At D-Central, our repair knowledge base — built from years of documentation — is how we train our technicians and share knowledge with the community.
- Prove ROI on maintenance investments. Can you quantify the return on your preventive maintenance program? With documentation, you can show that machines receiving quarterly maintenance have 40% fewer unplanned repairs than those running until failure.
This kind of operational intelligence is what separates professional mining operations from hobbyists running on hope. And it all starts with writing things down.
Documentation in the Context of Decentralized Mining
D-Central exists to decentralize every layer of Bitcoin mining. Part of decentralization is empowering individual miners to be self-sufficient — and documentation is a core pillar of self-sufficiency.
When you document your own repairs, you’re building sovereign knowledge. You don’t depend on a manufacturer’s tech support (which may not exist for older hardware). You don’t depend on a specific technician. Your repair knowledge lives in your records, transferable, searchable, and permanent.
This is especially relevant for the home mining community. A solo miner running a Bitaxe or a space heater conversion in their basement is their own operations team, their own maintenance crew, and their own documentation department. Building the discipline to document every repair and maintenance event is part of the sovereignty mindset that makes decentralized mining resilient.
When thousands of individual miners maintain their own documented repair histories, the collective knowledge base of the home mining community grows stronger. Shared documentation — in forums, Discord communities, and open-source repair wikis — strengthens the entire network.
FAQ
What’s the minimum documentation I should keep for a single ASIC miner at home?
At minimum, record the machine’s make, model, serial number, firmware version, purchase date, and electrical setup. Then for every repair or maintenance event, log the date, what happened, what you did, and any parts you used. Store photos of any visible damage or diagnostic readings. A simple spreadsheet works perfectly for 1-5 machines.
How does documentation help with warranty claims?
Manufacturers often deny warranty claims by alleging operator error or environmental damage. Documented evidence of proper operating conditions (voltage, temperature, humidity within spec), along with diagnostic proof showing the failure is a manufacturing defect, makes your claim significantly harder to deny. Include timestamped photos, diagnostic readings, and a failure timeline.
What are the most common ASIC failures to document?
Hashboard failures (failed ASIC chips, blown capacitors, cold solder joints), power supply failures (voltage regulation issues, failed capacitors), fan failures (seized bearings, degraded RPM), control board issues (firmware corruption, network interface failures), and environmental damage (power surges, overheating from inadequate ventilation, moisture corrosion).
Should I document firmware changes?
Absolutely. Always record the firmware version before and after any change, the source of the firmware, and any configuration changes (clock frequency, voltage, fan curves, pool settings). Firmware changes can dramatically affect machine behavior, and having a record prevents confusion when troubleshooting future issues.
What software should I use for ASIC repair documentation?
For home miners, a spreadsheet (Google Sheets, LibreOffice Calc) with a structured template is sufficient. Small repair shops should consider ticket-based systems like osTicket, Notion, or RepairDesk. Large operations benefit from integrated fleet management that links monitoring data with repair records. The best tool is the one you’ll actually use consistently.
How long should I keep repair records?
Keep records for the entire operational life of the machine and at least one year after decommissioning or sale. Warranty periods, potential legal disputes, and the resale value of documented machines all argue for long-term retention. Digital storage costs are negligible — there’s no good reason to delete repair history.
Does D-Central provide documentation with their repair services?
Yes. Every machine repaired at D-Central Technologies receives a comprehensive repair report including diagnostic findings, all repair actions performed, parts replaced with specifics, post-repair burn-in test results, and before/after performance comparison. This documentation is included with every repair at no additional cost.
 Nerdaxe Gamma / Supra / Ultra — Silent Operation & Stable Overclocking" width="80" height="80" loading="lazy" style="width:80px;height:80px;object-fit:contain;border-radius:6px;background:#1A1A1A;flex-shrink:0;">
Shop Heatsinks
Nerdaxe Gamma / Supra / Ultra — Silent Operation & Stable Overclocking" width="80" height="80" loading="lazy" style="width:80px;height:80px;object-fit:contain;border-radius:6px;background:#1A1A1A;flex-shrink:0;">
Shop Heatsinks