Every ASIC miner that leaves our workshop gets put through hell first. That is not a marketing line — it is the operational reality at D-Central Technologies, where we have been testing, repairing, and pushing Bitcoin mining hardware to its limits since 2016. In an industry flooded with untested refurbished units and questionable “like-new” listings, rigorous hardware testing is the difference between a miner that prints sats for years and an expensive paperweight that dies in week three.
This guide breaks down exactly how professional Bitcoin mining hardware testing works — the procedures, the benchmarks, the tools, and why it matters for every home miner running a rig in their basement, garage, or spare bedroom. Whether you are evaluating a new Antminer S21, stress-testing a Bitaxe build, or deciding whether a used hashboard is worth the gamble, understanding hardware testing gives you a decisive edge.
Why Hardware Testing Is Non-Negotiable
Bitcoin mining is an unforgiving discipline. Your hardware runs 24/7/365 at near-maximum load, generating enormous heat, drawing sustained power, and performing trillions of SHA-256 calculations every second. A single weak solder joint, a degraded ASIC chip, or a marginal power delivery component will eventually fail — and when it does, you lose hashrate, waste electricity, and miss blocks.
The Bitcoin network does not care about your excuses. At a network hashrate exceeding 800 EH/s, every terahash matters. Every minute of downtime is lost opportunity. The block reward sits at 3.125 BTC, and competition for it is relentless. Your hardware either performs or it does not.
This is precisely why D-Central tests every unit that comes through our ASIC repair facility before it ships back to a customer. Not a quick power-on check — a full burn-in, benchmark, and thermal validation cycle. Here is why that process matters and how you can apply the same principles to your own operation.
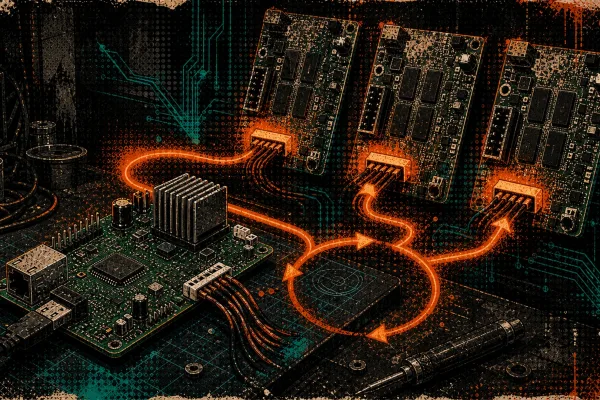
The Core Testing Framework: What We Evaluate
Professional mining hardware testing is not a single measurement. It is a multi-stage process that validates every critical subsystem of the miner. Here is how we break it down:
| Test Category | What It Measures | Why It Matters |
|---|---|---|
| Hash Rate Benchmarking | Sustained TH/s or GH/s output over time | Confirms the miner delivers advertised performance |
| Power Consumption | Wall-draw watts under full load | Determines true J/TH efficiency and operating cost |
| Thermal Stress Testing | Chip temps, heatsink performance, ambient response | Identifies cooling failures before they cause chip damage |
| ASIC Chip Validation | Individual chip hash contribution and error rates | Detects degraded or dead chips on hashboards |
| Power Delivery Testing | Voltage regulation, ripple, connector integrity | Prevents PSU-related failures and fire hazards |
| Burn-In Period | Extended 24-72 hour continuous operation | Catches intermittent faults that short tests miss |
| Firmware Validation | Firmware version, stability, feature verification | Ensures optimal software stack for the hardware revision |
Hash Rate Benchmarking: The Numbers Do Not Lie
Hash rate is the most visible metric, but measuring it correctly requires patience and methodology. A miner’s reported hash rate fluctuates constantly — what matters is the sustained average over a meaningful time window, not a momentary peak.
For ASIC miners like the Antminer S19 or S21 series, we benchmark hash rate over a minimum 24-hour window, measuring at the pool level (shares accepted) rather than relying solely on the miner’s self-reported dashboard figure. The pool-side measurement accounts for network latency, rejected shares, and stale work — giving you the real-world effective hash rate.
For open-source miners like the Bitaxe series, the process is similar but adapted for the hardware’s scale. A Bitaxe running a BM1366 chip targets around 500 GH/s — tiny compared to a full ASIC, but the testing principles are identical. Stable hash rate over time, minimal hardware errors, and consistent chip temperature are the benchmarks that matter. Note: Bitaxe models (Supra, Ultra, Gamma) use a 5V barrel jack connector (5.5×2.1mm DC) for power — not USB-C. The USB-C port is for firmware flashing and serial communication only. Getting this wrong is one of the most common mistakes new Bitaxe owners make.
What “Good” Looks Like
| Metric | Acceptable Range | Red Flag |
|---|---|---|
| Hash rate vs. spec | Within 5% of advertised TH/s | More than 10% below spec |
| Hash rate stability | Less than 3% variance over 24h | Frequent drops or spikes exceeding 10% |
| Hardware error rate | Below 0.5% of total shares | Above 2% — indicates chip degradation |
| Rejected shares | Below 1% | Above 3% — check network or firmware |
| J/TH efficiency | Within 10% of manufacturer spec | Significantly worse than rated efficiency |
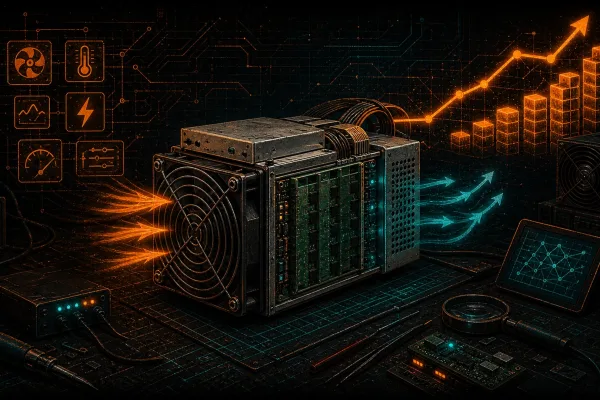
Thermal Stress Testing: Heat Is the Silent Killer
ASIC chips are remarkably resilient — but they have hard thermal limits. Most modern Bitcoin ASICs throttle performance above 85-90°C and risk permanent damage above 105°C. Thermal stress testing is about confirming your miner can maintain safe operating temperatures under sustained full-load conditions.
At D-Central, we monitor chip temperatures continuously during the burn-in period using the miner’s built-in sensors and, where possible, external thermal imaging. We are looking for:
- Even heat distribution across all hashboards — a board running 10°C hotter than its siblings indicates a cooling obstruction, degraded thermal paste, or a failing fan.
- Temperature stability — chip temps should reach equilibrium within 30-60 minutes and remain stable. A miner whose temps keep climbing after two hours has a cooling problem.
- Ambient response — how does the miner behave when room temperature changes? Canadian winters give us a natural advantage here: our Quebec facility experiences significant temperature swings, which makes for excellent real-world stress testing.
For home miners, thermal management is especially critical. You are not running in a purpose-built data center with industrial ventilation. Your miner sits in a basement or spare room, and its waste heat goes directly into your living space. This is actually the founding principle behind Bitcoin space heaters — capturing that thermal output and turning it into useful home heating. But the hardware still needs to operate within safe parameters, and testing confirms that it will.
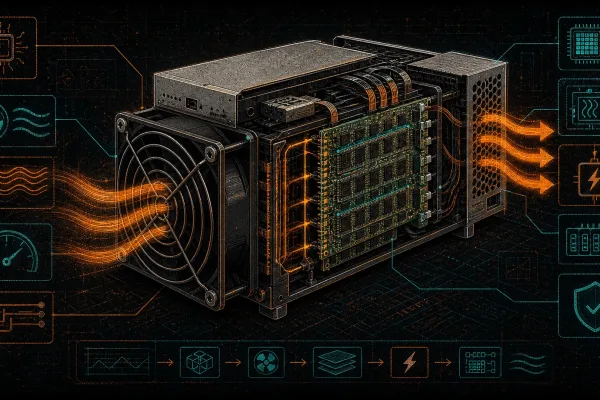
Power Delivery: The Foundation Everything Else Sits On
A miner is only as reliable as its power supply. Voltage irregularities, insufficient amperage, or poor connector quality will degrade performance, increase error rates, and can create genuine fire hazards — particularly in home mining setups where electrical infrastructure was never designed for sustained high-draw loads.
What We Test
- Wall power measurement — Using a calibrated power meter (not the PSU’s self-reported efficiency), we measure actual watts drawn from the wall. This gives you the true cost of operation.
- Voltage stability under load — PSU output voltage should remain within 5% of nominal (12.0V for most ASICs, 5V for Bitaxe/NerdAxe units). Voltage droop under load indicates an undersized or degraded PSU.
- Connector and cable integrity — Corroded connectors, loose pins, or undersized cables are responsible for a significant percentage of “mystery” miner failures. We inspect every power connection.
- Grounding verification — Proper grounding protects both the miner and the operator. An ungrounded miner in a home environment is a liability.
PSU Matching by Miner Type
| Miner Category | Power Connector | Typical PSU Requirement |
|---|---|---|
| Antminer S19/S21 Series | C13/C14 or direct DC | APW12/APW17 or equivalent (3000-3600W) |
| Bitaxe Supra/Ultra/Gamma | 5V DC barrel jack (5.5×2.1mm) | 5V/6A DC adapter (30W) |
| Bitaxe GT / Bitaxe Hex | 12V DC XT30 connector | 12V DC adapter (varies by model) |
| NerdAxe | 5V DC barrel jack (5.5×2.1mm) | 5V/6A DC adapter (30W) |
| NerdQAxe++ | 12V DC XT30 connector | 12V/10A DC adapter (120W) |
| NerdOctaxe Gamma | 12V DC XT60 connector | 12V/18-20A DC adapter (216-240W) |
Using the wrong power supply — or worse, the wrong connector type — is a fast path to damaged hardware. We see this constantly in our repair shop, particularly with Bitaxe units where owners attempt to power the device through USB-C. That port is for serial communication and firmware flashing only. The power input is the 5V barrel jack.
Firmware and Software: The Invisible Performance Layer
Hardware testing does not stop at the physical components. The firmware running on your miner determines how efficiently those components are utilized, and the wrong firmware version can mean the difference between hitting spec and underperforming by 15%.
Stock vs. Custom Firmware
Stock firmware from manufacturers like Bitmain is designed for stability and broad compatibility. It works. But it often leaves performance on the table — conservative clock speeds, limited tuning options, and no undervolting capabilities.
Custom firmware options (such as Braiins OS+ for Antminer hardware) unlock features like:
- Autotuning — Automatically finds the optimal frequency/voltage combination for each individual ASIC chip
- Undervolting — Reduces power consumption by 10-25% with minimal hash rate impact
- Remote management — Fleet monitoring and control across multiple units
- Advanced diagnostics — Deeper visibility into per-chip performance and error rates
For open-source hardware like the Bitaxe and NerdAxe families, the firmware is community-developed and open-source by nature. This is one of the great strengths of the open-source mining ecosystem — the code is auditable, improvable, and free from vendor lock-in. At D-Central, we validate firmware versions on every open-source unit before shipping and ensure the device is running the most stable, performant release available.
The D-Central Testing Protocol
Here is what our actual testing workflow looks like for a miner coming through our facility — whether it is a new unit being quality-checked or a repaired unit being validated:
- Visual inspection — Check for physical damage, corrosion, loose components, thermal paste condition, fan blade integrity.
- Power-on diagnostics — Initial boot, firmware check, network connectivity verification, pool configuration.
- Hash rate ramp-up — Monitor hash rate during the first 30 minutes as the miner reaches operating temperature and stabilizes.
- Full-load burn-in — Minimum 24-hour sustained operation at full hash rate. We monitor hash rate, chip temperatures, power consumption, and error rates continuously.
- Thermal imaging — Identify hot spots, validate cooling system performance, confirm even heat distribution across hashboards.
- Power measurement — Calibrated wall-draw measurement to determine true J/TH efficiency.
- Per-chip analysis — Where firmware supports it, review individual chip performance data to detect degraded ASICs.
- Final validation — Compare all metrics against manufacturer specifications and our internal pass/fail criteria.
Only units that pass every stage ship to customers. Failed units go back to the repair bench. No exceptions.
Testing Your Own Hardware at Home
You do not need a professional repair facility to implement meaningful hardware testing. Every home miner should adopt at least a basic testing discipline:
- Get a power meter — A $30 kill-a-watt meter on your miner’s power outlet gives you real energy consumption data. Compare it against the manufacturer’s spec.
- Monitor your pool dashboard — Your mining pool tracks your effective hash rate, rejected shares, and uptime. Check it weekly. A gradual decline in effective hash rate is an early warning sign of degrading hardware.
- Track chip temperatures — Log into your miner’s web interface and note chip temperatures. Establish a baseline during the first week, then watch for drift.
- Listen to your miner — Changes in fan noise, vibration, or intermittent shutdowns are physical symptoms of hardware problems. Do not ignore them.
- Test after any change — Moved the miner? Changed the firmware? Swapped a fan? Run a 24-hour observation period and confirm everything is stable before walking away.
If something fails these basic checks, that is when you bring it to a professional. Our ASIC repair service exists precisely for this — diagnosing and fixing hardware issues that are beyond what most home miners can handle with a screwdriver and a multimeter.
Why This Matters for Bitcoin’s Decentralization
Here is the bigger picture that most hardware testing articles skip entirely: the quality and reliability of home mining hardware directly impacts Bitcoin’s decentralization.
Every hash that comes from a home miner instead of a centralized data center strengthens the network. Every miner running reliably in a basement in Manitoba or a garage in Texas is a node of resistance against hash rate centralization. But that only works if the hardware actually runs. Poorly tested, unreliable equipment discourages home miners and pushes hash rate back toward institutional operations with dedicated maintenance teams.
This is why D-Central exists. We are not just selling hardware — we are equipping a decentralized army of home miners with tested, reliable, hacked-for-the-home equipment. From our mining consulting services to the open-source Bitaxe units we manufacture, every piece of the puzzle is oriented toward one goal: decentralization of every layer of Bitcoin mining.
When we test a miner, we are not just checking boxes on a quality control form. We are ensuring that another node in the decentralized mining network will come online and stay online. Every hash counts.
FAQ
What is the most important metric when testing a Bitcoin miner?
Joules per terahash (J/TH) is the single most important metric because it captures both hash rate performance and power efficiency in one number. A miner that delivers high hash rate but draws excessive power will cost more in electricity than it earns in bitcoin. Measure J/TH using wall-draw power (not PSU-reported), divided by sustained hash rate measured at the pool level over at least 24 hours.
How long should a burn-in test run before I trust a miner?
A minimum of 24 hours at full load is the baseline. For repaired or refurbished units, 48-72 hours is strongly recommended. Intermittent faults often do not manifest in the first few hours — they appear after thermal cycling and sustained stress. At D-Central, repaired units go through a minimum 24-hour burn-in before passing quality control.
Can I use USB-C to power a Bitaxe?
No. Bitaxe models (Supra, Ultra, Gamma) use a 5V DC barrel jack (5.5×2.1mm) for power input and require a 5V/6A power supply. The Bitaxe GT and Bitaxe Hex use a 12V XT30 connector. The USB-C port on these devices is exclusively for firmware flashing and serial communication — it does not deliver sufficient power to operate the miner. Using the wrong power input is one of the most common mistakes and can damage the device.
What chip temperature is too hot for an ASIC miner?
Most modern Bitcoin ASIC chips begin throttling performance between 85-90 degrees Celsius and risk permanent damage above 105 degrees Celsius. Optimal operating temperature is typically 60-80 degrees Celsius depending on the chip generation. If your miner consistently runs above 85 degrees Celsius, you need to improve airflow, clean dust from heatsinks, replace thermal paste, or add supplemental cooling.
Does D-Central test miners before shipping them?
Yes. Every miner — whether new or repaired — undergoes our full testing protocol before shipping. This includes visual inspection, power-on diagnostics, hash rate benchmarking, a minimum 24-hour burn-in at full load, thermal validation, and power efficiency measurement. Units that fail any stage go back to the repair bench. We do not ship hardware that has not passed testing.
What is the difference between hash rate shown on the miner dashboard versus the pool?
The miner dashboard shows local hash rate — the raw computational output of the hardware. The pool dashboard shows effective hash rate — computed from the shares your miner actually submits and gets accepted. Effective hash rate is always slightly lower due to network latency, rejected shares, and stale work. Pool-side hash rate is the number that matters because it reflects what you actually get paid for.
Can I do hardware testing at home without professional equipment?
Absolutely. A kill-a-watt power meter (around $30), your miner’s web interface (for chip temps and local hash rate), and your mining pool’s dashboard (for effective hash rate and error rates) give you the three essential data points. Monitor these weekly and establish baselines. If you see hash rate declining, error rates rising, or power consumption increasing for the same output, it is time to investigate further or send the unit in for professional diagnosis.
How does hardware testing support Bitcoin decentralization?
Reliable hardware is the foundation of a decentralized mining network. When home miners have equipment that runs consistently without failures, they stay online and contribute hash rate from independent, geographically distributed locations. Poorly tested hardware leads to failures, frustration, and miners going offline — pushing hash rate back toward large centralized operations. Every reliably running home miner strengthens Bitcoin’s censorship resistance.