Quick answer
D-Central has been converting Antminers for home power since 2016. This guide covers running miners on standard 110–120V North-American circuits, choosing a power supply, and mounting it safely. A 20A/120V circuit gives about 1,850W usable; a stock S19 draws ~3,250W at 240V; D-Central’s Slim Edition runs 860–930W on a normal 120V outlet, using 14 AWG minimum cable.
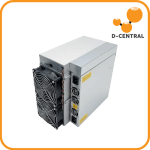
Bitmain builds the Antminer for one environment: a warehouse with three-phase 240V power, industrial breakers, and nobody around to listen to the fans scream. That is not your basement. That is not your garage. That is not the spare bedroom you are quietly turning into a mining operation while your spouse pretends not to notice. The gap between how an Antminer ships and how a home miner actually needs it to run is the problem D-Central has spent since 2016 solving — and most of that problem comes down to power and voltage.
This is the complete guide to Antminer power and voltage modification: converting miners to run on standard 110V/120V North American household circuits, choosing the right power supply, understanding D-Central’s Slim Edition and Loki Edition custom builds, mounting your PSU so it does not become a hazard, and — most importantly — keeping the whole thing from burning your house down. We are Bitcoin Mining Hackers: we take institutional-grade hardware and hack it into something a pleb can actually run at home. This guide is that philosophy written down.
Power & Voltage Modification — Quick Facts
| Standard North American outlet | 110-120V, typically 15A or 20A circuits |
| Usable continuous draw, 20A/120V circuit | ~1,850W (80% of breaker rating) |
| Stock Antminer S19 power draw | ~3,250W at 240V — far over a single 120V circuit |
| D-Central Slim Edition draw | 860-930W on 120V — runs on a normal outlet |
| Required cable gauge for 120V mining | 14 AWG minimum — never thinner |
| Recommended for the conversion itself | Licensed electrician for the circuit; D-Central for the miner mod |
Why Voltage Is the Real Barrier to Home Mining
Most people who want to mine Bitcoin at home assume the barrier is the hardware cost or the noise. It is neither. The barrier is voltage. Bitmain designs the Antminer S19, S19j Pro, S19k Pro, S21 and every other modern unit to run on 200-240V AC, because that is what data centers supply and it is more efficient at the wattages these machines pull. A stock S19 draws roughly 3,250 watts. A stock S21 draws even more. North American homes are wired primarily for 110-120V, with the occasional 240V circuit reserved for a dryer, range, or EV charger.
Here is the math that kills the dream for most people. A standard 20-amp, 120-volt household circuit can supply 2,400 watts on paper, but electrical code — and basic fire prevention — says you do not run a continuous load above 80% of the breaker rating. That is roughly 1,850 watts of continuous draw, and that assumes nothing else is on that circuit. Try to plug a stock 3,250W Antminer into a normal wall outlet and one of two things happens: the breaker trips immediately, or — if you have done something clever and dangerous with adapters — the wiring in your wall starts heating up. Neither is mining. One is a fire.
So you have three honest options. Pay an electrician to run a dedicated 240V circuit to wherever the miner lives. Buy a miner that was built from the ground up to sip power on 120V. Or have your existing miner professionally modified to run on a household circuit. This guide covers all three, and it covers them with real numbers, because the cypherpunk dream of sovereign home mining dies the moment someone gets hurt cutting corners.
What “110V” and “120V” Actually Mean
You will see “110V” and “120V” used almost interchangeably across mining forums, product listings, and — honestly — our own older content. They refer to the same thing: the standard single-phase residential supply in North America. Nominal voltage is 120V; “110V” is legacy shorthand from when grid voltage was lower decades ago. Your wall outlet today delivers somewhere between 114V and 126V depending on your utility and how loaded your local transformer is. When this guide says “120V mining,” it means running a miner on a normal household outlet. When older D-Central product names say “110V,” they mean exactly the same thing. Do not overthink the number. Think about the circuit: what amperage is the breaker, and what else is sharing it?
Three Paths to a Home-Friendly Miner
Path 1: Run a Dedicated 240V Circuit
If you want to run a full-power, unmodified Antminer at home and you have the electrical capacity in your panel, the cleanest answer is a dedicated 240V circuit. This is exactly what your clothes dryer uses. A licensed electrician runs appropriately gauged wire from your panel to a NEMA 6-20 or 6-15 receptacle near the miner, on its own breaker. The miner runs at full hash rate, full efficiency, exactly as Bitmain intended.
The upside: maximum performance, no compromises, no modification, warranty intact. The downside: it costs money to have done properly — typically a few hundred dollars depending on the run length and your panel’s spare capacity — and it does nothing about the other home-mining problem, which is noise. A stock S19 on a 240V circuit is still a 75+ decibel jet engine. This path is for people with a garage, an outbuilding, or a basement room they can isolate. Do not run 240V wiring yourself unless you are genuinely qualified. This is the part of home mining where the rebel ethos takes a back seat to not electrocuting yourself.
Path 2: Buy a Purpose-Built 120V Miner — D-Central’s Slim Edition
This is the path most home miners actually want, because it solves voltage and noise in one purchase. The Antminer Slim Edition is D-Central’s answer to a simple question: where do you put a Bitcoin miner when you live in a 600-square-foot apartment? We took industrial Antminer silicon and re-engineered the entire machine around the home.
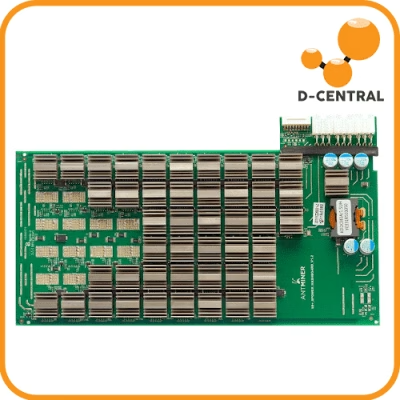
The Slim Edition is not a stock Antminer with a sticker on it. It is a ground-up rebuild: a custom 3D-printed slim chassis designed in-house, premium silent fans (Arctic P12 Max, Noctua NF-F12 iPPC, or Gelid Gale options), a Loki control board from Pivotal Pleb that enables single-hashboard 120V operation, and a single high-performance hashboard instead of the usual three. By running one hashboard instead of three, the machine draws what a household circuit can actually deliver.
Antminer Slim Edition — Real Specs
| Algorithm | SHA-256 (Bitcoin) |
| Hashrate range | 26 – 44 TH/s (variant dependent) |
| Power consumption | 860 – 930W (variant dependent) |
| Efficiency | 20.9 – 33.1 J/TH |
| Input voltage | 110 – 240V AC (runs on standard 120V outlets) |
| Absolute max wattage | 1,200W — never exceed |
| Power supply | APW3++ (silenced) |
| Control board | Loki board by Pivotal Pleb (120V single-hashboard) |
| Build & QA | Hand-assembled and 24-hour stress-tested in Montreal, Quebec |
A word on the numbers, because the internet is full of bad ones. You will find listings and old articles claiming the “120V Slim Edition” pushes 95 to 130 TH/s at 3,000+ watts. That is wrong — those are the stock three-hashboard 240V figures, and no household outlet on Earth supplies that. The Slim Edition is honest about what a 120V circuit can do: 26-44 TH/s at 860-930W, drawing well under the 1,200W ceiling, with the headroom that keeps the machine — and your wiring — alive long-term. Real mining power, real residential compatibility, no fantasy spec sheets.
Every Slim Edition is hand-assembled, firmware-tuned with VNish, and stress-tested for 24 hours in our Montreal workshop before it ships. Plug it into a normal outlet, point it at your pool, and start stacking sats. It also throws off real heat — see the dual-purpose section below.
Path 3: Have Your Existing Antminer Modified — The Loki Edition Conversion
Already own an S19, S19j Pro, or S19k Pro and do not want to buy a second machine? The third path is conversion: D-Central modifies the miner you already have into a home-friendly 120V configuration. Internally we call these Loki Edition builds, and the engineering is the same philosophy as the Slim Edition applied to a customer’s existing unit.
The conversion process is methodical, because power modification done sloppily is exactly how miners — and houses — die:
- Initial assessment. A D-Central technician evaluates your specific unit to confirm it is a suitable candidate. Not every board in every condition is worth converting.
- Hashboard reduction. One or two hashboards are removed to bring total power draw down to what a 120V circuit can supply. Fewer hashboards, less wattage, less heat — the same trick the Slim Edition uses, applied to your hardware.
- Hashboard deflector installation. This is the part amateurs skip and regret. When you remove hashboards, you change the airflow path through the chassis. A custom-designed deflector redirects air so the remaining hashboard(s) still get even cooling. Without it, you get hotspots, throttling, and premature chip death.
- PSU and control adjustment. The power supply and control board are configured for safe, stable 120V single-circuit operation — using the Loki control board approach pioneered by Pivotal Pleb.
- Stress testing and QA. The converted miner runs under load and gets a full quality check before it goes back to you.
Expect a converted S19 to land somewhere around 70-80 TH/s at roughly 2,000-2,200W — versus 110 TH/s at 3,250W stock. You give up raw hash rate. What you get back: it runs on a circuit you actually have, it runs quieter because it is moving less heat, the lower power draw reduces thermal stress on the surviving components, and in regions with expensive power the efficiency-per-watt often holds steady or improves. For a home miner, that trade is frequently the right one.
Worked Example — Annual Power Cost, Stock vs. Converted S19
At $0.10/kWh electricity:
- Stock S19 (240V): 3,250W × 24h × 365d = 28,470 kWh/yr → ~$2,847/yr
- Converted S19 (120V): ~2,100W × 24h × 365d = 18,396 kWh/yr → ~$1,840/yr
- Difference: roughly $1,000/yr less power cost — at the cost of hash rate
Your numbers depend on your local rate and the exact variant. Run yours through our Mining Power Cost Calculator before committing.
A Note on Warranty and DIY
Be honest with yourself here. Any voltage modification voids Bitmain’s original manufacturer warranty — that is true whether D-Central does it or you do it in your kitchen. The difference is that D-Central backs its own modification work and supports the converted miner afterward. We are the largest ASIC repair center in Canada; we have the diagnostic gear, the deflector designs, and the bench experience to do this without killing your hardware.
Can you do it yourself? Technically. Should you? We genuinely advise against it for the voltage conversion specifically. It is not soldering a fan header — it involves power delivery components, control board configuration, and airflow engineering, and the failure modes range from “dead miner” to “house fire.” If you are a hands-on maker and you want to learn, start with reversible accessory mods and read our ASIC repair resources. Leave the power-path surgery to a bench that does it every week.
Choosing the Right Power Supply
The PSU is the heart of the whole setup. It is the component standing between your wall outlet and several thousand dollars of mining silicon, and a bad one will take the silicon with it when it fails. Whether you are converting a miner, building from parts, or just replacing a dead unit, picking the right power supply is non-negotiable.
What a Mining PSU Actually Does
An ASIC power supply has four jobs, and it has to do all of them under brutal 24/7 load:
- Power conversion. Transforms AC from the wall into the regulated DC voltage the hashboards need.
- Voltage regulation. Holds output steady even as the miner’s draw fluctuates and as your grid voltage sags and swells. Unstable voltage is what kills chips.
- Current distribution. Splits high current cleanly across multiple PCIe connectors without any single connection overheating.
- Protection. A real mining PSU has overvoltage, undervoltage, overcurrent, overload, and short-circuit protection built in. When something goes wrong, the PSU shuts down instead of cooking your miner — or your wiring.
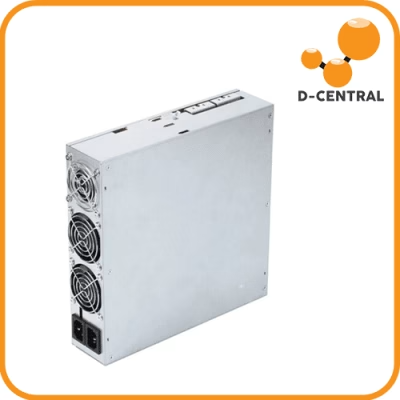
The Bitmain APW3 / APW3++
The APW3 and APW3++ are the workhorse power supplies for this whole category, and there is a reason they show up in nearly every D-Central home-mining build, including the Slim Edition. The key feature for our purposes: dual-voltage input. The APW3++ accepts both 110-120V and 200-240V AC, and that flexibility is exactly what makes household-circuit mining possible.
Bitmain APW3++ — Key Specs
| Rated output, 200-240V input | 1,600W |
| Rated output, 110-120V input | 1,200W |
| DC output voltage | 12.15 – 12.50V (adjustable, modifiable up to 13.6V) |
| AC input range | 100-140V / 200-264V |
| Efficiency | 90%+ |
| Connectors | 6-pin PCIe |
| Protections | Overload, overheat, short-circuit, low-voltage input |
| Cooling / noise | Temperature-controlled fan, under 43 dB |
Read the rated-output line carefully, because it is the single most misunderstood thing about home mining. The same APW3++ that delivers 1,600W on a 240V circuit only delivers 1,200W on a 120V circuit. That is not a defect — it is physics. Lower input voltage means the PSU can supply less wattage before it is pulling more current than the input side can safely handle. This is precisely why a 120V miner build runs fewer hashboards: the PSU’s 120V ceiling, not stubbornness, sets the limit. Any build that ignores that ceiling is a build that fails.
One thing the box does not include: a power cord. Most mining PSUs, the APW3++ included, ship without one. You must supply a cord rated for your mains and — critically — heavy enough gauge. More on cable gauge in the fire safety section, because it is not optional.
Matching a PSU to Your Miner
Before you buy anything, check three numbers against each other: your miner’s power draw (after any modification), your PSU’s rated output at your actual input voltage, and your circuit’s continuous capacity. All three have to line up. A Slim Edition pulling 900W on an APW3++ rated for 1,200W at 120V, on a 20A circuit good for 1,850W continuous — that is a healthy stack with headroom at every layer. A miner pulling 1,400W on that same PSU is over the 120V ceiling and the build is wrong on paper before you ever plug it in.
When in doubt, do not guess. D-Central’s bench builds this exact stack every week. Browse power supplies in our Power Supplies category, and if you are matching a PSU to a specific converted or stock miner, reach out — we would rather spend ten minutes on email than diagnose a melted connector later.
Mounting Your PSU: The APW3 Side Hodler
Here is a failure mode that has nothing to do with electronics and everything to do with gravity. On a lot of home mining setups — especially converted Antminers and DIY builds — the power supply is just sitting loose. On a shelf. On the floor. Balanced on top of the miner. A loose PSU is a slow-motion problem: it vibrates, the vibration works connectors loose over weeks, a half-seated PCIe connector arcs and heats, and now you have a hotspot at a power connection. That is not a hypothetical. That is one of the more common ways a home rig goes from “running fine” to “smells like burning plastic.”
The APW3 Side Hodler PSU Mount is D-Central’s fix — a custom 3D-printed mounting solution that secures an APW3-class power supply firmly to the side of an Antminer S9 or S19-series chassis. It does a few unglamorous but important things:
- Locks the PSU in place so it cannot shift, slide, or fall — which means connectors stay fully seated.
- Positions the PSU for proper airflow instead of trapping its heat against the miner or a wall.
- Kills vibration transfer between the PSU and the miner, reducing long-term wear on both.
- Keeps the build serviceable — you can get at the PSU for maintenance without dismantling everything.
The Side Hodler is also part of how a stock S9 or S19 gets brought toward that home-friendly Loki Edition configuration. It is a small, cheap, reversible accessory, and it is exactly the kind of “obvious once someone shows you” hardware that comes out of a workshop that actually runs these machines. Pair it with proper cabling from our Cables & Connectors category and your power path is solid from the wall to the hashboard.
Electrical Fire Safety: The Part You Do Not Skip
We will be blunt, because this section earns its place. An ASIC miner is a space-heater-grade electrical load running 24 hours a day, 365 days a year, often in a residential space that was never designed around a continuous multi-thousand-watt draw. Done right, that is completely safe — utilities and electricians manage loads like this constantly. Done wrong, it is the single most dangerous thing about home mining. Every power and voltage decision in this guide ultimately points back here.
How Mining Rigs Actually Catch Fire
Mining fires almost always trace back to one of four causes, and all four are preventable:
- Overheating. A miner that is not cooled properly — bad airflow, clogged filters, a botched hashboard removal with no deflector — runs hot enough to degrade components and, eventually, ignite. Heat is the constant threat; everything else accelerates it.
- Electrical overload. Pulling more continuous wattage than a circuit is rated for. The breaker is supposed to catch this — but overload through undersized extension cords, daisy-chained power strips, or worn wiring can heat conductors inside a wall before the breaker ever trips.
- Improper wiring and connections. Undersized cable gauge, loose connectors, poor grounding, ignoring local electrical code. A loose or arcing connection concentrates heat at a single point until something melts or ignites.
- Human error. Cheap adapters, “it’ll be fine” extension cords, no maintenance, no inspections. The miner does not make the mistake. The operator does.
D-Central’s Fire Safety Practices
Get the circuit right — use an electrician. This is the one place we tell you to stop being a hacker. Whether you are running a dedicated 240V line or putting a 120V miner on an existing circuit, have a licensed electrician confirm the circuit, breaker, and wiring can handle a continuous load. Code’s 80%-of-breaker continuous-load rule exists because of fires. Respect it. One miner per circuit, ideally, with nothing else sharing it.
Use heavy enough cable — 14 AWG minimum. For 120V Antminer operation, never run anything thinner than 14 AWG, and step up to 12 AWG for longer runs or higher draw. The thin cords that come with electronics are not rated for this. Undersized cable is the most common DIY mistake and it is invisible until it is glowing. Get proper cabling from our Cables & Connectors category — it costs a few dollars and it is the cheapest insurance you will ever buy.
Secure every connection. Loose PCIe connectors, loose plugs, a PSU flopping around — all of it leads to arcing and hotspots. Mount your PSU (the Side Hodler exists for this reason). Seat every connector fully. Check them on a schedule.
Cool it properly. Adequate airflow, clean filters, ambient temperature you can actually manage. If you converted a miner, the hashboard deflector is not optional — it is the difference between even cooling and a hotspot. Monitor temperatures; do not guess.
Maintain on a schedule. Weekly visual inspections — look at cables for wear or discoloration, listen for fans struggling. Monthly: check and re-tighten electrical connections. Quarterly: a fuller diagnostic — clean dust, test fans, verify grounding, check sensors. Dust is fuel and an insulator. Clean it out.
Detect and suppress. Put a smoke detector and ideally a heat sensor in the room with the miner. Keep a fire extinguisher rated for electrical fires within reach — and know how to use it before you need it. For a serious home setup, a dedicated suppression solution is worth pricing out. The point of every other practice in this section is to make sure you never need this one.
The non-negotiable checklist
- Dedicated circuit, verified by an electrician, one miner per circuit
- Continuous load under 80% of breaker rating
- 14 AWG cable minimum — heavier for long runs
- PSU mounted and secured; every connector fully seated
- Proper airflow; deflector installed on any converted miner
- Smoke/heat detection in the room; electrical-rated extinguisher within reach
- Weekly visual checks, monthly connection checks, quarterly deep service
The Dual-Purpose Angle: Mining Heat Is Not Wasted Heat
One last reason the power-and-voltage conversation matters: every watt your modified miner pulls from the wall comes back out as heat, and in a Canadian winter that heat is not a problem — it is a feature. A converted Antminer or a Slim Edition running in a basement, workshop, or spare room is genuinely warming that space. If you would otherwise be running electric baseboard heat, the miner is doing that job and earning sats while it does it. That is the D-Central thesis in one sentence: a miner is a dual-purpose machine, and in the right climate the heat output offsets a real cost.
This is also why the lower-power 120V builds make so much sense for home miners — 900 watts of quiet, controllable heat from a Slim Edition is something you can actually live alongside, where 3,250 watts of jet-engine S19 is not. We cover the heating side in depth on our dedicated Bitcoin Space Heaters page. The power modification is what makes the dual-purpose machine livable in the first place.
Where to Start
If you have read this far, you are taking it seriously — which is the right way to take electrical work. Here is the honest decision tree:
- You want maximum hash rate and you have panel capacity: hire an electrician for a dedicated 240V circuit, run the miner stock.
- You want a turnkey home miner with no electrical project: the Antminer Slim Edition — built for 120V, quiet, hand-assembled and tested in Montreal.
- You already own an S19-class miner: talk to us about a Loki Edition voltage conversion of your existing hardware.
- You are sourcing parts: start with the right power supply from Power Supplies, proper cabling from Cables & Connectors, and an APW3 Side Hodler to mount it safely.
New to home mining entirely and not sure which path is yours? Start at our Start Here guide — it walks you through the whole decision before you spend a dollar. And if your miner already has a power or board fault, that is a different job: D-Central is the largest ASIC repair center in Canada, and our ASIC Repair service handles PSU failures, voltage-domain faults, and hashboard repair across every major ASIC platform.
The Mining Hacker philosophy is not “do dangerous things with electricity.” It is “understand the machine well enough to make it serve you.” Voltage modification, done with real engineering and real respect for the electrical side, is exactly that — institutional hardware, hacked to live in your home, hashing for you and the network. Decentralization runs on miners that people can actually run. Let’s get yours running right.
Frequently Asked Questions
Can I plug a stock Antminer S19 into a normal wall outlet?
No. A stock S19 draws around 3,250W at 240V. A standard North American 120V circuit safely supplies roughly 1,850W continuous. Plugging a stock S19 into a normal outlet will trip the breaker — and any attempt to force it with adapters risks overheating your wiring. You need either a dedicated 240V circuit, a purpose-built 120V miner like the Slim Edition, or a professional voltage conversion.
What is the difference between “110V” and “120V” mining?
Nothing meaningful — they refer to the same standard North American residential supply. Nominal voltage is 120V; “110V” is legacy shorthand. Older D-Central product names use “110V” and newer ones use “120V,” but both mean “runs on a normal household outlet.” What actually matters is the circuit’s amperage rating and whether anything else shares it.
Does converting my miner to 120V void the warranty?
Yes — any voltage modification voids Bitmain’s original manufacturer warranty, regardless of who performs it. The advantage of having D-Central do the conversion is that we back our own modification work and continue to support the converted miner afterward.
How much hash rate do I lose converting an S19 to 120V?
A converted S19 typically runs around 70-80 TH/s at roughly 2,000-2,200W, versus 110 TH/s at 3,250W stock. You trade raw hash rate for the ability to run on a household circuit, quieter operation, and lower thermal stress. In high-electricity-cost regions, efficiency per watt often holds steady or improves.
Why does the APW3++ only deliver 1,200W on 120V instead of 1,600W?
It is physics, not a defect. At lower input voltage, the PSU reaches its safe input-current limit at a lower output wattage. The APW3++ is rated 1,600W at 200-240V and 1,200W at 110-120V. This 120V ceiling is exactly why home-mining builds run fewer hashboards — the build is sized to the PSU’s real 120V output, not its 240V rating.
What cable gauge do I need for 120V Antminer mining?
14 AWG minimum, and step up to 12 AWG for longer runs or higher-draw setups. The thin cords bundled with consumer electronics are not rated for continuous mining loads. Undersized cable is the most common — and most dangerous — DIY mistake, because it overheats inside the insulation where you cannot see it.
Can I do the voltage conversion myself?
Technically yes, but D-Central strongly advises against the voltage conversion specifically. It involves power-delivery components, control-board configuration, and airflow engineering (the hashboard deflector). Failure modes range from a dead miner to an electrical fire. The circuit work should go to a licensed electrician; the miner modification should go to a bench that does it regularly.
Why do I need a PSU mount like the Side Hodler?
A loose power supply vibrates, and over weeks that vibration works PCIe and AC connectors loose. A half-seated power connector arcs and creates a hotspot — one of the most common causes of home-rig fires. The APW3 Side Hodler locks the PSU to the miner chassis, keeps connectors seated, positions the PSU for airflow, and reduces vibration wear. It is a cheap, reversible accessory that removes a real hazard.
See also: the canonical North America Power Guide covers breaker sizing, the NEC/CEC 80% rule, dryer-outlet safety, and a per-model “runs at home?” verdict.