What Is the Bitaxe Ultra?
The Bitaxe Ultra is an open-source, standalone Bitcoin solo miner built around the BM1366 ASIC chip — the same silicon that powers Bitmain’s industrial-grade Antminer S19 XP. This is real SHA-256 mining hardware, shrunk down to the size of a deck of cards and running on a simple 5V barrel jack power supply. No 240V circuits, no screaming fans, no dedicated mining room. Just plug it in, connect to WiFi, and start hashing from your desk.
The Ultra was one of the earlier Bitaxe variants — a breakthrough that proved you could rip the same ASIC technology out of a warehouse-scale Antminer and put it into something that runs silently on your nightstand. At stock settings, the Bitaxe Ultra produces approximately 500 GH/s while drawing just 12–15W. With careful overclocking and adequate cooling, you can push it past 700 GH/s. Every hash is a ticket in the Bitcoin block reward lottery.
This is solo mining — sometimes called lottery mining. You are not splitting rewards with a pool of thousands. Every hash your Bitaxe Ultra computes is a real attempt at finding a valid Bitcoin block. If your device finds one, you keep the entire reward: 3.125 BTC at current subsidy. The odds on any given day are small, but they are never zero — and Bitaxe miners have found blocks before. Every hash counts.
D-Central Technologies has been a pioneer in the Bitaxe ecosystem since its earliest days. We created the original Bitaxe Mesh Stand — the first commercially manufactured stand for Bitaxe devices — and developed a complete line of accessories including custom heatsinks for Bitaxe and Bitaxe Hex, cases, and power solutions. We stock every Bitaxe variant (Ultra, Supra, Hex, Gamma, GT, and more) alongside the full open-source miner lineup. When you buy from D-Central, you are buying from a team that knows this hardware inside and out because we helped shape it.
This guide covers every step of setting up your Bitaxe Ultra, from unboxing to your first submitted share. No prior mining experience required — if you are brand new to Bitcoin mining, check our Getting Started guide first. Let’s get your hashrate online.
AxeOS is the open-source firmware that runs on every Bitaxe device. It provides a web-based dashboard for configuration, monitoring, and tuning — all accessible from your browser over your local WiFi network. No apps to install, no accounts to create, no cloud dependency. Throughout this guide, when we refer to the Bitaxe interface, we mean the AxeOS web dashboard.
Both the Bitaxe Ultra and the Bitaxe Supra use the BM1366 ASIC chip, so their hashrate and power consumption are similar. The difference is in the PCB layout: the Supra is a newer board revision with an improved circuit layout, refined power delivery, and minor component placement changes. If you are choosing between the two, the Supra is the newer design — but if you already have an Ultra, you are running the same proven ASIC chip and the setup process is identical. The Gamma, by contrast, uses the newer BM1370 chip for higher efficiency.
Technical Specifications
Before we dive into the setup, here is what you are working with. The Bitaxe Ultra packs a serious ASIC chip into a compact package that runs on a simple barrel jack power supply.
Bitaxe Ultra — Full Specifications
| ASIC Chip | Bitmain BM1366 (same as Antminer S19 XP) |
|---|---|
| Algorithm | SHA-256 (Bitcoin) |
| Hashrate (Stock) | ~500 GH/s |
| Hashrate (Overclocked) | 700+ GH/s (with adequate cooling) |
| Power Consumption | 12–15W at stock settings |
| Power Input | 5V DC barrel jack (5.5×2.1mm) — NOT USB-C |
| Recommended PSU | 5V / 6A (30W) barrel jack power supply |
| Connectivity | WiFi 2.4 GHz (802.11 b/g/n) |
| Controller | ESP32-S3 (dual-core, WiFi, web server) |
| Firmware | AxeOS (open-source, web-based interface) |
| Cooling | Passive heatsink + small onboard fan |
| Dimensions | Approximately 90 x 60 x 30 mm |
| Operating Temperature | 40–65 °C recommended ASIC range |
| Mining Mode | Solo mining (lottery) or pool mining via Stratum |
| Configuration | Web dashboard — any browser on your local network |
| Open Source | Fully open-source hardware and software (CERN-OHL-S) |
Where the Ultra Fits in the Bitaxe Family
The Bitaxe is an open-source hardware project with multiple variants, each built around a different ASIC chip. Here is how the Ultra compares to its siblings:
Bitaxe Variant Comparison
| Bitaxe Ultra | BM1366 chip • ~500 GH/s stock • 12–15W • Earlier board revision |
|---|---|
| Bitaxe Supra | BM1366 chip • ~500 GH/s stock • 10–15W • Newer board revision, improved layout |
| Bitaxe Gamma | BM1370 chip • ~1.0–1.2 TH/s stock • 15–25W • Higher efficiency, newer generation |
| Bitaxe Hex | 6x ASIC chips • ~3+ TH/s stock • 60–90W • Six chips on one board |
The Ultra was one of the models that proved the Bitaxe concept — that a single ASIC chip from a top-tier Antminer could be run standalone as a WiFi-connected solo miner. It laid the groundwork for everything that followed. If you own one, you own a piece of open-source mining history.
What’s in the Box
When your Bitaxe Ultra arrives from D-Central, take a moment to verify everything is present before you start. Unbox on a clean, static-free surface.
- Bitaxe Ultra board — The main PCB with the BM1366 ASIC chip, onboard fan, and ESP32-S3 controller
- Heatsink — Pre-attached or included for mounting (varies by configuration)
- Thermal pad — If the heatsink is not pre-attached, a thermal pad or thermal paste is included for proper heat transfer
- Stand or mounting hardware — For upright positioning and airflow (if included with your order)
Most Bitaxe Ultra units do not ship with a power supply. You need a 5V / 6A (30W) power supply with a 5.5×2.1mm barrel jack connector. This is NOT USB-C — cheap phone chargers will not work. The barrel jack is a deliberate design choice for clean, stable power delivery. See the prerequisites section below for what to get.
If anything is missing or shows signs of shipping damage, contact D-Central support immediately. We stand behind every unit we sell.
Before You Begin
The Bitaxe Ultra only supports 2.4 GHz WiFi networks. If your router broadcasts both 2.4 GHz and 5 GHz under the same network name (band steering / smart connect), the Bitaxe may have trouble connecting. Check your router settings and ensure a dedicated 2.4 GHz SSID is available. Consider creating a separate 2.4 GHz-only network for your mining devices — it also simplifies troubleshooting.
A note on Bitcoin wallet addresses: You need a valid Bitcoin address to receive mining rewards. This must be an address you fully control — from a hardware wallet like a Coldcard, Trezor, or Foundation Passport, or a self-custody software wallet like Sparrow, Electrum, or BlueWallet. Do not use an exchange deposit address for solo mining. If you find a block, you want that 3.125 BTC in a wallet where you hold the keys. Not your keys, not your coins.
Hardware Overview
Before you power on, take a moment to understand the components on your Bitaxe Ultra board. Knowing what you are looking at makes setup, troubleshooting, and future upgrades much easier.
Board Components
Bitaxe Ultra — Key Components
| BM1366 ASIC Chip | The main mining chip. Located center-board under the heatsink. This is the SHA-256 engine — identical silicon to the Antminer S19 XP. |
|---|---|
| ESP32-S3 Module | The brains of the operation. Dual-core microcontroller that runs AxeOS, handles WiFi connectivity, and serves the web dashboard. Small module near one edge of the board. |
| 5V DC Barrel Jack | Power input (5.5×2.1mm). Located on the board edge. This is the only power connection — the Bitaxe does NOT use USB-C for power. |
| Onboard Fan | Small axial fan for active cooling. Spins up immediately on boot. Speed is automatically controlled by AxeOS based on ASIC temperature. |
| LED Indicator(s) | One or more LEDs on the ESP32-S3 module or the PCB. Used for status indication — typically blinks during boot and remains steady during normal operation. |
| Heatsink | Aluminum or copper heatsink (pre-mounted or included separately) that sits on top of the BM1366 chip via a thermal pad. Essential for heat dissipation. |
| Voltage Regulator | Buck converter circuit that supplies the core voltage to the BM1366. This is what you are adjusting when you change core voltage settings in AxeOS. |
LED Indicators
The LEDs on your Bitaxe Ultra communicate the device’s state without needing to check the web dashboard:
- Solid LED on boot — Power is reaching the ESP32-S3. The firmware is loading.
- Blinking LED — The device is in AP mode (broadcasting its own WiFi network for initial setup) or actively attempting to connect to your home WiFi.
- Steady LED during operation — The Bitaxe is connected to WiFi and mining normally.
- No LED — No power reaching the board. Check your barrel jack connection and power supply.
LED behavior can vary between AxeOS firmware versions. If in doubt, the definitive status indicator is the AxeOS web dashboard — if you can reach it, the device is running.
Hardware Assembly
The Bitaxe Ultra is designed to be assembled in minutes with no specialized tools. If your unit came with the heatsink pre-attached, skip straight to connecting power.
Attach the Heatsink
Proper thermal management is critical for stable mining. The heatsink draws heat away from the BM1366 ASIC chip and dissipates it into the surrounding air. Without a heatsink, the chip will thermally throttle or shut down entirely to protect itself — you will not get anywhere near 500 GH/s.
- Locate the ASIC chip on the Bitaxe board — it is the largest square component, typically center-board.
- Prepare the thermal pad — Peel the protective film from both sides of the thermal pad. It should be sized to cover the ASIC chip surface. If you need to trim it, use clean scissors. If your kit includes thermal paste instead of a pad, apply a thin, even layer directly onto the chip surface (pea-sized dot, spread evenly or let mounting pressure spread it).
- Place the thermal pad centered directly on top of the ASIC chip. The pad fills microscopic gaps between the chip surface and heatsink base, ensuring efficient heat transfer.
- Press the heatsink down onto the thermal pad firmly and evenly. If your heatsink uses screw-through mounting, secure the screws in a cross pattern (tighten opposite corners first) to distribute pressure evenly.
- Verify the fit — Gently try to wiggle the heatsink. It should sit flush with no movement. The thermal pad’s natural tackiness holds it in place if there are no screws.
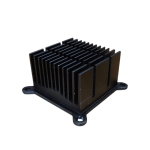
Bitaxe Heatsink — D-Central Design
D-Central’s custom-engineered heatsinks are precision-designed for Bitaxe devices, offering superior thermal contact and optimized fin geometry for maximum passive cooling. If your Ultra did not include a heatsink, or you want an upgrade for overclocking headroom, this is the one to get.
Connect Power Supply
The Bitaxe Ultra draws power through its 5V barrel jack (5.5×2.1mm DC connector). All data communication happens over WiFi — the barrel jack is for power only.
- Plug the barrel jack cable into the DC power port on the Bitaxe Ultra. The port is located on the edge of the PCB. It should click into place with a firm push.
- Connect the other end to your 5V / 6A barrel jack power supply.
- Plug the power supply into a wall outlet or a surge-protected power strip.
The Bitaxe Ultra draws 12–15W at stock, and more when overclocked. A weak, counterfeit, or undersized power supply causes voltage sag under load, which leads to random reboots, corrupted firmware writes, hash errors, or — worst case — permanent ASIC damage. Use a reputable brand PSU rated for at least 5V / 6A (30W) with a proper 5.5×2.1mm barrel jack. Your Bitaxe is precision mining hardware — the power supply is not the place to cut corners.
5V Barrel Jack Power Supply for Bitaxe
D-Central stocks tested, reliable 5V/6A barrel jack power supplies specifically verified for Bitaxe mining devices. Clean, stable power delivery — no voltage sag, no guesswork. Ships from Canada.
Position Your Bitaxe
Placement matters more than you might think. Proper positioning keeps the ASIC chip cool and your WiFi signal strong.
- Use an upright stand — The D-Central Bitaxe Mesh Stand (the original, designed by us) positions the board vertically for optimal natural airflow across the heatsink fins. Horizontal placement on a flat surface blocks airflow on one side and reduces cooling efficiency.
- Keep it in open air — Do not place the Bitaxe inside a closed cabinet, drawer, or box. It needs ambient air circulation around the heatsink.
- Avoid direct sunlight — A window shelf in direct sun will raise ambient temps and push the chip toward thermal throttling.
- Near your router helps — A strong WiFi signal means fewer disconnections and more consistent share submission. Walls and distance degrade 2.4 GHz signals.
- Stable surface — The Bitaxe is lightweight. Keep it where it will not get knocked over, and route the barrel jack cable so nothing tugs on the connection.
Initial Setup & WiFi Configuration
Hardware assembled, power connected. Now we bring the Bitaxe Ultra online. The entire setup process happens through your web browser — no software installation, no accounts, no app downloads.
First Boot
When you plug in the barrel jack, the Bitaxe Ultra powers on immediately. There is no power button — power in means power on. Here is what to expect:
- The onboard fan spins up — you should hear a faint whir. This confirms power is reaching the board.
- The LED indicator on the ESP32-S3 lights up, typically with a brief flash or blink as the firmware boots.
- After a few seconds, AxeOS completes its boot sequence and begins broadcasting its own WiFi access point for initial configuration.
If the fan does not spin or no LED lights up, disconnect power immediately. Check that the barrel jack connector is fully seated, verify your power supply is outputting 5V, and try a different wall outlet.
Connect to the AxeOS WiFi Network
On first boot (or whenever the Bitaxe cannot connect to a saved WiFi network), AxeOS creates its own WiFi access point so you can configure it directly.
- On your phone, laptop, or tablet, open your WiFi settings.
- Look for a network named “AxeOS” or “Bitaxe_XXXX” (where XXXX is a unique identifier). This is your Bitaxe broadcasting its configuration hotspot.
- Connect to this network. No password is required on initial setup (some firmware versions may use “password” or “12345678” as the default — check AxeOS release notes if prompted).
- Your device may show a “no internet” warning. This is expected — you are connected directly to the Bitaxe, not to the internet.
Once connected to the Bitaxe’s access point, open your web browser and navigate to:
http://192.168.4.1This is the default gateway IP the Bitaxe assigns itself when acting as an access point. The AxeOS dashboard should load in your browser, presenting the main configuration interface.
If the page does not load: (1) Confirm you are connected to the Bitaxe’s WiFi network, not your home network. (2) Disable mobile data on your phone — some phones route traffic over cellular when WiFi has no internet. (3) Try a different browser. (4) Clear browser cache. (5) Power cycle the Bitaxe by unplugging and reconnecting the barrel jack. (6) Some Android phones aggressively switch away from “no-internet” WiFi — check your phone’s WiFi settings for an option like “Auto-switch to mobile data” and disable it temporarily.
Configure Your Home WiFi Network
Now tell the Bitaxe how to connect to your home WiFi so it can reach the internet and communicate with your mining pool.
- In the AxeOS dashboard, navigate to the WiFi / Network settings section (often under a gear icon or “System” tab).
- Enter your WiFi network name (SSID) exactly as it appears. This is case-sensitive — “MyNetwork” and “mynetwork” are different.
- Enter your WiFi password.
- Click Save. The Bitaxe will reboot and attempt to connect to your home WiFi.
After rebooting, the Bitaxe stops broadcasting its own access point (assuming it successfully joins your network). You are now reconnected to your normal home WiFi.
To access the AxeOS dashboard going forward, you need the Bitaxe’s new IP address on your local network. There are several ways to find it:
- Check your router’s admin page — Look in the connected devices / DHCP client list for a device named “AxeOS”, “Bitaxe”, or “ESP32”.
- Use the mDNS hostname — Most AxeOS firmware versions support mDNS. Try navigating to:
http://bitaxe.local- Use a network scanner — Apps like Fing (iOS/Android), Advanced IP Scanner (Windows), or nmap (Linux/macOS) will show all devices on your network.
Once you have the IP address, bookmark it. You will be visiting this page regularly to check on your miner.
By default, your router assigns IP addresses dynamically, which means your Bitaxe’s address could change after a router reboot. Log into your router and create a DHCP reservation (static IP) tied to the Bitaxe’s MAC address. This ensures it always gets the same IP — no more hunting for it every time. If you run multiple Bitaxe devices, static IPs are essential for keeping track of each one.
AxeOS Web Interface Walkthrough
The AxeOS dashboard is your command center. Everything you need to configure, monitor, and tune your Bitaxe Ultra lives here — accessible from any browser on your local network. No cloud, no third-party service, no login credentials. Just you and your miner.
Dashboard Overview
When you load the AxeOS interface, the main dashboard displays a real-time overview of your miner’s status. Here are the key metrics you will see:
- Hashrate — Current hashing speed in GH/s. At stock settings, expect approximately 500 GH/s. This number fluctuates naturally — watch the average over 10–30 minutes for a true reading.
- ASIC Temperature — The BM1366 chip temperature in Celsius. Your target range is 40–65 °C.
- Fan Speed — Shown as RPM or percentage. AxeOS adjusts this automatically based on temperature.
- Shares Accepted / Rejected — Accepted shares are valid work units submitted to the pool. Rejected shares are stale or invalid. A small rejection rate (under 2%) is normal.
- Best Difficulty — The highest-difficulty share your Bitaxe has ever found. This is your personal record — your closest brush with a block.
- Uptime — Time since last reboot. Longer uptime means stable operation.
- Power Consumption — Estimated wattage drawn by the ASIC.
- Core Frequency & Voltage — Confirms your current tuning settings.
Settings Sections
Beyond the dashboard, AxeOS organizes configuration into several sections:
- Mining / Stratum — Pool URL, port, worker name (Bitcoin address), and password. This is where you tell the Bitaxe where to submit work.
- WiFi / Network — SSID and password for your home WiFi. Also shows current connection status and signal strength (RSSI).
- System — Firmware version, device info, hostname, OTA firmware update interface, and factory reset option.
- Tuning / Overclocking — Core frequency (MHz), core voltage (mV), and fan speed controls. This is where you push performance or dial it back.
The interface is intentionally simple. No bloat, no tracking, no analytics. Open-source firmware built by miners, for miners.
Pool Configuration — Solo Mining Setup
Your Bitaxe Ultra is on your WiFi network and the AxeOS dashboard is accessible. Now you tell it where to send work and where to deposit any rewards. This is the part that matters.
Solo Mining vs. Pool Mining
The Bitaxe communicates with a mining pool using the Stratum protocol. Even for solo mining, you connect to a pool server — the pool handles the protocol-level communication with the Bitcoin network.
Two options:
Solo Mining (Lottery Mining) — You connect to a solo pool like public-pool.io. Every hash your Bitaxe computes has a shot at finding a full Bitcoin block. Find one, and the entire block reward (3.125 BTC) goes to your Bitcoin address. No split, no cut, no intermediary. This is the purist’s approach — real participation in Bitcoin’s proof-of-work consensus, and a lottery ticket every second. This is what the vast majority of Bitaxe owners do.
Pool Mining — You connect to a traditional pool (Braiins, Ocean, CKPool). Your hashrate is combined with everyone else’s, and you receive small payouts proportional to your contribution. With a single Bitaxe Ultra at ~500 GH/s, your pool payouts will be single-digit satoshis per day. Pool mining with a Bitaxe is a learning exercise, not an income strategy.
For this guide, we will set up solo mining using public-pool.io — the most popular choice in the Bitaxe community.
Recommended Pool Settings
In the AxeOS dashboard, navigate to the Mining / Stratum section. Enter the following settings:
Public Pool — Solo Mining Configuration
| Pool URL | public-pool.io |
|---|---|
| Port | 21496 |
| Full Stratum Address | stratum+tcp://public-pool.io:21496 |
| User / Worker Name | Your Bitcoin address (e.g., bc1q…youraddress) |
| Password | x (or leave blank) |
Some AxeOS versions have the URL and port as separate fields; others expect a single combined Stratum address. Enter the information in whatever format your firmware version requires.
Alternative Solo Mining Pools
Public Pool is not the only option. Here are other solo-friendly pools compatible with the Bitaxe Ultra:
Alternative Pool Settings
| CK Solo Pool | solo.ckpool.org : 3333 — Run by Con Kolivas, long-standing solo pool |
|---|---|
| Ocean (OCEAN) | mine.ocean.xyz : 3334 — Decentralized pool by Luke Dashjr, non-custodial payouts |
| Braiins Pool | stratum+tcp://stratum.braiins.com : 3333 — Traditional pool with proportional payouts |
Each pool has different philosophies and payout mechanisms. For pure solo mining (100% of the block reward if you find one), stick with Public Pool or CK Solo Pool. For more information on choosing a pool, read our Mining Pool Comparison Guide.
Set Your Bitcoin Address
The Worker Name (or Username) field is where you enter your Bitcoin wallet address. On Public Pool for solo mining, your worker name IS your Bitcoin address — this is how the pool knows where to direct the block reward if your device finds a block.
- Open your Bitcoin wallet (Coldcard, Sparrow, Electrum, BlueWallet, etc.).
- Generate or copy a receive address. We recommend a bc1 (native SegWit) address for the lowest transaction fees.
- Paste this address into the Worker Name or Username field in AxeOS.
- Optionally append a device identifier: bc1qyouraddresshere.myultra — this helps identify the device on the pool dashboard if you run multiple miners.
Double-check the address character by character. A wrong character means lost rewards if you ever find a block. Once everything looks correct, click Save. The Bitaxe will reboot and begin mining.
Never use a Bitcoin exchange deposit address (Coinbase, Binance, Kraken, etc.) as your mining payout address. Exchanges can change deposit addresses without notice, freeze accounts, or refuse mining-related deposits. Use a wallet where you control the private keys. This is solo mining — the whole point is sovereignty. Not your keys, not your coins.
Overclocking Basics
The Bitaxe Ultra runs well at stock settings, but the open-source spirit of this hardware means you have full control over every performance parameter. Overclocking increases your hashrate — more lottery tickets per second — at the cost of higher power consumption and heat. Our Bitaxe Overclocking Manual covers advanced techniques in detail.
Pushing frequency and voltage too high causes instability, excessive heat, or — in extreme cases — permanent ASIC damage. Start with small increments, monitor temperatures for stability, and prioritize long-term reliability over peak hashrate. A Bitaxe that runs rock-solid at 550 GH/s 24/7 beats one that crashes every few hours chasing 750 GH/s.
Core Frequency & Core Voltage
Two settings control the Bitaxe Ultra’s performance:
- Core Frequency (MHz) — The clock speed of the BM1366 ASIC. Higher frequency means more hashes per second, but also more heat and power draw. Stock is typically around 485–500 MHz.
- Core Voltage (mV) — The electrical potential supplied to the ASIC core. Higher voltage provides stability at higher frequencies, but increases power consumption and heat. Stock is typically around 1150–1200 mV.
These two are interdependent. Increasing frequency without increasing voltage eventually causes hash errors and instability. Think of voltage as the foundation and frequency as the building height — you need a stronger foundation to go higher.
Safe Overclocking Procedure
- Run at stock for 30+ minutes — Establish baseline hashrate, power draw, and temperature. Write these numbers down. This is your reference point.
- Increase frequency by 25 MHz — In the AxeOS tuning section, bump core frequency from stock (e.g., 500 MHz to 525 MHz). Save and let the Bitaxe restart.
- Monitor for 15–30 minutes — Watch hashrate stability, temperature, and rejected shares. If hashrate is stable (not fluctuating wildly), temperature is under 65 °C, and rejected shares are minimal, the overclock is holding.
- Repeat with another 25 MHz — Keep stepping up until you see instability: frequent restarts, rising rejected shares, temperature above 70 °C, or declining effective hashrate despite higher frequency (thermal throttling).
- If unstable, increase voltage by 10–20 mV — This gives the ASIC more electrical headroom to run at the higher frequency. Then retry the current frequency target.
- Find your ceiling — The ideal overclock is the highest stable frequency where your Bitaxe runs 24/7 with acceptable temperatures. For most Ultra units, this lands in the 550–625 MHz range, yielding 600–700+ GH/s.
- Back off one notch — Once you find the edge of stability, drop frequency by 25 MHz. This safety margin accounts for ambient temperature changes (warm summer days, heat waves, etc.).
Every BM1366 chip is slightly different due to manufacturing variation (the “silicon lottery”). Your Ultra might overclock beautifully to 700 GH/s, or it might top out at 600 GH/s. Both are good results. Optimize for your specific chip.
For a deep dive into advanced overclocking techniques, frequency/voltage curves, and per-variant tuning guides, see our dedicated Bitaxe Overclocking Guide.
Temperature Management
Heat is the primary enemy of stable mining. The BM1366 is an efficient chip, but it still generates significant heat in a small package. Proper thermal management is the difference between a miner that runs reliably for years and one that throttles, crashes, or degrades prematurely.
Temperature Ranges
BM1366 Operating Temperature Guide
| Below 40 °C | Cool — Very safe. Room for more overclock if desired. |
|---|---|
| 40–55 °C | Optimal — Ideal operating range for long-term reliability. |
| 55–65 °C | Warm — Acceptable, but monitor closely. Summer ambient temps may push this higher. |
| 65–70 °C | Hot — Reduce overclock or improve cooling. Sustained operation here shortens component life. |
| Above 70 °C | Critical — Reduce overclock immediately. Thermal throttling is imminent. Risk of long-term ASIC degradation. |
Cooling Best Practices
- Heatsink quality matters — A larger heatsink with more fin surface area dissipates heat more effectively. D-Central’s custom heatsinks are engineered specifically for Bitaxe devices.
- Thermal interface material — Ensure your thermal pad or thermal paste makes full, even contact between the ASIC chip and heatsink. Replace thermal pads every 1–2 years, or if you notice rising temperatures at the same settings.
- Vertical positioning — Using a stand (like the Bitaxe Mesh Stand) leverages natural convection — hot air rises away from the heatsink fins instead of pooling around them.
- External airflow — In hot environments, a small USB desk fan pointed at the Bitaxe can drop ASIC temperatures by 5–10 °C. Cheap and effective.
- Ambient temperature — Remember that your Bitaxe can only cool to slightly above ambient room temperature. A miner running at 55 °C in a 20 °C room will hit 65+ °C in a 30 °C summer room at the same settings. Plan your overclock for your warmest expected conditions.
- Fan maintenance — The small onboard fan can accumulate dust over months. A gentle blast of compressed air every few months keeps airflow optimal.
For comprehensive thermal management strategies across all Bitaxe variants, including heatsink upgrades and custom cooling solutions, check our Bitaxe Accessories Guide.
Monitoring Your Bitaxe Ultra
Once your Bitaxe Ultra is mining, you have two monitoring channels: the local AxeOS dashboard and the pool’s web dashboard. Together, they give you complete visibility into your miner’s operation.
Local Monitoring via AxeOS
Access the AxeOS dashboard at your Bitaxe’s IP address (e.g., http://192.168.1.xxx or http://bitaxe.local). Key metrics to watch:
- Hashrate trend — Should hold steady near your expected value (e.g., ~500 GH/s at stock). Short-term fluctuations of +/-10% are normal. If it drops significantly or swings wildly, investigate.
- Temperature — Stable within the 40–65 °C target range. Rising temperatures at the same settings can indicate dust buildup, degraded thermal paste, or increasing ambient temps.
- Shares accepted vs. rejected — Rejection rate should stay below 2%. Higher rates indicate network latency, pool issues, or overclock instability.
- Uptime — Longer is better. If the device reboots frequently (uptime resets often), something is wrong — usually power supply instability or thermal throttling.
- WiFi signal (RSSI) — Some AxeOS versions display WiFi signal strength. Below -70 dBm indicates a weak connection that may cause share submission delays.
Pool Dashboard Monitoring
Check your miner’s status on Public Pool by visiting:
https://web.public-pool.io/#/app/bc1q...youraddressReplace bc1q…youraddress with your actual Bitcoin address. The dashboard shows:
- Connected workers — How many of your Bitaxe devices are online and submitting work.
- Total hashrate — Combined hashrate across all your miners using this address.
- Share history — Timeline of submitted shares.
- Best difficulty — Your highest-difficulty share ever found. This is the Bitaxe community’s favorite metric — the bigger the number, the closer you came to a block. Share your bests on X with the community.
No login, no account, no registration. Just your Bitcoin address. That is the beauty of Public Pool.
It is tempting to refresh the hashrate counter every five minutes. Resist. Check your Bitaxe once in the morning and once in the evening. If hashrate is in range, temperature is under 65 °C, and shares are being accepted, everything is working. Solo mining is a marathon played over months and years. Set it, verify it, and let it run.
Troubleshooting Common Issues
Most Bitaxe Ultra issues have straightforward solutions. Here are the most common problems, organized by symptom. For an exhaustive reference, see our dedicated Bitaxe Troubleshooting Guide.
WiFi Connection Issues
Symptom: The Bitaxe keeps broadcasting its “AxeOS” access point instead of connecting to your home WiFi.
- Verify SSID and password — Reconnect to the Bitaxe AP (192.168.4.1), check saved WiFi credentials. SSIDs are case-sensitive. Passwords must be exact.
- Confirm 2.4 GHz — The Bitaxe does not support 5 GHz WiFi. If your router uses band steering (combined SSID), create a separate 2.4 GHz-only network.
- Check special characters — SSIDs or passwords containing ‘ ” & # $ % can cause parsing issues. Test with a simpler password temporarily.
- Move closer to the router — Weak 2.4 GHz signal can prevent initial association. Set up close to the router first, then relocate.
- Check router client limits — Some consumer routers cap connected devices at 20–30. Ensure you have not hit the limit.
- Factory reset AxeOS — If nothing else works, reset AxeOS to defaults and reconfigure from scratch. Check the Bitaxe Firmware Update Guide for reset procedures.
Symptom: WiFi drops intermittently — the Bitaxe connects but periodically loses connection and stops submitting shares.
- Check WiFi signal strength — Move the Bitaxe closer to the router or add a WiFi access point / mesh node near the miner.
- Check for interference — Microwaves, cordless phones, and neighboring WiFi networks on overlapping channels all degrade 2.4 GHz performance. Try changing your router’s WiFi channel.
- Assign a static IP — DHCP lease renewals can briefly drop connectivity on some router firmware. A static reservation eliminates this.
- Update AxeOS firmware — WiFi stability improvements are a common part of firmware updates. Check the ESP-Miner GitHub releases for the latest version.
Low Hashrate
Symptom: Hashrate is significantly below expected — under 400 GH/s when you expect ~500 GH/s at stock.
- Check temperature — If the BM1366 is overheating, AxeOS will automatically throttle frequency to protect the chip. Improve cooling, reduce overclock, or reposition for better airflow.
- Verify power supply — An underpowered PSU (under 3A or poor regulation) causes voltage drops under load, forcing the chip below its rated speed. Try a known-good 5V/6A PSU.
- Inspect the barrel jack — Cheap cables with thin conductors cause resistive voltage drop. Ensure a firm connection with no looseness.
- Review overclock settings — If you have been overclocking, excessive settings cause the chip to error and restart repeatedly, averaging the hashrate down. Return to stock settings and test.
- Update firmware — Newer AxeOS releases often include BM1366-specific optimizations. Check the ESP-Miner GitHub for updates.
Overheating
Symptom: ASIC temperature consistently above 65 °C or spiking above 70 °C.
- Check heatsink contact — Remove the heatsink and inspect the thermal pad. It should make full, even contact with the ASIC chip. Replace if shifted, compressed, or dried out.
- Improve airflow — Move to a more open location. Use the mesh stand for vertical positioning. Add a small desk fan for supplemental airflow.
- Lower ambient temperature — Air conditioning, relocating away from heat sources, or moving to a cooler room.
- Reduce overclock — Drop core frequency by 25–50 MHz. This is the most effective immediate fix and will reduce power (and therefore heat) proportionally.
- Verify the onboard fan — Ensure it is spinning. A stopped fan means no active cooling. If the fan has failed, contact D-Central support for assistance.
- Upgrade the heatsink — D-Central’s custom heatsinks offer larger surface area and better fin geometry for superior passive cooling.
No Shares Being Accepted
Symptom: The Bitaxe shows a hashrate but the share counter stays at zero.
- Verify pool settings — Double-check the pool URL, port, and Bitcoin address. A single typo prevents share acceptance.
- Check internet connection — The Bitaxe needs active internet access to reach the pool. Confirm your WiFi is connected and your router has internet.
- Wait 10–15 minutes — First shares can take a few minutes to appear on some pool configurations. Be patient before troubleshooting.
- Try a different pool — Temporarily switch to solo.ckpool.org:3333 to rule out a Public Pool-side issue.
- Check firewall / DNS — Some routers block outbound connections on non-standard ports or apply DNS filtering. Try changing router DNS to 1.1.1.1 or 8.8.8.8.
- Power cycle everything — Unplug the Bitaxe, reboot your router, then reconnect the Bitaxe. Fresh connections resolve many intermittent issues.
Not Finding Blocks
Symptom: Your Bitaxe has been mining for weeks or months and has not found a block.
This is not a malfunction — it is the expected statistical reality of solo mining. At ~500 GH/s, the Bitaxe Ultra represents a minuscule fraction of Bitcoin’s total network hashrate (currently hundreds of exahashes per second). The expected time between blocks for a single Bitaxe is measured in decades to centuries of continuous operation. But probability does not work on a schedule — every single hash has an independent, non-zero chance of being the winning one.
The Bitaxe community has proven that solo miners DO find blocks. It is rare, it is improbable, and it happens. That is the entire point of lottery mining. Keep your miner running, keep it stable, and keep it hashing. Every hash counts.
For additional troubleshooting scenarios, see our comprehensive Bitaxe Troubleshooting Guide.
Firmware Updates
AxeOS is actively developed, with regular releases that bring performance improvements, bug fixes, new features, and better chip-specific tuning. Keeping your firmware current is the easiest way to ensure your Bitaxe Ultra runs at its best.
How to Update AxeOS
- Check your current version — In the AxeOS dashboard, navigate to the System section. Note the current firmware version.
- Download the latest release — Visit the ESP-Miner GitHub releases page. Download the latest .bin firmware file compatible with the BM1366 / Bitaxe Ultra.
- Back up your settings — Note your current pool URL, Bitcoin address, frequency, voltage, and WiFi credentials. Some updates reset configuration to defaults.
- Apply the update — In the AxeOS dashboard, go to the OTA Update section. Upload the .bin file. The device will flash the new firmware and reboot automatically.
- Verify and reconfigure — After reboot, check that your mining settings are intact. If they were reset, re-enter your pool configuration and tuning parameters.
Before updating, always read the GitHub release notes. They document what changed, whether settings will be reset, and if there are any known issues with specific hardware revisions. Firmware updates are generally safe, but informed updates are safer. If your miner is running perfectly and the new release does not address any issues you have, there is no urgency to update — “if it ain’t broke” is valid wisdom.
For detailed firmware update procedures, rollback instructions, and USB serial flashing, see our full Bitaxe Firmware Update Guide.
Frequently Asked Questions
What are the odds of my Bitaxe Ultra finding a Bitcoin block?
The honest answer: very small on any given day. At ~500 GH/s, the Bitaxe Ultra represents an astronomically tiny fraction of Bitcoin’s total network hashrate (currently measured in hundreds of exahashes per second). The expected time for a single Bitaxe to find a block, statistically, is measured in decades. But probability does not work on schedules — every hash has an independent chance, and Bitaxe miners have found blocks before. You are not doing this for guaranteed daily income — read our guide to solo Bitcoin mining to understand the math. You are doing it for the shot at a 3.125 BTC block reward, and to contribute to Bitcoin’s decentralization. Every hash counts.
How much electricity does the Bitaxe Ultra use?
At stock settings, approximately 12–15 watts — comparable to an LED light bulb. Running 24/7, that is about 0.36 kWh per day or roughly 10–11 kWh per month. At typical North American electricity rates ($0.10–0.15/kWh), your monthly cost is about $1–1.50 CAD. Even fully overclocked, you are unlikely to exceed 20W. The Bitaxe is one of the most power-efficient ways to participate in Bitcoin mining.
Can I power the Bitaxe Ultra via USB-C?
No. The Bitaxe Ultra uses a 5V DC barrel jack (5.5×2.1mm) for power input, not USB-C. This is a deliberate design choice — barrel jack connectors provide more stable, higher-current power delivery with a more secure physical connection than USB-C for this application. You need a dedicated 5V/6A barrel jack power supply. Do not attempt to rig USB-C to barrel jack adapters unless they are properly rated — voltage and current must be correct.
Can I run multiple Bitaxe devices simultaneously?
Absolutely. Each Bitaxe operates independently with its own WiFi connection, IP address, and pool settings. You can run as many as your network and power outlets support. If you use the same Bitcoin address for all of them, your combined hashrate appears as one total on the Public Pool dashboard. More Bitaxe units means more hashrate, which means better solo mining odds. Some miners run 10, 20, or 50+ units. D-Central’s Bitaxe Mesh Stand — which we designed — is purpose-built for clean, well-cooled multi-Bitaxe setups.
Is the Bitaxe Ultra loud?
Barely audible. The small onboard fan produces minimal noise — typically under 30 dB at stock, which is quieter than a whisper. Most people cannot hear it from more than a meter away. It is completely suitable for a desk, living room, or bedroom. This is a massive advantage over full-size ASIC miners like the Antminer S19, which produce 75+ dB and require a dedicated space. The Bitaxe Ultra was designed for home environments where noise matters.
What is the difference between the Bitaxe Ultra and the Bitaxe Supra?
Both use the same BM1366 ASIC chip, so their hashrate and power consumption are essentially identical (~500 GH/s at 12–15W). The difference is in the PCB: the Supra is a newer board revision with an improved circuit layout, refined power delivery, and minor component placement optimizations. If you already own a Ultra, you are running the same proven chip — the Supra is an incremental board-level improvement, not a generational leap. The Gamma (BM1370) is the model that represents a significant step up in efficiency and hashrate.
What happens if I lose power or internet?
The Bitaxe handles interruptions gracefully. On power loss, it simply stops — no data corruption risk, as the ESP32 uses flash memory for settings. When power returns, it boots automatically (no power button), reconnects to WiFi, and resumes mining. All configuration is preserved. On internet loss, the Bitaxe continues running but cannot submit shares to the pool. When internet is restored, it reconnects automatically. You lose mining time during outages but no configuration or hardware damage occurs. The Bitaxe is designed to be set-and-forget.
Do I need a computer running for the Bitaxe to mine?
No. The Bitaxe Ultra is a fully standalone device. The ESP32-S3 microcontroller runs AxeOS independently — it handles WiFi, Stratum communication, ASIC control, and temperature management all on its own. You only need a browser-equipped device (phone, laptop, tablet) for initial configuration and occasional monitoring. Once set up, the Bitaxe mines autonomously 24/7 with no external device dependency.
Can the Bitaxe Ultra mine other cryptocurrencies?
The BM1366 is a SHA-256 ASIC — it can only compute SHA-256 hashes. Bitcoin is the dominant SHA-256 cryptocurrency. While other SHA-256 chains exist (BCH, BSV), AxeOS is built and optimized specifically for Bitcoin mining. We strongly recommend sticking with Bitcoin — it is the only SHA-256 network worth securing, and it is the reason this hardware exists. Bitcoin is the signal; everything else is noise.
Is solo mining “worth it” financially?
If you measure “worth” strictly by expected daily income versus electricity cost, a single Bitaxe mining solo does not produce positive expected value on any short timeline. The math does not favor it as a financial strategy. But that framing misses the point entirely. Solo mining with a Bitaxe is about direct participation in Bitcoin’s proof-of-work consensus — running your own SHA-256 computations, contributing to hashrate decentralization, and holding a perpetual lottery ticket for 3.125 BTC. It costs about a dollar a month in electricity. For many Bitcoiners, that is the cheapest and most meaningful way to engage with the technology they believe in. And blocks have been found by solo Bitaxe miners. The probability is not zero.
Why D-Central
D-Central Technologies is not a reseller that discovered Bitaxe last month. We have been embedded in the Bitaxe ecosystem since its earliest days — pioneers, not followers.
- Created the original Bitaxe Mesh Stand — We designed and manufactured the first commercially available stand for Bitaxe devices. Every mesh stand in the ecosystem traces back to our original design.
- Developed custom heatsinks — Our precision-engineered heatsinks for Bitaxe and Bitaxe Hex are designed for maximum thermal performance in compact form factors.
- Stock the complete ecosystem — Every Bitaxe variant (Ultra, Supra, Hex, Gamma, GT), every accessory (heatsinks, cases, PSUs, stands), and the full Nerd/open-source lineup (NerdAxe, NerdQAxe, Nerdminer, NerdNOS).
- Real mining expertise — Founded in 2016, 2,500+ ASIC miners repaired, full-service repair lab in Laval, Quebec. We are Bitcoin Mining Hackers — we do not just sell mining hardware, we understand it at the board level.
- Canadian quality and support — Ship from Canada, Canadian customer support, phone line at 1-855-753-9997. Real humans who mine Bitcoin and know the hardware.
- Full-service ecosystem — Hardware sales, ASIC repair, mining hosting in Quebec, consulting, and training. No other Bitaxe retailer offers this breadth of service.
When you buy a Bitaxe from D-Central, you are buying from the team that helped build this ecosystem. We are here before, during, and after your purchase.
Open-Source Bitcoin Miners at D-Central
Bitaxe Ultra, Supra, Gamma, Hex, GT, NerdAxe, NerdQAxe, Nerdminer — D-Central stocks the complete open-source mining lineup. Every device ships from Canada with fast delivery and expert support. More miners, more hashrate, more decentralization.
Next Steps
Your Bitaxe Ultra is hashing, shares are flowing, and you are officially a solo Bitcoin miner. Welcome to the global community of individuals running their own hardware, securing the most important monetary network ever built. Here is where to go from here:
- Experiment with overclocking — Now that your Ultra is running stable at stock, revisit the Overclocking section or read the dedicated Bitaxe Overclocking Guide for advanced tuning techniques.
- Keep firmware updated — Follow the ESP-Miner GitHub repository for new AxeOS releases. Our Bitaxe Firmware Update Guide walks you through every step.
- Accessorize your setup — D-Central carries the full range: heatsinks, mesh stands, cases, and power supplies. See the Bitaxe Accessories Guide or browse accessories in the shop.
- Expand your fleet — One Bitaxe becomes many. Each additional miner multiplies your solo mining odds. Some builders run dozens of units on mesh stands.
- Explore other miners — Check out the Bitaxe Hex (6 ASIC chips, 3+ TH/s), the NerdAxe, NerdQAxe, and the rest of the open-source lineup.
- Consider a Bitcoin Space Heater — If you want serious hashrate AND room heating, D-Central’s Bitcoin Space Heaters convert full-size ASIC power into thermal energy. Mining and warmth, combined.
- Join the community — The Bitaxe community is active on X, Discord, and Reddit. Share setup photos, compare best difficulty scores, celebrate block wins. Follow @DCentralTech on X for news and updates.
- Read the Bitaxe Hub — D-Central’s Bitaxe Hub is the definitive resource for all things Bitaxe — model comparisons, deep-dive guides, firmware tutorials, and community block win tracking.
Solo mining is a long game. Your Bitaxe Ultra is hashing around the clock, every second a new attempt at finding a valid Bitcoin block. Most days will pass quietly. But one day — maybe tomorrow, maybe in a year — your little miner might find the hash that changes everything. Until then, you are part of something bigger: a global network of individuals running their own miners, keeping Bitcoin decentralized, and proving that you do not need a warehouse full of hardware to participate in securing sound money.
Every hash counts. Happy hashing.
— The D-Central Technologies Team
Bitcoin Mining Hackers since 2016
What are the odds of my Bitaxe Ultra finding a Bitcoin block?
The honest answer: very small on any given day. At ~500 GH/s, the Bitaxe Ultra represents an astronomically tiny fraction of Bitcoin’s total network hashrate (currently measured in hundreds of exahashes per second). The expected time for a single Bitaxe to find a block, statistically, is measured in decades. But probability does not work on schedules — every hash has an independent chance, and Bitaxe miners have found blocks before. You are not doing this for guaranteed daily income —…
How much electricity does the Bitaxe Ultra use?
At stock settings, approximately 12–15 watts — comparable to an LED light bulb. Running 24/7, that is about 0.36 kWh per day or roughly 10–11 kWh per month. At typical North American electricity rates ($0.10–0.15/kWh), your monthly cost is about $1–1.50 CAD. Even fully overclocked, you are unlikely to exceed 20W. The Bitaxe is one of the most power-efficient ways to participate in Bitcoin mining.
Can I power the Bitaxe Ultra via USB-C?
No. The Bitaxe Ultra uses a 5V DC barrel jack (5.5×2.1mm) for power input, not USB-C. This is a deliberate design choice — barrel jack connectors provide more stable, higher-current power delivery with a more secure physical connection than USB-C for this application. You need a dedicated 5V/6A barrel jack power supply. Do not attempt to rig USB-C to barrel jack adapters unless they are properly rated — voltage and current must be correct.
Can I run multiple Bitaxe devices simultaneously?
Absolutely. Each Bitaxe operates independently with its own WiFi connection, IP address, and pool settings. You can run as many as your network and power outlets support. If you use the same Bitcoin address for all of them, your combined hashrate appears as one total on the Public Pool dashboard. More Bitaxe units means more hashrate, which means better solo mining odds. Some miners run 10, 20, or 50+ units. D-Central’s Bitaxe Mesh Stand — which we designed — is purpose-built for clean,…
Is the Bitaxe Ultra loud?
Barely audible. The small onboard fan produces minimal noise — typically under 30 dB at stock, which is quieter than a whisper. Most people cannot hear it from more than a meter away. It is completely suitable for a desk, living room, or bedroom. This is a massive advantage over full-size ASIC miners like the Antminer S19, which produce 75+ dB and require a dedicated space. The Bitaxe Ultra was designed for home environments where noise matters.
What is the difference between the Bitaxe Ultra and the Bitaxe Supra?
Both use the same BM1366 ASIC chip, so their hashrate and power consumption are essentially identical (~500 GH/s at 12–15W). The difference is in the PCB: the Supra is a newer board revision with an improved circuit layout, refined power delivery, and minor component placement optimizations. If you already own a Ultra, you are running the same proven chip — the Supra is an incremental board-level improvement, not a generational leap. The Gamma (BM1370) is the model that represents a…
What happens if I lose power or internet?
The Bitaxe handles interruptions gracefully. On power loss, it simply stops — no data corruption risk, as the ESP32 uses flash memory for settings. When power returns, it boots automatically (no power button), reconnects to WiFi, and resumes mining. All configuration is preserved. On internet loss, the Bitaxe continues running but cannot submit shares to the pool. When internet is restored, it reconnects automatically. You lose mining time during outages but no configuration or hardware…
Do I need a computer running for the Bitaxe to mine?
No. The Bitaxe Ultra is a fully standalone device. The ESP32-S3 microcontroller runs AxeOS independently — it handles WiFi, Stratum communication, ASIC control, and temperature management all on its own. You only need a browser-equipped device (phone, laptop, tablet) for initial configuration and occasional monitoring. Once set up, the Bitaxe mines autonomously 24/7 with no external device dependency.
Can the Bitaxe Ultra mine other cryptocurrencies?
The BM1366 is a SHA-256 ASIC — it can only compute SHA-256 hashes. Bitcoin is the dominant SHA-256 cryptocurrency. While other SHA-256 chains exist (BCH, BSV), AxeOS is built and optimized specifically for Bitcoin mining. We strongly recommend sticking with Bitcoin — it is the only SHA-256 network worth securing, and it is the reason this hardware exists. Bitcoin is the signal; everything else is noise.
Is solo mining “worth it” financially?
If you measure “worth” strictly by expected daily income versus electricity cost, a single Bitaxe mining solo does not produce positive expected value on any short timeline. The math does not favor it as a financial strategy. But that framing misses the point entirely. Solo mining with a Bitaxe is about direct participation in Bitcoin’s proof-of-work consensus — running your own SHA-256 computations, contributing to hashrate decentralization, and holding a perpetual lottery ticket for…