Why Update Your Bitaxe Firmware?
Your Bitaxe is a tiny, open-source Bitcoin mining machine. Under the hood, it runs AxeOS — an open-source firmware built on the ESP32-S3 microcontroller that handles everything from ASIC chip communication to WiFi networking to the web dashboard you use to configure your miner. Like any actively developed open-source project, AxeOS receives regular updates from the community, and those updates matter.
Firmware updates can deliver measurable hashrate improvements through better ASIC tuning algorithms, new features like TLS-encrypted pool connections and hashrate graphing, bug fixes that eliminate crashes or connectivity issues, and hardware support for newer Bitaxe models. Running outdated firmware means leaving performance on the table — and in solo mining, every fraction of a gigahash counts. A single firmware update has been known to unlock 10-15% more hashrate on certain models just through improved voltage regulation and frequency management.
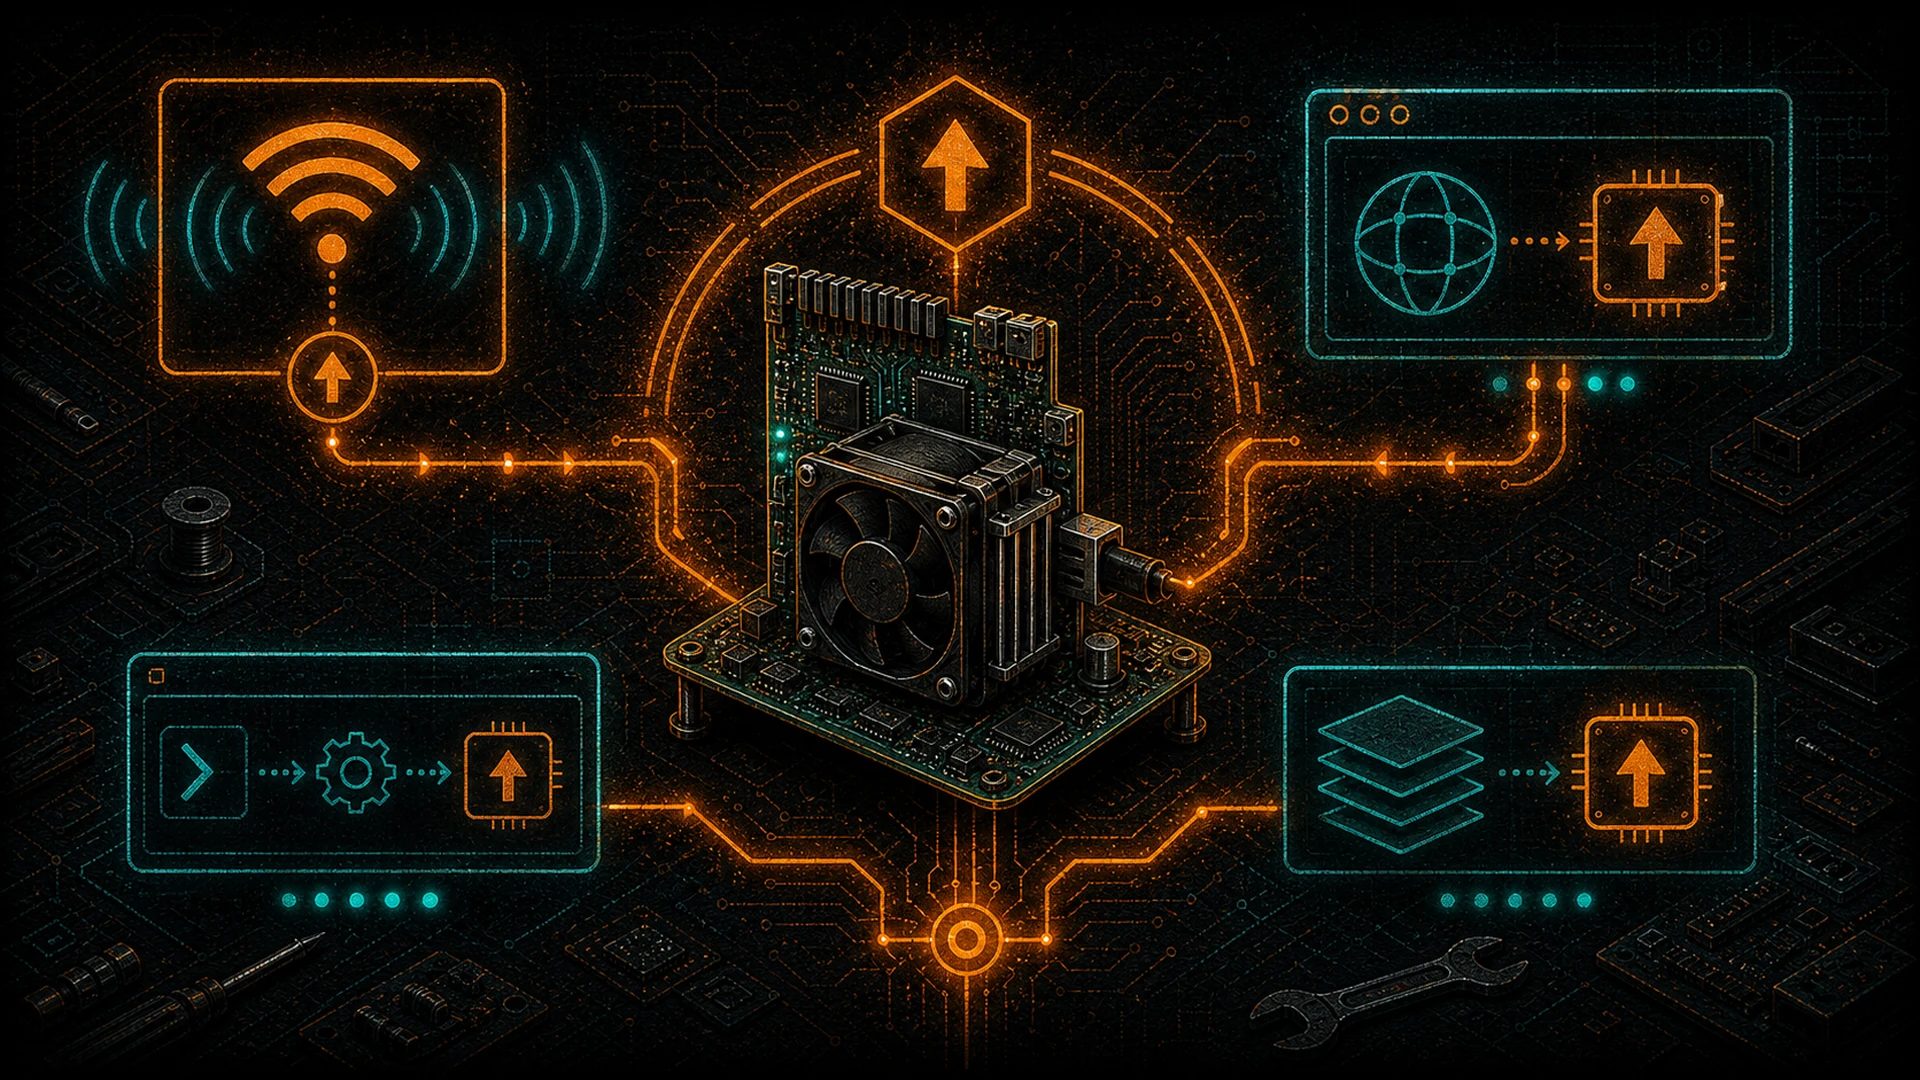
This guide covers every method for updating your Bitaxe firmware: the quick OTA (Over-The-Air) update through your browser, the browser-based Web Flasher for recovery situations, the command-line bitaxetool for power users, and building from source for developers. If your device is completely unresponsive, also see our SD Card Recovery Guide. Whether you are running a Bitaxe Supra, Ultra, Gamma, Hex, GT, or any other variant (explore them all on our Bitaxe Hub), the process is fundamentally the same — and we will walk you through all of it.
D-Central Technologies has been a pioneer in the Bitaxe ecosystem since its earliest days. We created the original Bitaxe Mesh Stand, developed custom heatsinks and accessories, and stock every Bitaxe variant alongside the full open-source miner lineup. We have flashed firmware on thousands of Bitaxe devices. This guide is written from hands-on experience, not secondhand documentation.
The OTA method (Method 1) requires zero technical background — if you can use a web browser, you can update your firmware. USB methods are provided for recovery scenarios or first-time flashing of bare boards.
What Changed in ESP-Miner v2.15.0 (Released August 21, 2026)
ESP-Miner v2.15.0 went stable on August 21, 2026 (release notes). It is the first release in a long time that changes the update procedure itself, so read this section before you flash:
- The web interface is now inside esp-miner.bin. The AxeOS dashboard is compiled, gzipped and embedded in the firmware binary (the “unified firmware”, PR #1763). The release page carries no www.bin, and there is nothing to upload after the firmware — the dashboard always matches the firmware you just flashed. Step 6 of Method 1 now applies only to v2.14.x and earlier.
- mDNS hostname access. The miner registers itself as <hostname>.local (PR #1240). The factory hostname is bitaxe, so a fresh v2.15.0 board answers at http://bitaxe.local; change the hostname under Settings → Network and the miner re-registers immediately (AxeOS redirects you to the new .local address). If two miners share a hostname, the second one renames itself with the last two bytes of its MAC address, e.g. bitaxe-a1b2.local. The IP address on the OLED still works everywhere, and every curl command in this guide accepts the .local name in place of the IP.
- Network discovery. Every v2.15.0 miner advertises an HTTP service with an _axeos subtype, so avahi-browse _axeos._sub._http._tcp (Linux) lists all of them, with board, family, ASIC and firmware version in the TXT records. The Swarm page accepts .local names as well as IPs.
- Custom web UI is now an opt-in switch. Developers who want to serve their own dashboard build enable “Enable custom web UI” under Settings and upload a www.bin; the switch resets itself after any firmware OTA or partition switch, and http://<IP>/recovery gained a “Disable Custom Web UI” button for when a custom build misbehaves.
- Factory images. Nineteen board-specific images, named esp-miner-factory-<board>-v2.15.0.bin, for boards 102, 201, 202, 203, 204, 205, 207, 302, 303, 400, 401, 402, 403, 601, 602, 650, 701, 702 and 801, plus the OTA esp-miner.bin (2.5 MB, up from 1.65 MB in v2.14.2 because the dashboard now rides along). Board 603 has been supported in the source since v2.14.1 but has no factory image on this release page.
- Also in this release: a Bluetooth LE Wi-Fi setup service for boards still in AP mode (PR #1827), ESP-IDF 6.0.2, multi-line charts and total uptime/hashes on the dashboard, an HTTP handler audit and several heap/WebSocket crash fixes, and Stratum V2 hardening — 8 kB frames, single-write frames, fractional pool difficulty and a per-pool “require authentication” option (the SV2 protocol itself was specified by Braiins; AxeOS has shipped it natively since v2.14.0 — see our Bitaxe Stratum V2 setup guide).
The update itself is unchanged: an OTA from a v2.14.x build with esp-miner.bin (Method 1) preserves your settings, and the factory images flash with the Web Flasher or bitaxetool exactly as before (Methods 2 and 3).
Bitaxe Model & Firmware Reference
Every Bitaxe model runs the same ESP-Miner firmware, but each model requires a model-specific firmware binary that matches its hardware revision number. Flashing the wrong binary for your board will not damage it — the device simply will not boot correctly — but you will need to reflash with the correct file. Here is the complete mapping of Bitaxe models to their hardware revision numbers and firmware files:
Bitaxe Models & Firmware File Mapping
| Model Name | Hardware Rev | ASIC Chip | Power Input | Factory Firmware File |
|---|---|---|---|---|
| Bitaxe Max | 100 series | BM1397 | 5V DC barrel jack | esp-miner-factory-102-vX.X.X.bin |
| Bitaxe Ultra | 200 series | BM1366 | 5V DC barrel jack | esp-miner-factory-20X-vX.X.X.bin |
| Bitaxe Hex (UltraHex) | 300 series | 6x BM1366 | 12V DC XT30 | esp-miner-factory-30X-vX.X.X.bin |
| Bitaxe Supra | 400 series | BM1368 | 5V DC barrel jack | esp-miner-factory-40X-vX.X.X.bin |
| Bitaxe Gamma | 600 series | BM1370 | 5V DC barrel jack | esp-miner-factory-60X-vX.X.X.bin |
| Bitaxe Gamma (alt) | 650 | BM1370 | 5V DC barrel jack | esp-miner-factory-650-vX.X.X.bin |
| Bitaxe SupraHex | 700 series | 6x BM1368 | 12V DC XT30 | esp-miner-factory-70X-vX.X.X.bin |
| Bitaxe GT (Gamma Turbo) | 800 series | 2x BM1370 | 12V DC XT30 | esp-miner-factory-80X-vX.X.X.bin |
Your hardware revision number is printed directly on the Bitaxe PCB (circuit board), usually near the edge or next to the model name. It is also displayed in AxeOS under the System section of the web dashboard. Look for the “Board Version” or “Device Model” field. You need to match this number exactly when downloading firmware files — a Bitaxe Supra 401 needs the 401 firmware, not the 402.
When downloading firmware, you will see two types of .bin files on the GitHub releases page:
- esp-miner-factory-XXX-vX.X.X.bin — A complete factory image that includes the bootloader, partition table, AxeOS web interface, and the mining firmware. This is what you use with USB flashing tools (bitaxetool, Web Flasher) and when doing a full reflash.
- esp-miner.bin — The firmware binary used for OTA updates through the AxeOS web interface. This file does not include the bootloader or partition table, because those are already on your device. From v2.15.0 it also carries the AxeOS web interface, which is why the v2.15.0 release page has no separate www.bin.
For standard OTA updates (Method 1), you only need the esp-miner.bin file. For USB recovery or first-time flashing, you need the factory image matching your specific board revision.
Before You Update
Firmware updates on the Bitaxe are low-risk — the ESP32-S3 has a dual-partition scheme, meaning it writes the new firmware to a separate partition and only switches to it after verifying the write was successful. If something goes wrong mid-flash, the device boots back to the old firmware. That said, a few minutes of preparation will save you time and frustration.
When you update via the OTA method through the AxeOS web interface, your mining settings (pool, wallet, frequency, voltage) are stored in NVS (Non-Volatile Storage) and are preserved across updates. However, if you flash a factory image with bitaxetool or esptool, or with the Web Flasher with its “Keep configuration” box unchecked, all settings will be erased and you will need to reconfigure your Bitaxe from scratch. (The Web Flasher’s “Keep configuration” option skips the 24 KB NVS region at flash offset 0x9000 where those settings live, so WiFi, pool and wallet survive the factory flash.) This is why backing up your settings matters.
Check Your Current Firmware Version
Before updating, confirm what version you are currently running. Open your web browser and navigate to your Bitaxe’s IP address (shown on the device’s OLED screen) — on v2.15.0 and later, http://bitaxe.local (or your custom hostname followed by .local) works too. In the AxeOS dashboard, look at the bottom of the page or under the System tab. You will see the current firmware version displayed as something like v2.15.0. Compare this against the latest release on GitHub to determine if an update is available.
Method 1: OTA Update via AxeOS Web Interface (Recommended)
This is the simplest and safest method. It takes about five minutes, requires no cables or tools, and preserves all your mining settings. If your Bitaxe is already running AxeOS and connected to your WiFi network, this is the method you should use.
Step 1 — Open the AxeOS Dashboard
On a computer or phone connected to the same WiFi network as your Bitaxe, open a web browser and type the Bitaxe’s IP address into the address bar. This is the IP address shown on the device’s OLED display. It will look something like 192.168.1.42. If the miner already runs v2.15.0 or later you can type http://bitaxe.local instead (the default hostname is bitaxe; if you renamed it, use http://<your-hostname>.local). The AxeOS dashboard should load, showing your miner’s current hashrate, temperature, and status.
Step 2 — Navigate to Settings
Click the Settings tab (gear icon) in the AxeOS navigation. Scroll to the bottom of the Settings page. You will find the firmware management section, which shows your current firmware version and provides options to check for updates and upload firmware files.
Step 3 — Check for Latest Release
AxeOS can check GitHub directly for the latest available firmware. Click the “Check” button next to “Latest Releases.” AxeOS will query the ESP-Miner GitHub repository and compare the latest release against your installed version. If a newer version exists, it will indicate that an update is available and provide a download link.
Alternatively, you can manually download the firmware file:
- Visit https://github.com/bitaxeorg/ESP-Miner/releases
- Find the latest stable release (not a beta/pre-release, unless you want to test bleeding-edge features)
- Download the file named esp-miner.bin — this is the OTA update binary
On the GitHub releases page, you will see both stable releases (e.g., v2.15.0, v2.14.2) and pre-releases flagged “Pre-release” (e.g., the v2.14.0b4 beta that preceded v2.14.0). Stable releases are tested and recommended for most users. Pre-releases contain the newest features and fixes ahead of the next stable tag, but may have undiscovered bugs. If you want to live on the edge, flash the pre-release. If your miner is earning sats and you want it to stay that way, stick with stable. This is open-source mining — your device, your choice.
Step 4 — Upload the Firmware
In the AxeOS Settings page, locate the “Update Firmware” section. Click the “Browse” button and select the esp-miner.bin file you downloaded. AxeOS will begin uploading the firmware to your Bitaxe over your local network. This process typically takes 30 to 60 seconds depending on your network speed.
While the firmware upload and flash are in progress, do not unplug your Bitaxe, close the browser tab, or disconnect from WiFi. Interrupting the flash process can leave the firmware in a corrupted state. The ESP32-S3’s dual-partition design provides some protection, but you should still treat the flash as an atomic operation. Wait for the success confirmation before touching anything.
Step 5 — Verify the Update
When the upload completes, you should see a green “Success! Firmware updated” message. The Bitaxe will automatically reboot with the new firmware. The AxeOS web interface will also update itself and reload the page. This may take an additional 15-30 seconds.
After the reboot:
- Refresh the AxeOS dashboard in your browser
- Navigate to the System section and confirm the firmware version now shows the new version number
- Check that your hashrate is normal and the ASIC temperature is within expected range
- Verify your mining pool connection is active and shares are being submitted
- Confirm your wallet address and pool settings are unchanged
That is it. Your firmware is updated, your settings are preserved, and your miner is back to hashing. The entire process takes less than five minutes.
Step 6 — Update the Web Interface (v2.14.x and Earlier Only)
On v2.14.2 and earlier, the AxeOS web interface (the HTML/JavaScript frontend) lives in its own www flash partition and ships as a separate www.bin on every release. If the dashboard looks outdated after a firmware update, or the release notes mention “www” changes, update it independently: in AxeOS, open the “Update WWW” section in Settings and upload the www.bin from the same release as your esp-miner.bin. This rewrites only the dashboard — the mining firmware remains untouched.
On v2.15.0 and later, skip this step. The web interface is embedded in esp-miner.bin, the release page has no www.bin, and the dashboard is replaced together with the firmware in Step 4. The Settings page shows a “Custom Frontend” toggle instead: leave it off unless you build your own AxeOS frontend. If you do enable it and upload a custom www.bin, the firmware switches back to its embedded dashboard after the next OTA or partition change, and http://<IP>/recovery has a “Disable Custom Web UI” button should the custom build not load.
Method 2: Bitaxe Web Flasher (Recovery & First-Time Flash)
The Bitaxe Web Flasher is a browser-based tool that connects directly to your Bitaxe’s ESP32-S3 chip over USB serial. It is the go-to method when your Bitaxe is not connecting to WiFi (so OTA is not possible), when the AxeOS web interface is corrupted or inaccessible, when you are setting up a brand-new bare board for the first time, or when you need to recover a bricked device.
The Web Flasher uses the Web Serial API, which is supported in Google Chrome and Microsoft Edge. Firefox and Safari do not support Web Serial — use Chrome or Edge for this method.
Requirements
- USB-C data cable — Must be a cable capable of data transfer, not a charge-only cable. If your cable only charges your phone, it will not work here. Look for USB cables labeled “data” or “sync.”
- Google Chrome or Microsoft Edge — The Web Flasher requires the Web Serial API.
- Power supply for your Bitaxe — The device needs external power; USB alone is not sufficient for operation. Standard models use a 5V barrel jack (5.5×2.1mm), while the Hex, SupraHex, and GT use 12V XT30 connectors.
- USB serial driver — Your computer may need a driver for the USB-to-serial chip on the Bitaxe. See the driver section below.
The USB-C port on your Bitaxe is used exclusively for firmware flashing and serial console access. It does not power the device for mining. All standard Bitaxe models (Supra, Ultra, Gamma) draw power from the 5V barrel jack (5.5×2.1mm DC connector). The Bitaxe GT and Hex variants use a 12V DC XT30 connector. You must connect the appropriate power supply in addition to the USB-C cable during the flashing process.
If you need a replacement supply for a standard 5V Bitaxe, compare the listed 5V 6A Bitaxe PSU with your board’s required voltage and connector before ordering. This listing excludes 12V GT, Hex and NerdQAxe++ devices. Keep using a suitable existing supply if you have one; firmware updates are free and do not require a purchase.
USB Serial Driver Installation
The Bitaxe uses either a CP2102 (Silicon Labs) or CH340 (WCH) USB-to-serial bridge chip, depending on the board revision. Your operating system needs the correct driver to communicate with the chip over USB.
USB Serial Driver Downloads
| Operating System | CP2102 (Silicon Labs) | CH340 (WCH) |
|---|---|---|
| Windows 10/11 | Download from Silicon Labs VCP Drivers | Download from WCH CH340 Driver |
| macOS | Built-in on recent macOS versions; manual install from Silicon Labs if not detected | Built-in on macOS 12+; manual install from WCH for older versions |
| Linux | Built-in kernel driver (cp210x module) | Built-in kernel driver (ch341 module) |
How to tell which chip your board uses: Plug the Bitaxe into your computer via USB-C. On Windows, open Device Manager and look under “Ports (COM & LPT)” — you will see either “Silicon Labs CP210x” or “USB-SERIAL CH340.” On macOS, open Terminal and run ls /dev/tty.usb* — you should see a device listed. On Linux, run dmesg | tail after plugging in to see which driver loaded.
Step-by-Step: Flashing with the Web Flasher
- Power on your Bitaxe using its normal power supply (5V barrel jack or 12V XT30, depending on your model). The device needs power to be flashed — USB alone does not provide enough.
- Open the Web Flasher in Chrome or Edge: bitaxeorg.github.io/bitaxe-web-flasher/
- Enter bootloader mode on your Bitaxe:
- Locate the Boot button on the left side of the device (near the fan/heatsink)
- Press and hold the Boot button
- While still holding Boot, press and release the Reset button (located above the Boot button)
- Release the Boot button
- The device is now in download mode, ready to accept a flash
- Connect the USB-C cable from your Bitaxe to your computer
- In the Web Flasher, click “Connect” — a popup will show available serial ports. Select your Bitaxe (it will appear as a COM port on Windows, or a /dev/ttyUSB device on Linux/macOS)
- Select your model type and board version from the dropdown menus in the Web Flasher. Match these exactly to your hardware revision number.
- Select the firmware version you want to flash. The Web Flasher pulls releases directly from GitHub.
- Decide whether to keep your configuration. Tick “Keep configuration” to preserve your WiFi, pool and wallet settings (the flasher then skips the NVS region); leave it unticked for a true factory reset.
- Click “Start Flashing” and wait. Do not disconnect the USB cable, do not close the browser, do not unplug power. The flash process takes 1-3 minutes.
- When you see a “Flash Complete” or “Done” message, the flash is finished. Disconnect the USB-C cable.
- Press the Reset button on your Bitaxe (or power-cycle it) to boot with the new firmware.
With “Keep configuration” unticked, the Web Flasher writes the full factory image, which erases all your stored settings (WiFi credentials, pool configuration, wallet address, frequency/voltage tuning) — your Bitaxe then boots into the initial setup wizard. With the box ticked, the flasher skips the NVS region and your settings survive. You will need to reconnect to WiFi and re-enter your mining configuration. This is why we recommend the OTA method (Method 1) whenever possible — it preserves your settings.
Method 3: Command-Line Flash with Bitaxetool (Power Users)
For those who prefer the terminal — or need to script firmware updates across multiple Bitaxe devices — bitaxetool is the official command-line utility. It is a Python wrapper around esptool.py that abstracts away the low-level flash offsets and chip configuration, making the command-line flash as simple as specifying a port and a firmware file.
Install Bitaxetool
You need Python 3.4+ and pip installed on your system. Then install bitaxetool from PyPI:
pip install --upgrade bitaxetoolBitaxetool does not work properly with esptool v5.x.x. The tool is locked to esptool v4.9.0 or earlier for compatibility. Bitaxetool version 0.6.1+ handles this automatically by pinning the correct esptool version. If you encounter serial communication errors, verify your esptool version with esptool.py version and downgrade if necessary: pip install esptool==4.9.0.
Identify Your Serial Port
Connect your Bitaxe via USB-C and identify the serial port:
# Windows — check Device Manager, or:
mode

# macOS:
ls /dev/tty.usb*

# Linux:
ls /dev/ttyUSB* /dev/ttyACM*
Your Bitaxe will typically appear as COM3, COM6, etc. on Windows, /dev/tty.usbserial-XXXX on macOS, or /dev/ttyUSB0 on Linux.
Flash the Firmware
Put your Bitaxe into bootloader mode (hold Boot, press Reset, release Boot), then run the flash command. Replace the port and firmware filename to match your setup:
# Flash firmware only (factory image):
bitaxetool --port COM6 --firmware ./esp-miner-factory-401-v2.15.0.bin

# Flash firmware with config file:
bitaxetool --port COM6 --config ./config-401.cvs --firmware ./esp-miner-factory-401-v2.15.0.bin

# macOS / Linux example:
bitaxetool --port /dev/ttyUSB0 --firmware ./esp-miner-factory-601-v2.15.0.bin
Bitaxetool will automatically detect the ESP32-S3, upload the flashing stub, erase the flash, and write the firmware. You will see progress output in the terminal. When it completes, press the Reset button on your Bitaxe to boot with the new firmware.
Alternative: Direct esptool.py (Low-Level)
If you prefer to use esptool.py directly without the bitaxetool wrapper, you can flash the factory image at address 0x0:
esptool.py --port COM6 --baud 230400 write_flash 0x0 ./esp-miner-factory-401-v2.15.0.binThis is the same thing bitaxetool does under the hood, but it gives you full control over baud rate and flash parameters. Useful if you encounter communication issues and need to try different baud rates (115200, 460800, 921600).
OTA Update via API (Headless/Remote)
If you want to update your Bitaxe firmware remotely without opening a browser — for example, in a scripted environment or over SSH — you can POST the firmware binary directly to the AxeOS API endpoint:
# Update mining firmware: (v2.15.0+: the dashboard is inside esp-miner.bin)
curl -X POST -H "Content-Type: application/octet-stream" --data-binary "@esp-miner.bin" http://192.168.1.42/api/system/OTA

# Update AxeOS web interface — v2.14.x and earlier only
# (on v2.15.0+ this endpoint only loads a custom UI; see Step 6):
curl -X POST -H "Content-Type: application/octet-stream" --data-binary "@www.bin" http://192.168.1.42/api/system/OTAWWW

# Restart after update:
curl -X POST http://192.168.1.42/api/system/restart
Replace 192.168.1.42 with your Bitaxe’s actual IP address (or, on v2.15.0 and later, with its .local hostname, e.g. http://bitaxe.local/api/system/OTA). This is particularly powerful if you are running a fleet of Bitaxe devices — you can script the update to roll firmware across all of them in sequence.
Method 4: Building from Source (Developers)
ESP-Miner is fully open-source. If you want to customize the firmware, add features, fix bugs, or just understand how the sausage is made, you can build it from source. This is the cypherpunk way — don’t trust, verify. And modify.
Prerequisites
- ESP-IDF toolchain — Espressif’s official development framework for the ESP32 family. Follow the Espressif ESP-IDF installation guide for your platform.
- Node.js and npm — Required for building the AxeOS web interface frontend.
- Git — For cloning the repository.
- Python 3.4+ — Required by the ESP-IDF toolchain and bitaxetool.
Clone, Build, Flash
# Clone the repository:
git clone https://github.com/bitaxeorg/ESP-Miner.git
cd ESP-Miner

# Initialize ESP-IDF environment (path depends on your install):
. $HOME/esp/esp-idf/export.sh

# Build the firmware:
idf.py build

# Create a merged factory binary:
./merge_bin.sh ./esp-miner-merged.bin

# Flash to your Bitaxe (replace port and config as needed):
bitaxetool --port /dev/ttyUSB0 --config ./config-401.cvs --firmware ./esp-miner-merged.bin
The merge_bin.sh script combines the bootloader, partition table, and application binary into a single factory image that can be flashed in one pass.
Docker Build (Alternative)
If you do not want to install the full ESP-IDF toolchain on your host machine, the ESP-Miner repository includes a Docker-based development container:
# Build the Docker image:
docker build -t espminer-build .devcontainer

# Run the build inside the container:
docker run --rm -it -v $(pwd):/workspace espminer-build /bin/bash
git config --global --add safe.directory /workspace
idf.py build
This is the cleanest approach if you want a reproducible build environment without polluting your system with toolchain dependencies.
Firmware Version History
The ESP-Miner project moves fast. Here are the major releases and what they brought to the table:
Notable ESP-Miner / AxeOS Releases
| Version | Date | Key Changes |
|---|---|---|
| v2.15.0 | Aug 21, 2026 | Unified firmware — AxeOS dashboard embedded in esp-miner.bin (no www.bin), mDNS hostname access (<hostname>.local), custom-web-UI toggle, Bluetooth LE Wi-Fi setup, ESP-IDF 6.0.2, SV2 frame/difficulty fixes — current recommended version |
| v2.14.2 | Jul 8, 2026 | Stable point release — use-after-free fix, self-test frequency fallback |
| v2.14.1 | Jun 19, 2026 | Stable point release on v2.14.0 — board 603 support, configurable self-test warm-up, swarm edit and rejected-share buffer fixes |
| v2.14.0 | Jun 4, 2026 | Native Stratum V2 support (PR #1553; protocol specified by Braiins), customizable dashboard, scoreboard, WebSocket API, pause/resume mining, fan controller tuning |
| v2.12.2 | Jan 2026 | GT self-test improvements, TPS phase register support, Bitaxe GT 801 hardware support |
| v2.12.0 | Dec 2025 | Device identification, hashrate graphs (1m/10m/1h), SupraHex 701/702 support |
| v2.11.0 | Nov 2025 | Swarm redesign, overheat protection, hashrate registers, IPv6 support |
| v2.13.0b8 | Feb 2026 (beta) | TLS support, response time graphing, coinbase transaction decode, improved API docs |
For the complete changelog with every commit, bugfix, and contributor credit, check the ESP-Miner releases page on GitHub. This is open-source software maintained by a community of Bitcoiners who believe in decentralized mining. Every contribution makes the ecosystem stronger.
Model-Specific Notes
While all Bitaxe models run the same ESP-Miner firmware, there are hardware differences that affect the firmware update experience. Here is what to watch for on each model family:
Bitaxe Supra, Ultra & Gamma (Single-Chip Models)
These are the standard single-ASIC Bitaxe devices. They all share the same form factor, use a 5V barrel jack (5.5×2.1mm) for power, and have the Boot and Reset buttons in the same positions. The firmware update process is identical across all three — the only difference is which firmware binary you download (match the 3-digit hardware revision number). These models are the simplest to update and the most forgiving if something goes wrong.
Bitaxe Hex (UltraHex) & SupraHex (Multi-Chip Models)
The Hex variants pack six ASIC chips onto a single board, delivering significantly more hashrate. They use a 12V DC XT30 connector for power — not the 5V barrel jack used by single-chip models. Make sure you are providing 12V power during USB flashing. The firmware update process is otherwise the same, but flash times may be slightly longer due to the larger configuration footprint. When selecting firmware, use the 300-series binary (UltraHex) or 700-series binary (SupraHex).
Bitaxe GT (Gamma Turbo)
The GT is the highest-performance single-board Bitaxe, running dual BM1370 ASIC chips at over 2 TH/s. Like the Hex variants, it uses a 12V DC XT30 connector for power. The GT was added as a supported device model starting with firmware v2.12.2 (800-series hardware revision). If you are running a GT, make sure your firmware is v2.12.2 or later for proper hardware support including self-test functionality.
Some Bitaxe board revisions have been reported to work more reliably with a USB-A to USB-C adapter rather than a direct USB-C to USB-C cable when connecting to a computer for serial flashing. If you are having trouble getting your computer to detect the Bitaxe over USB-C, try a USB-A port with a USB-A to USB-C cable or adapter.
Troubleshooting
For general Bitaxe hardware and connectivity issues beyond firmware, see our Bitaxe Troubleshooting Guide.
OTA Update Fails or Times Out
If the OTA upload stalls, fails, or the browser shows a timeout error:
- Check your WiFi signal. A weak or unstable connection between your computer and your Bitaxe can cause the upload to fail. Move your Bitaxe closer to the router, or move your computer closer to the Bitaxe. They must be on the same local network.
- Try a different browser. Some users report better results with Chrome over Edge, or vice versa.
- Verify the firmware file. Make sure you downloaded the correct esp-miner.bin file (not the factory image, which is larger). If the file is corrupted or incomplete, the upload will fail. Re-download it from GitHub.
- Power-cycle and retry. Unplug your Bitaxe, wait 10 seconds, plug it back in, wait for it to boot and reconnect to WiFi, then try the OTA update again.
- Try the curl API method. If the browser-based upload keeps failing, use the curl command to POST the firmware directly to the OTA endpoint. This bypasses any browser-related issues.
- Use the recovery page. If the AxeOS web interface is partially corrupted, try accessing http://<IP>/recovery — this is a minimal recovery page built into the firmware that provides basic flash functionality even when the main AxeOS interface is broken. On v2.15.0 and later it also carries a “Disable Custom Web UI” button that returns the miner to its embedded dashboard.
Device Not Detected on USB
If your computer does not recognize the Bitaxe when connected via USB-C:
- Verify you are using a data cable. Many USB-C cables are charge-only and lack data wires. Try a cable you have used for phone data transfer or file sync.
- Install the correct serial driver. Check Device Manager (Windows), System Report (macOS), or dmesg (Linux) to see if the CP2102 or CH340 chip is being recognized. Install the appropriate driver if not.
- Try a different USB port. Some USB hubs and USB 3.0 ports can cause issues. Try a direct USB-A port on your computer (using a USB-A to USB-C cable if needed).
- Confirm the device is powered. The Bitaxe needs external power from its barrel jack or XT30 connector — USB alone does not power it sufficiently for serial communication in all cases.
- Enter bootloader mode. Hold Boot, press Reset, release Boot. The device may not show up as a serial port until it is in bootloader mode.
Bricked Device Recovery
A “bricked” Bitaxe is almost always recoverable. The most common cause is flashing the wrong firmware binary (e.g., flashing a 401 image on a 601 board). The hardware itself is fine — you just need to reflash the correct firmware.
- Enter bootloader mode using the Boot + Reset button sequence described above.
- Use the Bitaxe Web Flasher at bitaxeorg.github.io/bitaxe-web-flasher/ to flash the correct factory image for your board revision.
- If the Web Flasher does not detect the device, use bitaxetool or esptool.py from the command line. These tools communicate at a lower level and can sometimes detect devices that the Web Flasher misses.
- As a last resort, try erasing the flash completely before reflashing:
# Erase the entire flash:
esptool.py --port COM6 erase_flash

# Then reflash with the correct factory image:
bitaxetool --port COM6 --firmware ./esp-miner-factory-601-v2.15.0.bin
Settings Lost After Update
If your mining settings (pool, wallet, frequency) disappeared after an update:
- You likely used a factory flash method (Web Flasher, bitaxetool, or esptool) instead of OTA. Factory images overwrite NVS storage where settings are kept (the Web Flasher only does so when “Keep configuration” is unticked).
- Re-enter your settings through the AxeOS web interface. This is why we emphasize backing up your configuration before any update.
- For future updates, use the OTA method (Method 1) which preserves your settings.
WiFi Not Connecting After Update
If your Bitaxe is not connecting to WiFi after a firmware update:
- Check your WiFi frequency. The Bitaxe only supports 2.4 GHz networks. If your router combines 2.4 GHz and 5 GHz under one SSID, the Bitaxe may try to connect to the 5 GHz band and fail.
- Check your router’s security features. Some ASUS and TP-Link routers have “AiProtection” or “IoT Guard” features that block mining traffic. Disable these if your Bitaxe shows zero hashrate or cannot connect.
- Factory flash resets WiFi. If you factory-flashed, the Bitaxe will broadcast its own WiFi hotspot (AP mode) so you can connect and configure it. Look for an open network named Bitaxe_XXXX (the last two bytes of the board’s MAC address) in your WiFi settings.
bitaxe.local Does Not Resolve (v2.15.0 and Later)
Hostname access depends on an mDNS resolver on the device you are browsing from, not on the Bitaxe:
- Confirm the firmware. Only v2.15.0 and later register <hostname>.local; a v2.14.x miner answers on its IP only, whatever its hostname says.
- Check the name the miner actually took. http://<IP>/api/system/info returns “fullHostname”; if another device already owned the name, the Bitaxe renamed itself to <hostname>-<mac>.local.
- Check the client. macOS, iOS and Linux with avahi-daemon resolve .local natively; Windows 10/11 does in most setups — if yours does not, install Apple’s Bonjour service or use the IP. Android browsers are inconsistent — use the IP.
- Check the network. Guest/IoT VLANs and some mesh routers drop multicast between clients; the IP from the OLED always works. Our bitaxe.local not found fix walks through the resolver and router checks step by step.
Overclocking Settings After Update
If your overclocked frequency and voltage were reset to defaults after an OTA update:
- Some firmware updates may reset overclocking parameters to safe defaults, especially if the update changes the ASIC driver or power regulation logic.
- Re-enter your overclock settings in AxeOS. Navigate to Settings and append ?oc to the URL to unlock the frequency and voltage fields.
- Test gradually. After a firmware update, the ASIC tuning may behave differently. Start at stock settings and work your way up to your previous overclock to ensure stability.
Pushing frequency and voltage beyond stock values generates more heat and draws more power. Without adequate cooling — like D-Central’s purpose-built Bitaxe heatsinks — overclocking can overheat and potentially damage your ASIC chip. Always monitor temperatures after changing overclock settings. The AxeOS dashboard shows real-time ASIC temperature. Keep it below 65°C for longevity.
Frequently Asked Questions
Do I need to update my Bitaxe firmware? It seems to be working fine.
You are not required to update, and a working miner is a good miner. However, firmware updates often include hashrate optimizations, new pool compatibility improvements, bug fixes for edge cases you might not have encountered yet, and support for new features like TLS-encrypted connections and improved hashrate graphing. If you are happy with your current performance and stability, you can skip an update — but checking the release notes costs nothing and you might find a meaningful improvement worth the five minutes it takes to flash.
Will updating firmware erase my mining settings?
It depends on the method. OTA updates through the AxeOS web interface preserve all your settings (WiFi, pool, wallet, frequency, voltage) because they only overwrite the firmware partition, not the NVS storage where settings live. Factory flashes (bitaxetool, esptool, or the Web Flasher with “Keep configuration” unticked) erase everything and restore the device to a clean state. Always back up your settings before updating, regardless of the method you choose.
Can I brick my Bitaxe by flashing the wrong firmware?
You cannot permanently brick a Bitaxe through firmware alone. The ESP32-S3 microcontroller has a hardware bootloader (ROM bootloader) that is burned into silicon and can never be overwritten by software. Even if you flash completely wrong firmware, you can always enter bootloader mode (hold Boot + press Reset) and reflash the correct firmware via USB. The Web Flasher and bitaxetool tools are specifically designed for this recovery scenario. Think of it as a safety net built into the chip itself.
What is the difference between esp-miner.bin and the factory .bin files?
esp-miner.bin is the firmware binary used for OTA updates. It contains the mining application — and, from v2.15.0, the embedded AxeOS web interface — and is uploaded to the device’s secondary firmware partition. esp-miner-factory-XXX-vX.X.X.bin is a complete factory image that includes the bootloader, partition table, AxeOS web interface, and mining firmware — all merged into one file for flashing at address 0x0 via USB. Use esp-miner.bin for routine OTA updates; use the factory file for USB recovery, first-time flashing, or when you need to start completely fresh.
Can I downgrade to an older firmware version?
Yes. The OTA update process does not enforce version ordering — you can flash any version, newer or older. Simply download the older esp-miner.bin from the GitHub releases page and upload it through AxeOS the same way you would upload a newer version. If OTA does not work (some older versions may have incompatible web interfaces), use the Web Flasher or bitaxetool with the factory image of the version you want. One v2.15.0-specific note: rolling back to a v2.14.x build means the older firmware serves its dashboard from the separate www partition again, which the rollback leaves untouched — if the dashboard then looks broken or incomplete, upload that release’s www.bin through http://<IP>/recovery. Downgrading is useful if a new release introduces a regression that affects your specific hardware.
Should I use beta firmware or wait for stable releases?
Pre-releases (flagged “Pre-release” on GitHub, like the v2.14.0b4 beta) contain the newest features and improvements but may have undiscovered bugs. Stable releases (like v2.15.0) have been tested more broadly and are the safer choice for a device you want to run 24/7 without babysitting. If you are running a single Bitaxe for solo mining and enjoy tinkering, betas are fine — the worst case is you need to downgrade. If you are running multiple miners and want set-and-forget reliability, stick with stable releases.
My Bitaxe is not showing up as a serial device when I connect USB. What do I do?
First, verify you are using a data-capable USB-C cable — many cables are charge-only. Second, install the correct serial driver for your board’s USB chip (CP2102 from Silicon Labs or CH340 from WCH). Third, make sure the Bitaxe has external power connected (5V barrel jack or 12V XT30) — USB alone may not be enough. Fourth, try entering bootloader mode (hold Boot, press Reset, release Boot) — the device may only enumerate as a serial port in bootloader mode. Fifth, try a USB-A port with a USB-A to USB-C cable, as some USB-C to USB-C connections can be problematic. If none of this works, the USB-to-serial chip on the board may be defective — contact D-Central support for diagnosis.
When to Contact D-Central
Most firmware updates are straightforward, but occasionally hardware issues masquerade as firmware problems. If your Bitaxe will not boot after multiple flash attempts with the confirmed correct firmware, if the OLED screen stays blank even after a successful flash, if the USB-to-serial chip is not being detected by any computer, or if the device shows signs of physical damage — it is time for professional diagnosis.
D-Central has repaired over 2,500 mining devices since 2016. We know the Bitaxe hardware intimately — we have been building and selling these devices since the earliest days of the project. If your Bitaxe needs repair or you have exhausted all the troubleshooting steps in this guide, reach out to us.
D-Central ASIC Repair Service
Professional mining hardware repair from Canada’s leading Bitcoin mining specialists. Since 2016, D-Central has diagnosed and repaired thousands of ASIC miners — from Antminers to Bitaxe. If your device is not responding to firmware recovery, our technicians can diagnose the hardware and get you back online.
Bitaxe Accessories — Heatsinks, Stands & More
Running updated firmware with overclocked settings (see our Bitaxe Overclocking Manual)? Make sure your thermal solution can keep up. D-Central’s custom-engineered Bitaxe heatsinks, the original Mesh Stand, and premium power supplies are designed by the team that helped pioneer the Bitaxe ecosystem. Keep your miner cool, stable, and hashing at peak performance.
Why D-Central Technologies
D-Central Technologies has been building, repairing, and supporting Bitcoin mining hardware since 2016. We are not resellers copying product descriptions from a manufacturer’s website. We are Bitcoin Mining Hackers — taking institutional-grade mining technology and making it accessible to home miners, one hash at a time.
In the Bitaxe ecosystem specifically, D-Central is a pioneer. We created the original Bitaxe Mesh Stand — the very first commercially manufactured stand for Bitaxe devices. We developed custom heatsinks for both standard Bitaxe and Bitaxe Hex models. We stock every Bitaxe variant — Supra, Ultra, Gamma, Hex, SupraHex, GT — alongside the full open-source miner lineup including NerdAxe, NerdNOS, Nerdminer, and NerdQAxe, with many more always in the pipeline.
When you buy a Bitaxe from D-Central, you are buying from a team that has flashed, tested, overclocked, repaired, and pushed these devices to their limits. This guide exists because we have done every step in it thousands of times. Our mission is the decentralization of every layer of Bitcoin mining — and keeping your firmware updated is part of that mission.
Do I need to update my Bitaxe firmware? It seems to be working fine.
You are not required to update, and a working miner is a good miner. However, firmware updates often include hashrate optimizations, new pool compatibility improvements, bug fixes for edge cases you might not have encountered yet, and support for new features like TLS-encrypted connections and improved hashrate graphing. If you are happy with your current performance and stability, you can skip an update — but checking the release notes costs nothing and you might find a meaningful…
Will updating firmware erase my mining settings?
It depends on the method. OTA updates through the AxeOS web interface preserve all your settings (WiFi, pool, wallet, frequency, voltage) because they only overwrite the firmware partition, not the NVS storage where settings live. Factory flashes (bitaxetool, esptool, or the Web Flasher with Keep configuration unticked) erase everything and restore the device to a clean state. Always back up your settings before updating, regardless of the method you choose.
Can I brick my Bitaxe by flashing the wrong firmware?
You cannot permanently brick a Bitaxe through firmware alone. The ESP32-S3 microcontroller has a hardware bootloader (ROM bootloader) that is burned into silicon and can never be overwritten by software. Even if you flash completely wrong firmware, you can always enter bootloader mode (hold Boot + press Reset) and reflash the correct firmware via USB. The Web Flasher and bitaxetool tools are specifically designed for this recovery scenario. Think of it as a safety net built into the chip itself.
What is the difference between esp-miner.bin and the factory .bin files?
esp-miner.bin is the firmware binary used for OTA updates. It contains the mining application — and, from v2.15.0, the embedded AxeOS web interface — and is uploaded to the device’s secondary firmware partition. esp-miner-factory-XXX-vX.X.X.bin is a complete factory image that includes the bootloader, partition table, AxeOS web interface, and mining firmware — all merged into one file for flashing at address 0x0 via USB. Use esp-miner.bin for routine OTA updates; use the factory file for USB recovery, first-time flashing, or when…
Can I downgrade to an older firmware version?
Yes. The OTA update process does not enforce version ordering — you can flash any version, newer or older. Simply download the older esp-miner.bin from the GitHub releases page and upload it through AxeOS the same way you would upload a newer version. If OTA does not work (some older versions may have incompatible web interfaces), use the Web Flasher or bitaxetool with the factory image of the version you want. Rolling back from v2.15.0 to a v2.14.x build leaves the separate www partition untouched; if the dashboard then looks broken, upload that release’s www.bin through the /recovery page. Downgrading is useful if a new release introduces a regression that affects…
Should I use beta firmware or wait for stable releases?
Pre-releases (flagged as pre-release on GitHub, like the v2.14.0b4 beta) contain the newest features and improvements but may have undiscovered bugs. Stable releases (like v2.15.0) have been tested more broadly and are the safer choice for a device you want to run 24/7 without babysitting. If you are running a single Bitaxe for solo mining and enjoy tinkering, betas are fine — the worst case is you need to downgrade. If you are running multiple miners and want set-and-forget reliability, stick with stable releases.
My Bitaxe is not showing up as a serial device when I connect USB. What do I do?
First, verify you are using a data-capable USB-C cable — many cables are charge-only. Second, install the correct serial driver for your board’s USB chip (CP2102 from Silicon Labs or CH340 from WCH). Third, make sure the Bitaxe has external power connected (5V barrel jack or 12V XT30) — USB alone may not be enough. Fourth, try entering bootloader mode (hold Boot, press Reset, release Boot) — the device may only enumerate as a serial port in bootloader mode. Fifth, try a USB-A port with…
Updating past v2.14.0 also unlocks native Stratum V2 — here is how to enable it.