Here’s the honest reason most plebs pay OpenAI twenty bucks a month: it isn’t the chat window. The chat window is the loss leader. What you’re actually buying is a conversational engine that bolts into everything else you use — your IDE’s autocomplete, the voice memo transcriber, the notes app that answers questions about your own writing, the home automation that turns off the shed breaker when you ask. ChatGPT earns its fee because it does things, not because it talks.
Most plebs who install Ollama never connect those dots. They end up with a very expensive local chatbot that they forget to open, while the subscription keeps renewing.
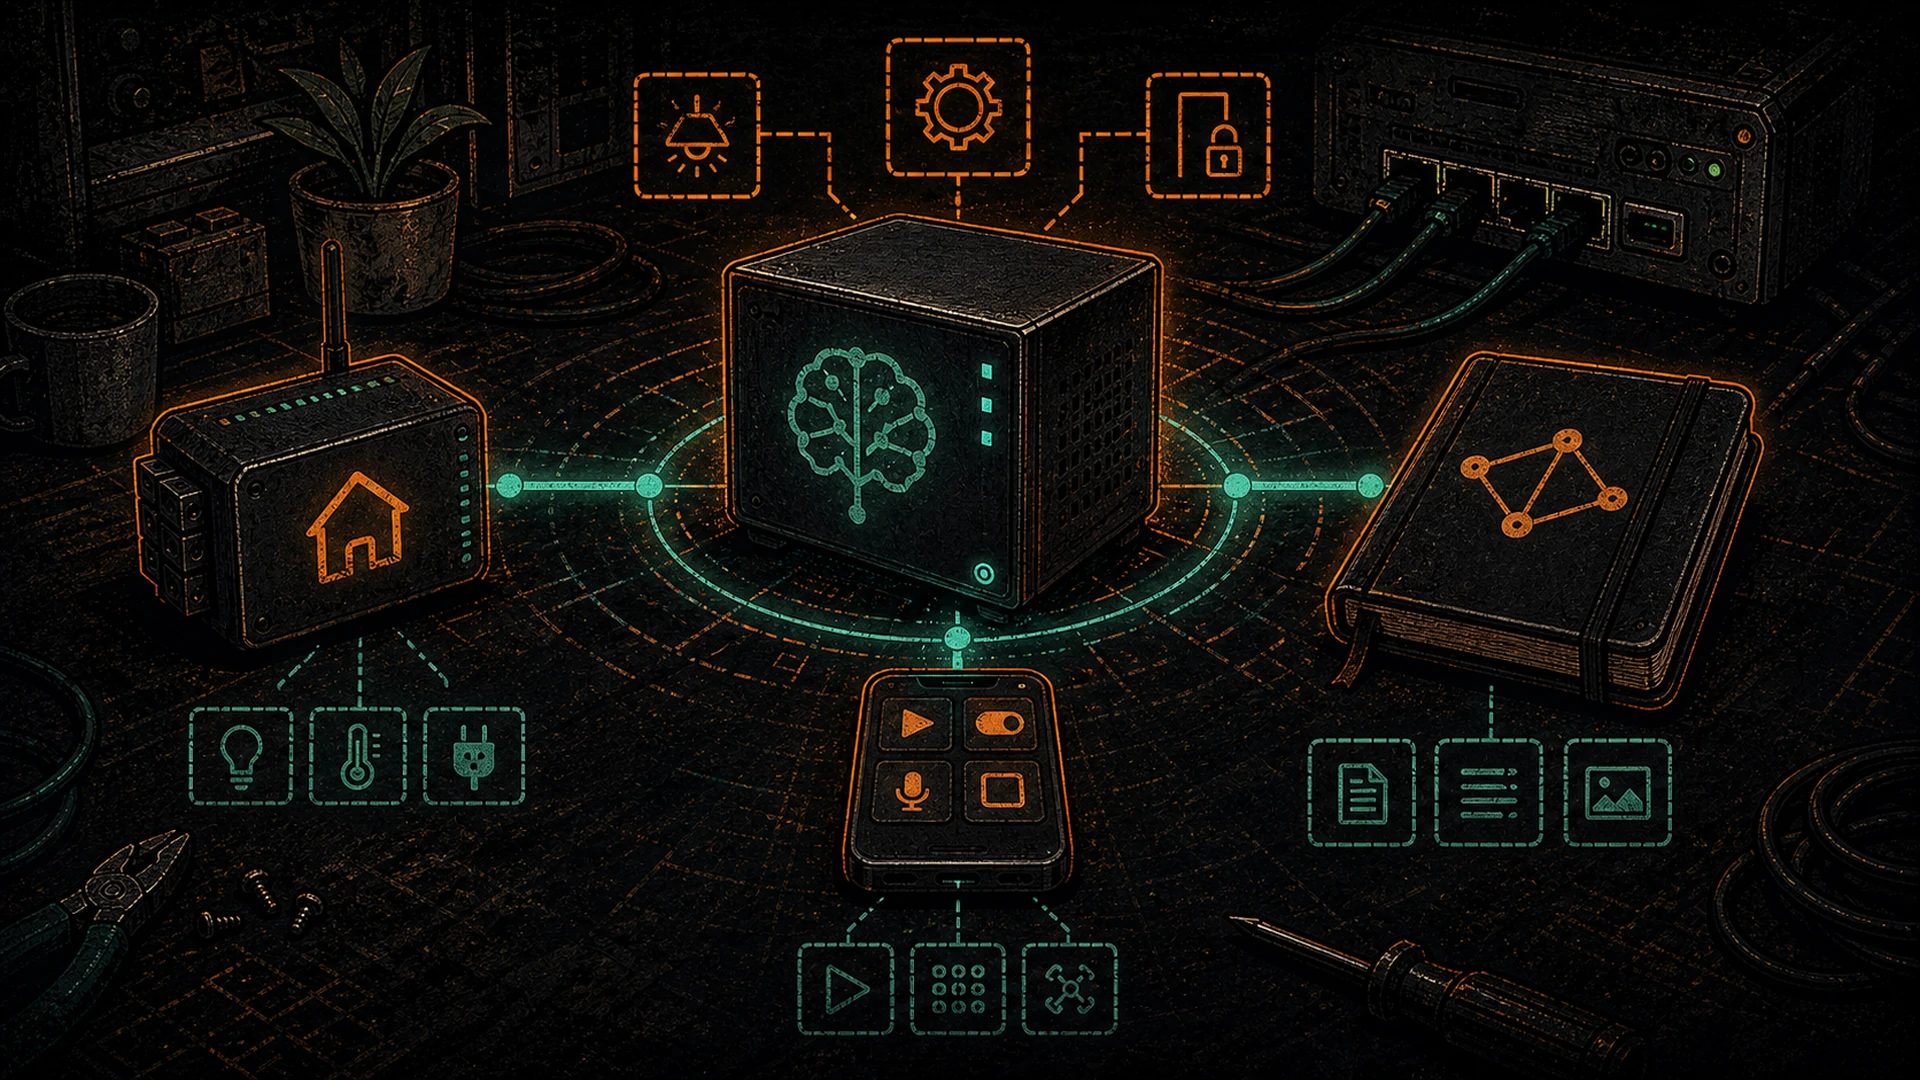
This post is the plumbing. Ollama exposes an OpenAI-compatible API on port 11434. Every tool that was built to talk to OpenAI can talk to Ollama — you just change the base URL. By the end of this walkthrough, your self-hosted AI will be answering voice commands in Home Assistant, reading your Obsidian vault, powering VS Code autocomplete, and sitting as an icon on your phone’s home screen. None of it uplinks to a hyperscaler. All of it runs on your Hashcenter, downstairs, humming.
Cancel the subscription. Keep the capabilities. That’s the trade.
The OpenAI-compatible API key
Before anything else, the piece every integration depends on.
Ollama — built by the Ollama team, and we stand on their shoulders here — ships with two endpoints. Its native API lives at /api/chat. Its OpenAI-compatibility layer lives at /v1/chat/completions. That second endpoint mimics OpenAI’s JSON request/response format closely enough that the vast majority of tools written against OpenAI’s SDK will just work when pointed elsewhere.
What every tool in this post wants from you:
- Base URL:
http://your-hashcenter.local:11434/v1(or an IP — whatever your Hashcenter answers to on your LAN) - API key: any non-empty string. Ollama doesn’t validate it, but most client libraries refuse to send a request with an empty key field. Type
ollama, or a pseudonym, or the first four bytes of block 840000. Ollama doesn’t care. - Model name: whatever you’ve pulled —
llama3.1:8b,qwen2.5-coder:7b,gemma3:4b, etc. Runollama liston your Hashcenter to see what you have.
One prerequisite that catches everyone the first time: Ollama by default binds only to 127.0.0.1, which means it only answers to requests from its own machine. That’s fine if your Hashcenter is also your daily driver, useless otherwise. Expose it to your LAN by setting OLLAMA_HOST=0.0.0.0 in the environment before Ollama starts. On Linux with systemd that’s an Environment= line in the service file; on macOS it’s launchctl setenv OLLAMA_HOST 0.0.0.0; on Windows it’s a system environment variable. Restart Ollama after.
If a tool can’t reach the API, check this first. More troubleshooting lives in the self-hosted AI troubleshooting guide.
Integration 1 — Home Assistant (voice and automation)
If you’re already running Home Assistant, stop reading and go set this up first. It’s the most satisfying integration on this list because it replaces Alexa, Google Assistant, and Siri with something that answers to no advertiser.
Home Assistant added a first-party Ollama integration in the 2024.7 release. Credit where it’s due — the Home Assistant team and the Nabu Casa folks behind it did the hard work of bridging voice pipelines to local LLMs, and this whole integration would not exist without their lift.
Setup
- In Home Assistant, go to Settings → Devices & Services → Add Integration
- Search for Ollama
- Enter the URL:
http://your-hashcenter.local:11434 - Pick a model from the dropdown (it will list whatever you’ve pulled). Llama 3.1 8B is a solid default; Gemma 3 4B is faster if your Hashcenter is modest.
- Optional: tick “Control Home Assistant” so the model can actually execute service calls, not just chat
Hooking it into Assist
Home Assistant’s voice pipeline is called Assist. To make Ollama the brain:
- Settings → Voice Assistants → Add Assistant
- Conversation agent: your Ollama integration
- Speech-to-text and text-to-speech: your pick (Whisper + Piper, both local, are the cypherpunk choices)
Now every voice command — from a wake-word puck, a mobile app, or a browser — runs through your local model.
What you can do with it
- “Turn off the shed breaker.” Home Assistant exposes your devices and services to the model; the model parses intent and calls the right service.
- “Is the ASIC still hashing?” Expose a sensor from whatever you use to monitor your miners (Home Assistant has integrations for most firmwares via their APIs), and ask in plain English.
- “Tell me how much the heating saved me this month.” Combine an energy sensor with a math template; the model reads the state and phrases the answer.
- “Set the garage to 18 C when the overnight rate kicks in.” Model-authored automations, refined by you.
The best part isn’t the features. It’s that nothing leaves the LAN. Your voice, your intent, your home’s state — all of it stays in the building. Alexa will never offer that. Google will never offer that. They can’t; their business model depends on the opposite.
Integration 2 — Obsidian (smart notes over your own writing)
Obsidian is the note-taking app of choice for a lot of plebs because it’s a pile of plain-text markdown files on your disk, not a cloud service. Credit to the Obsidian team for that design decision — it’s why local-first AI integrations even make sense here.
Two community plugins matter for our purposes:
- Copilot for Obsidian by Logan Yang — in-editor chat, Q&A against current note or whole vault, supports custom Ollama backend. Standing on Logan’s shoulders for this one.
- Smart Connections by Brian Petro — semantic search over your vault, with RAG-style question answering. Also supports Ollama.
Both do similar things with different ergonomics. Try both; keep the one that fits your brain.
Setup: Copilot for Obsidian
- Obsidian → Settings → Community Plugins → Browse → “Copilot” → install and enable
- Copilot settings → Model providers → add custom provider
- Provider type: Ollama (or “OpenAI-compatible” if the Ollama option isn’t on your version)
- Base URL:
http://your-hashcenter.local:11434/v1 - API key:
ollama(remember, Ollama doesn’t validate — but the field wants something) - Model name:
llama3.1:8bor whatever you’ve pulled - Hit save, bind a hotkey to “Copilot: Toggle chat window”
Setup: Smart Connections (adds RAG)
Smart Connections does semantic search, which means it needs an embedding model on top of the chat model. Embeddings are short mathematical fingerprints of your notes — the plugin runs every note through an embedding model once to fingerprint it, then when you ask a question it fingerprints the question and fetches the notes with the closest fingerprints. That’s Retrieval-Augmented Generation (RAG) in one paragraph. It’s how you chat with your own documents without shoving every note into the prompt.
Pull the embedder on your Hashcenter:
ollama pull nomic-embed-text
Credit to Nomic — nomic-embed-text is free, open-weights, and punches well above the tokens it weighs. Then in Smart Connections: set the LLM provider to Ollama, chat model to llama3.1:8b, embedding model to nomic-embed-text. Let it index your vault (coffee break — first run takes a while for a big vault), and you’re done.
What you can do with it
- “Summarize everything I wrote about running on 240V last month.” The RAG pipeline grabs the relevant notes; the LLM summarizes.
- “What questions did I leave unanswered in my mining research?” Works surprisingly well.
- “Draft a blog post from my notes tagged #btc-energy.” It won’t be a finished post, but it gives you scaffolding in seconds.
- “Find where I wrote about the S19 PSU replacement.” Semantic search finds paraphrases that keyword search misses.
Nothing leaves the machine. Your half-finished thoughts, your fresh ideas, your unpublished drafts — not training fodder for a frontier lab, not sitting in an S3 bucket somewhere. Yours.
Integration 3 — VS Code with Continue (local-first autocomplete)
The tool most likely to justify your Hashcenter’s existence to any developer pleb on the fence.
Continue is the open-source alternative to GitHub Copilot. It’s a VS Code (and JetBrains) extension that does inline completion, chat-about-selection, edit-selection, and terminal-command generation. It supports Ollama natively. The Continue team’s work is what makes local-first IDE AI practical for normal humans, and we’re standing on their shoulders for this entire integration.
Setup
- VS Code → Extensions → search Continue → install
- Click the Continue sidebar icon
- Open the config file (Continue shows a button; the file lives at
~/.continue/config.jsonor the JSON underconfig.yamlon newer versions) - Add an Ollama model:
{
  "models": [
    {
      "title": "Qwen 2.5 Coder 7B",
      "provider": "ollama",
      "model": "qwen2.5-coder:7b",
      "apiBase": "http://your-hashcenter.local:11434"
    }
  ],
  "tabAutocompleteModel": {
    "title": "Qwen 2.5 Coder 1.5B",
    "provider": "ollama",
    "model": "qwen2.5-coder:1.5b",
    "apiBase": "http://your-hashcenter.local:11434"
  }
}
Two models: a bigger one for chat, a tiny fast one for inline tab-autocomplete. The autocomplete model has to respond in ~200ms to feel good; a 1.5B model on a modern GPU is in that window.
Model picks
qwen2.5-coder:7b— chat and edits. Credit to Alibaba’s Qwen team; the Qwen Coder line is genuinely competitive with closed models on code tasks.qwen2.5-coder:1.5b— tab autocomplete. Small, fast, accurate enough.deepseek-coder-v2:16b— if your Hashcenter has the VRAM and you want higher-quality chat suggestions. Credit to DeepSeek for open-weighting a frontier-adjacent code model.
What you can do with it
- Inline completion as you type — ghost-text suggestions just like Copilot.
- Highlight code → Cmd/Ctrl+L → “explain this” — the selection goes to the chat sidebar.
- Highlight code → Cmd/Ctrl+I → “rename foo to something that makes sense” — in-place edit with a diff you can accept or reject.
- Cmd/Ctrl+K in the terminal pane — natural language to shell command. “Find all files over 100MB modified in the last week” → actual
findinvocation.
No code leaves your machine. No one is training on your proprietary work. No one is logging your prompts to figure out what your company is building.
Integration 4 — Apple Shortcuts (your phone and Mac, no app needed)
The integration that converts skeptics, because it fits in a pocket.
Apple Shortcuts can call any HTTP endpoint. That is all you need. Credit to Apple’s Shortcuts team for building a no-code automation tool general enough that it can speak arbitrary JSON to arbitrary servers — it was never designed for LLM integration, but it fits the bill perfectly.
Prereq: reach your Hashcenter from outside the LAN
Your phone isn’t always on your home Wi-Fi. If you want Shortcuts to work anywhere, put a mesh VPN between your phone and your Hashcenter. Tailscale is the usual pick; the Open WebUI post covers the setup. Once you’re on the tailnet, your Hashcenter has a stable name like hashcenter.ts.net that resolves from anywhere.
Build the shortcut
Open the Shortcuts app → New Shortcut. Add actions in this order:
- Ask for Input — prompt: “What do you want to ask?”, input type: Text
- Text action — build the JSON body. Paste:
json
   {
     "model": "llama3.1:8b",
     "messages": [{"role": "user", "content": "Provided Input"}]
   }
Tap “Provided Input” and replace it with the magic variable from the Ask for Input step.
3. Get Contents of URL
– URL: http://hashcenter.ts.net:11434/v1/chat/completions
– Method: POST
– Headers: Content-Type: application/json, Authorization: Bearer ollama
– Request Body: JSON → choose the Text step’s output
4. Get Dictionary Value — path: choices.0.message.content
5. Show Result
Name it “Ask Hashcenter”. Add it to your home screen. Tap, talk (iOS gives you a dictation button in the text prompt), get an answer in a few seconds.
What you can do with it
- “Translate this sentence to French for my Quebec supplier.”
- “Draft a tweet about today’s block height.” (Chain in a Get URL step against mempool.space first.)
- “Summarize my last five voice memos.” (Use the Transcribe Audio action — local on iPhone — then feed the result in.)
- “Explain this ASIC error code.”
This is the moment a pleb realizes: I have my own private ChatGPT app. On my phone. Running on my own hardware. No subscription. No app store. No telemetry.
Integration 5 — Email and productivity (brief)
The integrations in this section are early-days but worth knowing about.
- Thunderbird + local LLM extensions — a handful of community extensions now wire local models into Mozilla’s email client for reply drafting and summarization. Ecosystem is nascent; search the Add-ons site and pick whatever’s current.
- Raycast (macOS) — the launcher has community extensions that hit Ollama. If you live in Raycast, a
hashcenterextension is a quick quality-of-life win. - Logseq / Reflect / other note apps — most have community Ollama plugins in the same spirit as Obsidian’s. If your note-tool-of-choice isn’t Obsidian, search its plugin directory for “Ollama”.
Keep an ear to the ground. The tools are emerging faster than blog posts can track them.
Integration 6 — RAG over your own documents
We covered basic RAG in the Open WebUI post — drag a PDF into the chat, ask questions, done. That’s enough for 90% of plebs.
If you want to go further — a dedicated RAG application over a curated corpus, not just ad-hoc document dumps — two options:
- LlamaIndex — Python library for building RAG pipelines. Point its LLM at Ollama, its embedder at Ollama’s
nomic-embed-text, and you have a programmable private ChatGPT over any documents you feed it. Credit to the LlamaIndex team. - LangChain — similar niche, different ergonomics. Also Ollama-compatible.
What this is good for: a private corpus of every Bitcoin whitepaper, mining-rig manual, firmware changelog, and conference talk transcript you’ve collected. Index it once, chat with it forever. A mining engineer with a well-indexed hard drive is suddenly more capable than one with a ChatGPT subscription — because the model on their Hashcenter knows their library, not the scraped public internet.
This is the dividend of local-first RAG: the knowledge compounds for you, not for the service.
The LiteLLM proxy (power-pleb tip)
Optional, but worth knowing about.
LiteLLM is an OpenAI-compatible proxy that sits between your tools and a zoo of backend providers. It speaks Ollama, Anthropic, OpenAI, Google, OpenRouter — everything. Credit to the LiteLLM team for the unified abstraction.
Why a pleb might want it:
- One endpoint, many models. Your tools all point at your LiteLLM instance. Behind it, you can have seven local models plus a remote fallback, swap them freely, and nothing downstream cares.
- Rate limiting and budgets. If you ever open a remote route for something specific, LiteLLM enforces caps.
- Logging. You can see every request that hit your AI stack, across every tool.
- Virtual keys. Give different keys to different tools so you can revoke or rate-limit individually.
Install:
pip install litellm[proxy]
litellm --config /path/to/config.yaml
Sample config points at Ollama and exposes OpenAI-format endpoints on :4000. Your tools just change their base URL from :11434/v1 to :4000/v1 and keep working. Full docs at docs.litellm.ai.
Overkill for one tool and one model. Worth it the minute you’re running four tools, two local models, and want real observability.
The Hashcenter perspective
Stand back and look at what just happened.
Your Hashcenter started as a box that ran inference. One integration in, it became the voice of your home. Two integrations in, it became the second brain that reads your notes. Three integrations in, it was autocompleting your code. Four in, it was in your pocket.
That box isn’t just a GPU hosting an LLM any more. It’s the center of your digital life. Your home speaks to it. Your notes sit next to it. Your code asks it questions. Your phone is a thin client to it. Every subscription you paid for that capability — each one bought a piece of this, sold to you at a recurring markup, conditional on a cloud provider’s continued interest in serving you.
You can cancel the subscription now. It has a real dollar value and you can see it clearly on the next bill. What you gained has a different value that doesn’t show up on any invoice: sovereignty over your intelligence stack. One more layer decentralized.
And if you did the heating-with-inference trick, the whole setup is also warming your house. Your Hashcenter heats your building and runs your cognitive stack. The electricity bill is one bill. The value stack is layered. That’s the pleb’s arbitrage.
If you’re still planning the hardware, the S19-to-AI-Hashcenter path is the cheapest on-ramp. If you’re comparing runtimes, we wrote up LM Studio vs Ollama vs llama.cpp. If you’re wondering why Q4_K_M keeps appearing in model names, see the quantization explainer.
Closing
Local LLM. OpenAI-compatible API. A whole generation of tools that were written to speak that API. That’s the stack. Every integration in this post is the same shape — change the base URL, type ollama into the API key field, pick a model. Once you’ve done it twice it stops feeling like a hack and starts feeling like the default way software should be wired.
You now have a daily driver AI stack that depends on zero third-party services. Your voice commands, your notes, your code, your phone prompts — all routed through a machine you own, in a building you’re standing in. That’s what owning your intelligence looks like. One more layer decentralized.
Further reading: the Sovereign AI for Bitcoiners Manifesto for the why; the Pleb’s Guide to Self-Hosted AI for the map of everything.
Cancel the subscription. Keep the capabilities. Welcome home.