From S19 to Your First AI Hashcenter
If you’ve ever stood in your mining shed at 2 a.m. watching the blinking green LEDs of an S19 stack and felt the warm exhaust wrap around your boots, here’s a secret that should have been obvious the whole time: you already built the hardest part of an AI Hashcenter. The 200A service drop. The cold-aisle/hot-aisle split. The sound-isolated walls your neighbour stopped complaining about in 2022. The breaker panel you sized for 3,500W per miner. The dust filters, the smoke detector, the ducted return that warms the basement.
Non-miners who want to self-host AI are starting from scratch. They’re pricing mini-split A/Cs, arguing with their HOA about a subpanel, and watching their partner reject “a server rack in the spare bedroom.” You are starting at roughly 80% done.
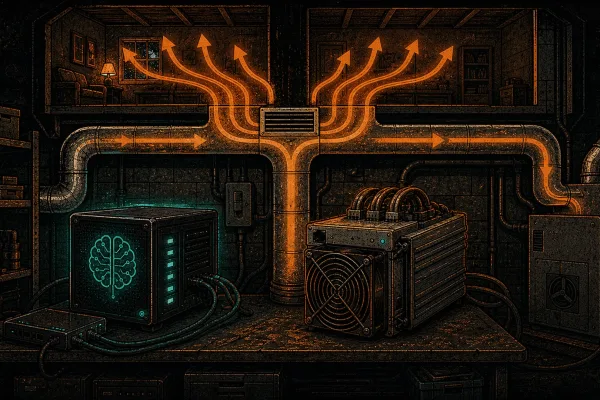
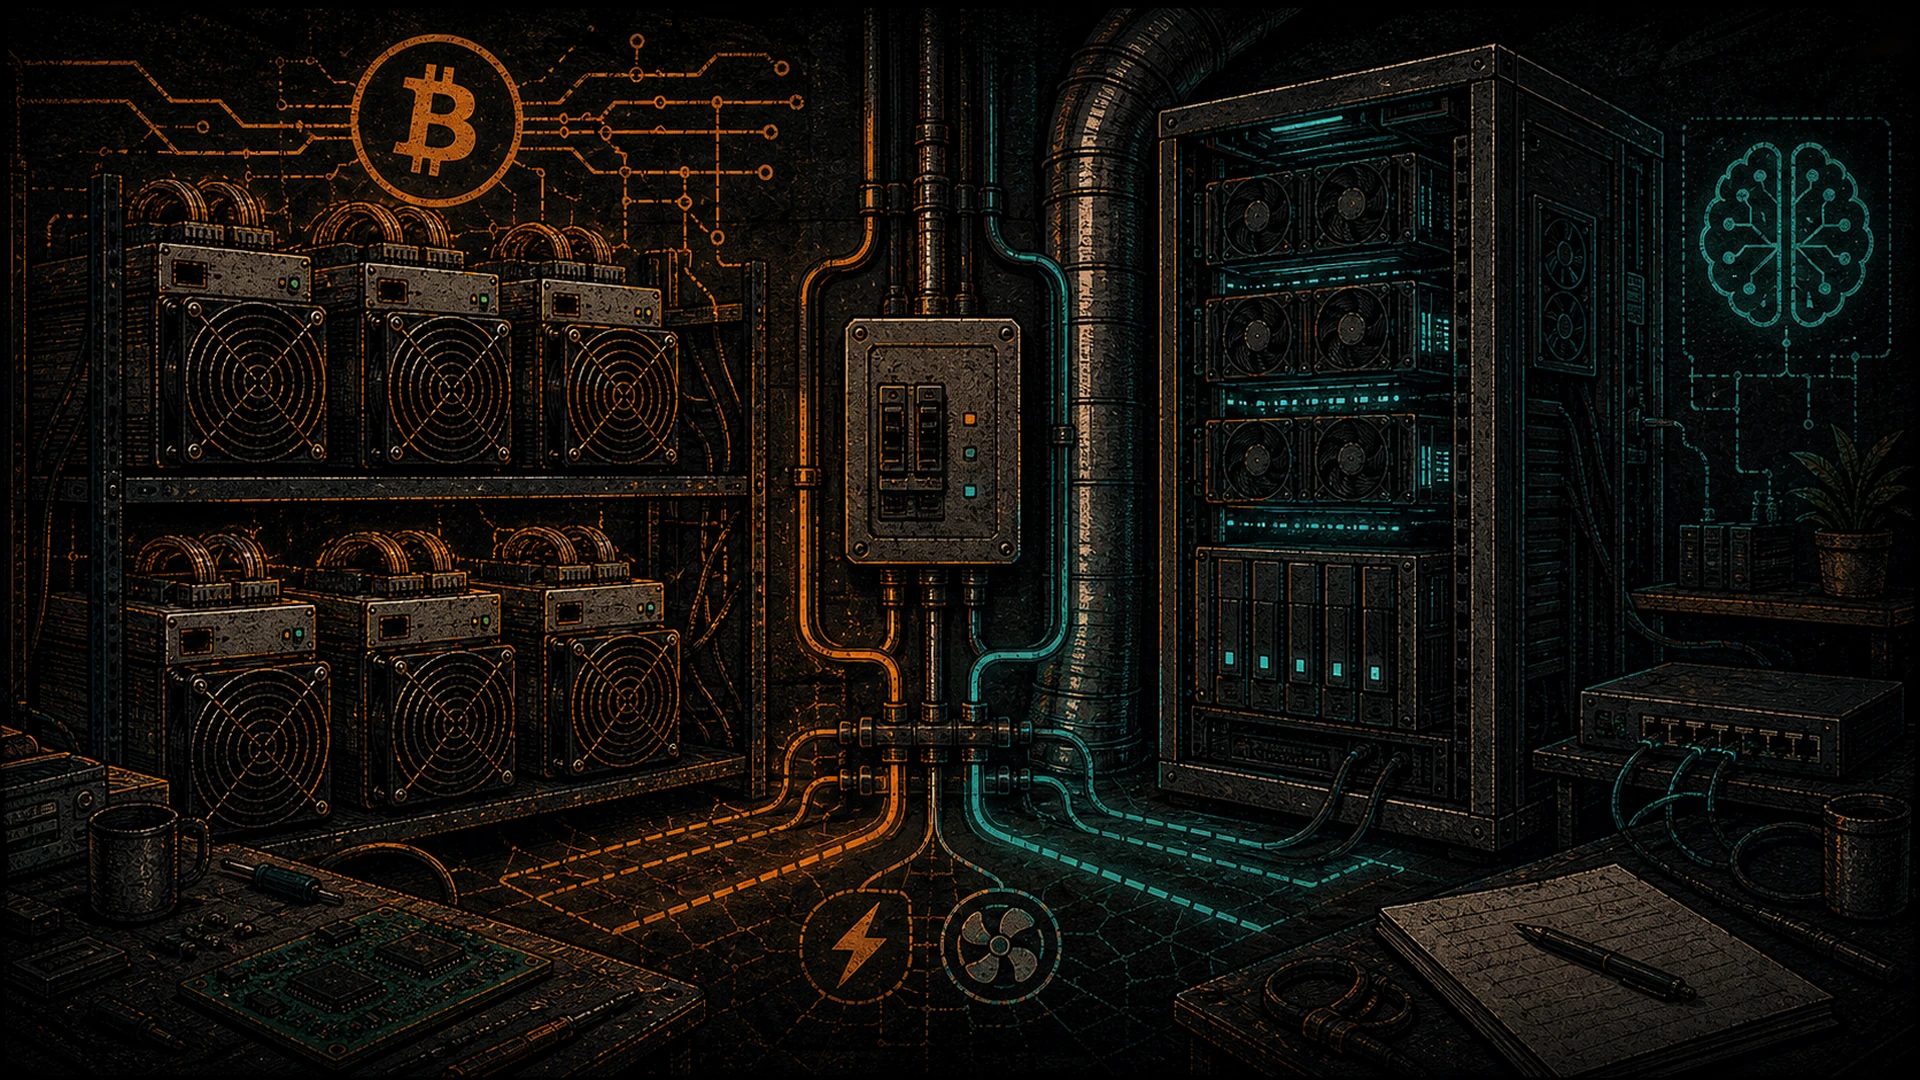
This post is a build log. It’s for the pleb who runs two or three S19s, understands what a 6AWG wire looks like, and has been reading about local LLMs but doesn’t yet know what VRAM is or why anyone would measure speed in “tokens per second.” We’re going to convert a mining shed — or better, a portion of a mining shed — into a GPU inference Hashcenter. The whole thing is a weekend of electrical and HVAC touch-ups, plus a hardware shopping list. The real move, as you’ll see, is the hybrid shed: one or two S19s still humming on one breaker for baseload heat and sats, and a four-GPU inference shelf on the next breaker over. Same footprint. Same airflow. Two sovereign workloads under one roof.
Before we start: Hashcenter is not a datacenter. A datacenter is a hyperscaler’s Wall Street prop — redundant everything, uptime SLAs, air-gapped from the humans it serves, heat vented to the sky as waste. A Hashcenter is residential, owner-operated, commodity-hardware-first, and the heat goes into the home that owns it. No uptime theater. No SLA lawyers. If your rig goes down, you walk ten feet and fix it. That’s the editorial hook of this entire thing: the plebs already built a distributed fleet of Hashcenters before anyone named them. Sovereign AI is just one more layer decentralized onto infrastructure you already paid for.
What the S19 shed already solves
Let’s inventory what you have. You’d be surprised how many of these line items are $5,000+ obstacles for a non-miner.
- 240V service, typically 30–50A dedicated circuits. An S19j Pro pulls 3,050W at the wall. An S19 XP pulls 3,250W. You almost certainly have one circuit per miner, landed on a subpanel, and the subpanel itself is sized for simultaneous draw. GPU rigs love the same voltage — more on that in a moment.
- Structured airflow. ASIC-miner cooling is more aggressive than what a GPU rig needs. S19-class miners want 400+ CFM of clean intake and a straight path to exhaust. If you’ve already built that, you’ve over-provisioned airflow for inference. This is a good problem.
- Sound isolation. Stock S19 fans hit 75–80 dBA at full tilt — airport-adjacent. You’ve probably done some combination of foam panels, double-wall construction, a sound trap on the exhaust, or all three. Consumer GPU fans peak around 55–65 dBA, and blower-style workstation cards (A4000, A5000) are quieter than that. Your shed is already quieter than it needs to be for GPUs.
- Dust filtration. If you installed MERV-rated filter media on the intake (most serious plebs do, after the first time they opened an S19 and found a felt hat of lint on the hashboards), that same filtration protects GPU fins and VRM heatsinks.
- Fire safety. Smoke detection, CO detection if you’re burning gas nearby, dedicated breakers, AFCI/GFCI where applicable, the fire extinguisher you hopefully never used. All transfers.
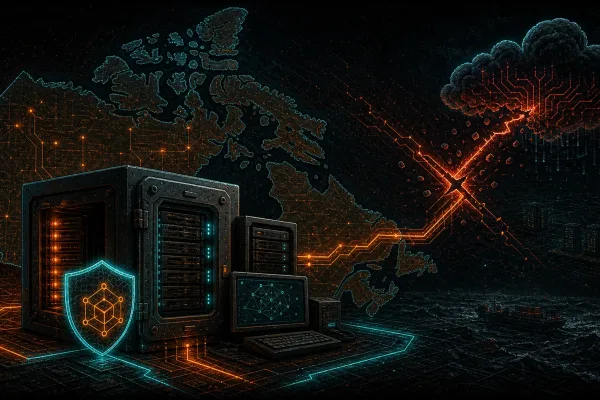
- Network isolation. Your miners probably live on a VLAN or a separate SSID that isn’t your home LAN — because nobody wants a pool DDoS to take down Netflix. That same isolation is exactly what you want for sovereign AI reachable over Tailscale.
If you’re starting from scratch, these line items add up to five figures and six months of weekend work. You skipped all of it.
The electrical delta — GPUs want different loads
Here’s the one place you need to think, because ASIC and GPU loads feel similar on paper but are shaped differently on the breaker.
An S19-class miner pulls 3,300–3,500W steady-state at 208/240V. Pull is boringly constant — once it’s hashing, the wattmeter barely twitches. You can size the circuit by nameplate + 25% NEC headroom and forget about it.
A GPU inference rig is bursty. A 4-GPU frame with RTX 3090s draws ~200W at idle (GPUs asleep, CPU and motherboard alive, PSU overhead). When a large model loads into VRAM and starts generating tokens, it can ramp to 1,200–1,800W in under a second, then drop back to idle the moment the response finishes. A busy Open WebUI with five plebs in your household asking questions all evening looks like a sawtooth wave on the wattmeter.
Two implications:
- You may be able to retire an S19 and run the GPU rig on the same circuit. A 30A/240V circuit is good for ~5,760W continuous (80% rule). One S19 at 3,300W leaves ~2,400W of headroom — enough for a small GPU rig. Pulling the S19 and landing a 4×3090 build on that circuit is well within spec. Always measure. Always check your panel schedule. If you’re unsure, this is a licensed-electrician call. See the S19 power profiles reference for exact per-model draw at various tuned efficiency points.
- Bursty loads want beefier transient response. Cheap consumer PSUs hate going from 200W to 1,500W in 100ms. This is exactly where the server-PSU-plus-breakout-board approach — which the homelabber community figured out years ago for early GPU mining and kept perfecting — shines. Shoulders of giants: none of this would be documented without the folks on r/homelab and the old Bitcointalk GPU-mining threads.
PSU reuse. The server PSUs coming off decommissioned ASIC shelves — Delta 2400W, HP DPS-1200FB, Artesyn DS2000 — are absolute units. 94%+ efficient, 12V-only, built for 24/7 industrial duty. Pair one or two with a breakout board (the community standardized on a few PCB layouts with 6-pin and 8-pin PCIe outputs), fuse each rail properly, and you have a GPU-mining-rig power stage that will outlast the GPUs by a decade. The one caveat: server PSUs are 12V-only. Your motherboard still needs 24-pin ATX + 8-pin EPS, so either use an ATX add-in board that converts server 12V to motherboard rails, or run a small secondary ATX PSU for the motherboard and server PSUs for the GPUs. Both approaches are well-documented.
240V vs 120V for GPU rigs. Run 240V if you can. Same argument as with your ASICs: lower current, less I²R loss in the wire, better PSU efficiency (most server PSUs peak efficiency at 230V+), less heat in the breaker panel. The 120V mining conversation for plebs who don’t have 240V available translates directly to GPU rigs — the same trade-offs apply.
The airflow delta
ASIC airflow is linear and directional. Intake on one end, exhaust on the other, straight shot through the hashboards. You probably built ducting to match.
GPU airflow is more omnidirectional and more forgiving. A 4-GPU open-air frame wants 150–250 CFM across the card stack, not the 400+ CFM per S19 you’re used to providing. Any existing intake/exhaust your shed has will handle a GPU rig and then some.
Three scenarios to think through:
- GPU-only shed (you retired all the ASICs). Your existing ducting is dramatically over-spec. You can downsize the intake fan, run it slower, save the power. The shed becomes nearly silent.
- Hybrid shed, shared duct (ASICs + GPU rig share intake/exhaust). This is fine for almost everyone. The ASICs draw their 400+ CFM through their own chassis; the GPU rig pulls from the shared cold aisle. As long as your intake can supply the sum of both demands, you’re good. Put a CFM meter on the intake for a week and confirm.
- Hybrid shed, segregated airflow. If you want belt-and-suspenders, partition the shed with a simple plywood baffle. ASIC side gets the aggressive duct, GPU side gets a modest squirrel-cage fan. Useful if you’re running GPUs that are particular about intake temps (the 3090s specifically dislike >35 °C intake in sustained loads).
Heat recovery into the home. You already do this for your ASICs — that’s half the reason you’re mining. GPU inference recovers heat too, but the shape of the heat curve is different: ASIC heat is a flat line, GPU heat is a sawtooth. A pure-GPU shed dumps 1.8 kW for 20 minutes while someone runs a long agent task, then 200W for two hours, then another spike. Your home’s thermal mass absorbs most of the variability, but if you’re using the shed as your primary winter heat source, the flat baseload of one or two S19s plus the burst heat of a GPU shelf is a more comfortable curve than either alone. This is another vote for the hybrid. See the Heating Your Home With Inference post for the thermal math and the dead-honest caveats.
The hardware shopping list
Here’s the gear. Prices and availability are 2026-Q2; treat as rough.
| Component | Pleb pick | Why |
|---|---|---|
| GPU: best $/VRAM | Used RTX 3090 (24GB) | The gold standard for used inference. 24GB VRAM fits 34B models at Q4. Available used for roughly half of 4090 money. |
| GPU: current-gen | RTX 4090 (24GB) | Faster, more efficient per token, newer driver support. You pay for it. |
| GPU: cheap 24GB, older silicon | Tesla P40 or P100 | Data-center pulls, dirt cheap, 24GB VRAM — but Pascal-era. Works in Ollama and llama.cpp; slower than 3090 on modern quants. Great for experimentation. |
| GPU: blower, rack-friendly | RTX A4000 / A5000 | Single-slot blower-style. Quieter. Ideal if your shed is actually a server rack. Lower VRAM per dollar than a 3090. |
| Motherboard | Any used X99, X299, or TRX40 with 4–7 PCIe slots | Lane count matters more than generation for inference. PCIe 3.0 x8 per GPU is plenty for Ollama/vLLM on 24GB cards. |
| Frame | Open-air GPU mining frame | Re-use what you have. Or a rack-mount 4U chassis if you’re going server-style. |
| PSU | Server PSU + breakout board | See above. Delta 2400W or HP 1200W are pleb favorites. |
| CPU + RAM | Any modern 8-core, 64–128GB RAM | Inference is GPU-bound. Don’t overspend here. |
| Storage | 2TB NVMe | Models are big. A single Llama 3.1 70B quant is ~40GB. You’ll want to keep 10–20 models around. |
| Networking | 1 Gbps to the house, managed switch | Gigabit is fine for inference traffic. 10 Gbps is a nice-to-have, not a need. |
Full deep-dive with specific listings and what to look for when buying used coming in Used RTX 3090 for LLMs in 2026.
For the GPU selection itself, NVIDIA’s GeForce product page is the canonical source for current SKU specs. Memory bandwidth and VRAM capacity are the two numbers that matter most for inference — ignore gaming benchmarks.
Software stack
If you’re running DCENT hardware on the Bitcoin side, DCENT_OS is in active development for the S19 family — it is public beta today, with downloadable images for the Antminer S9 and S19j Pro (Zynq/XIL boards), with S19-class support planned (GPL-3.0, public beta open since 9 July 2026, an estimate). Any S19s you keep in service stay on the roadmap; nothing about this conversion changes that.
For the GPU shelf, here’s what a pleb can actually run today:
- Operating system: Ubuntu Server 24.04 LTS. Boring is good.
- GPU driver: NVIDIA open kernel module + CUDA 12.x via the official
.debpackages. Don’t let anyone talk you into the distro-packaged drivers on a rig that does real work. - Inference runtime: Ollama for the easiest path — built on top of llama.cpp, which Georgi Gerganov started and an entire ecosystem continues. Without llama.cpp, none of this — Ollama, LM Studio, half the open-source inference tooling — exists. Credit where it’s due.
- Frontend: Open WebUI gives you a ChatGPT-style interface pointed at your Ollama instance. See Pleb’s Guide to Self-Hosted AI for the full setup and Install Ollama in 10 Minutes for the fast path. A dedicated walkthrough of the Open WebUI experience is coming in the Open WebUI ChatGPT Experience post.
- Models: Meta’s Llama 3.1 and Llama 3.3 families. Alibaba’s Qwen 2.5 and Qwen 3. Google’s Gemma 2. DeepSeek’s V3 and R1 distills. Each of these represents hundreds of millions of dollars and thousands of researcher-years of work made freely available to plebs like us. We are standing on absolute mountains of shoulders.
- Networking: Tailscale so the shed is reachable from inside the house — and from your phone, while you’re camping — without opening a single port on your router. Works flawlessly with WireGuard under the hood.
- Monitoring: Prometheus + Grafana is the open-source standard. If you’re deep in the D-Central ecosystem, the forthcoming DCENT_Toolbox gives a unified dashboard across ASICs and GPU nodes (in public beta as of July 2026, GPL-3.0).
On the GPU-side OS: keep it boring and sovereign. Ubuntu plus the open-source tools above is the stable path — you own the stack, you read the source, and nothing phones home. That is the whole point.
Hybrid Hashcenter — the recommended config
For most plebs with an existing two- or three-S19 shed, the move is not “rip out the ASICs and become an AI person.” The move is:
- Keep 1–2 S19s running — baseload heat, baseload sats, baseload psychological comfort that your Bitcoin position keeps compounding.
- Add a 4-GPU shelf for inference on the next breaker.
- One shared monitoring dashboard.
- One shared Tailscale network.
- One sovereign household running on weights you chose and hash you mined.
Here’s the comparison:
| Pure ASIC shed | Pure GPU shed | Hybrid (recommended) | |
|---|---|---|---|
| Constant heat output | Excellent (flat line) | Poor (sawtooth) | Excellent (baseload + bursts) |
| Sovereign AI capability | None | Full | Full |
| 24/7 revenue | Yes (sats) | No | Yes (sats) |
| Peak workload | Mining only | Inference only | Both simultaneously |
| Peak noise | 75–80 dBA | 55–65 dBA | 75–80 dBA (ASIC dominates) |
| Power cost | Constant | Variable, often lower | Constant + bursts |
| Breaker utilization | High | Low-to-moderate | High |
| Hardware diversification | Low (single-purpose) | Low (single-purpose) | High |
Hybrid wins on every axis that matters to a pleb: the heat curve is smoother for your home, the revenue floor stays, and you gain AI sovereignty without giving up Bitcoin sovereignty. You’re not choosing between two loyalties. You’re stacking them.
For the broader view of why this matters at a civilizational scale — the argument that Bitcoin plebs are structurally the right people to own sovereign AI infrastructure — see Bitcoin AI Public Companies and the Hashcenter Pivot. Mining heater context, for the plebs who got into this for the heat in the first place, is in the mining heaters writeup.
The sovereignty close
Your S19 shed was already a Hashcenter. You just didn’t have the word for it. It was already the thing hyperscalers charge $20M per megawatt to build, minus the SLA theater, minus the absent ownership, minus the heat being thrown into the sky.
Adding a GPU inference shelf makes it a multi-workload Hashcenter. Bitcoin on one breaker, sovereign AI on the next. One roof, one breaker panel, one household that runs on weights you downloaded, numbers you mined, and answers you generated without asking permission. The mining shed you built in 2021 because electricity prices made sense becomes, in 2026, the most undervalued piece of real estate you own.
This is what “one more layer decentralized” looks like in practice. Not a pivot. Not a replacement. An extension of the sovereignty you already bought — now with the ability to think locally too.
For the philosophical frame, read Sovereign AI for Bitcoiners: A Manifesto. For the thermal engineering, read Heating Your Home With Inference. For the fast hands-on, Install Ollama in 10 Minutes and Pleb’s Guide to Self-Hosted AI. And when you’re ready to flip the breaker and land the first 3090, the used 3090 buying guide will be waiting.
The shed was the hard part. You already built it. Now plug in.
 Antminer S19 Space Heater Edition" width="80" height="80" loading="lazy" style="width:80px;height:80px;object-fit:contain;border-radius:6px;background:#1A1A1A;flex-shrink:0;">