A lead-free SAC305 reflow profile runs four stages: preheat (1-3°C/s up to ~150°C), soak (150-200°C for 60-120s), a reflow peak of 235-245°C with 45-90s above the ~217°C liquidus, and controlled cooling at ≤4°C/s. On aluminum-substrate Antminer hashboards, add bottom-side preheat and slow your ramps — the metal core wicks heat away from any FR4-tuned profile.
Reflowing a joint on an ASIC hashboard is not the same job as reflowing a hobby PCB, and a profile that works beautifully on FR4 will quietly fail you on an Antminer board. The reason is the substrate: most modern Antminer hash boards are built on an aluminum core, not fiberglass. That core is a superb heat spreader during mining and a stubborn heat sink during rework. This reference lays out a citable four-stage SAC305 thermal profile, then gives the concrete adjustments that high-thermal-mass aluminum boards demand. It is a profile reference, not a substitute for hands-on training — treat the numbers as a tuned starting point, then verify on a sacrificial board.
Why hashboard reflow is its own discipline
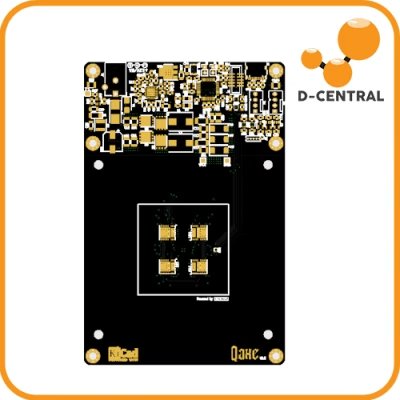
Standard surface-mount profiles are written around FR4, whose in-plane thermal conductivity sits well under 1 W/m·K. Heat you put into a joint largely stays near that joint. Aluminum is the opposite: the metal base typically conducts on the order of 150-200 W/m·K and carries far more thermal mass per square centimeter. When you aim a hot-air nozzle at a single bottom-terminated ASIC, the aluminum pulls that energy outward across the whole board before the target joints ever reach the ~217°C liquidus of SAC305.
Technicians who do not account for this fall into one of two traps. Either they never melt the joint cleanly — producing cold, dull, grainy connections that look soldered but fail under thermal cycling — or they overcompensate by cranking the air tool to 400°C+, which scorches the solder mask, oxidizes pads, lifts traces, and cooks neighboring level shifters and capacitors. The fix is not more top heat. It is a properly staged profile with the bulk of the board pre-warmed from below. If you are new to why these boards behave this way, D-Central’s guide to Bitmain aluminum substrates covers the material science, and the broader chip-level repair deep dive puts reflow in the context of full board diagnosis.
The four-stage SAC305 reflow profile (FR4 baseline)
SAC305 is the Sn96.5/Ag3.0/Cu0.5 lead-free alloy used in nearly all current ASIC hardware and on the 0.4mm reball spheres used for chip replacement. Its melting behavior is the anchor for everything below: it begins to melt (solidus) at about 217°C and is fully liquid (liquidus) by roughly 218-220°C. Every number in the profile is referenced to that ~217°C threshold. The values below reflect the consensus across paste technical data sheets (AIM, Kester) and the JEDEC/IPC J-STD-020 reflow framework.
| Stage | Target temperature | Ramp rate | Duration | What it does |
|---|---|---|---|---|
| 1. Preheat / ramp-up | Ambient → ~150°C | 1-3°C/s (aim 1.5-2.5) | ~60-90s | Drives off paste solvents and gently warms the board; too fast risks spatter and thermal shock |
| 2. Soak / thermal equalization | 150-200°C | ~0.5-1°C/s (gentle) | 60-120s | Activates flux, equalizes temperature across the joint and board, reduces voiding |
| 3. Reflow / peak | Peak 235-245°C (ceiling ~250°C) | 1-2°C/s up to peak | Time above 217°C liquidus: 45-90s | Melts the solder and wets the joints; the working window above liquidus |
| 4. Cooling / solidification | Peak → below 217°C → ambient | −2 to −4°C/s (4°C/s max) | — | Forms a fine-grain joint; too fast invites cracking and warpage |
Stage 1 — Preheat
Bring the assembly up at 1-3°C/s, settling around 150°C. Most TDS guidance and field practice favor the calmer end (1.5-2.5°C/s) for mixed-mass boards. A steep ramp on a board loaded with small 0402 passives can tombstone parts and stress joints before the flux has done any work.
Stage 2 — Soak
Hold the board in the 150-200°C band for roughly 60-120 seconds. This is where the flux activates and reduces oxides, and — critically on a high-mass board — where the whole assembly catches up to the joint temperature. Skimp on the soak and you reach peak with a cold board underneath a hot joint, which is exactly how you get voiding and inconsistent wetting.
Stage 3 — Reflow peak
Cross the 217°C liquidus and bring the joint to a peak of 235-245°C. Keep the time above liquidus to roughly 45-90 seconds — long enough to wet fully, short enough to avoid growing brittle intermetallic compounds and stressing the silicon. Component bodies are typically rated to a 260°C class peak under J-STD-020, but there is no reason to ride that ceiling; 240°C ±5 at the joint is a healthy target for hand and hot-air rework.
Stage 4 — Cooling
Let the joint solidify and cool at no more than ~4°C/s, ideally 2-4°C/s. Controlled cooling produces a finer, stronger grain structure. Yanking heat away — a blast of compressed air, an open shop door in winter — shocks the joint and, on aluminum, invites the warpage and pad-cracking failures described below.
The aluminum-substrate adjustment
Here is the part the generic profile leaves out. The four stages above are correct in shape for an Antminer board, but the FR4 numbers will not get you there because the aluminum core fights you the entire time. The differences are not cosmetic — aluminum’s high thermal conductivity, high thermal mass, and high coefficient of thermal expansion (roughly 23 ppm/°C, well above silicon and copper) change how you reach and leave the peak. Adjust as follows.
| Parameter | FR4 baseline | Aluminum-substrate adjustment | Why it changes |
|---|---|---|---|
| Bottom-side preheat | Optional | Mandatory — preheat the whole board to a ~150-160°C bed before any top air | The metal core wicks heat from the joint; the top tool can only add the final delta to liquidus |
| Soak duration | 60-120s | Extend the dwell; give the bulk time to equalize | High thermal mass is slow to reach a uniform temperature |
| Top hot-air setpoint | Moderate | Do NOT crank higher to “win” — raise the board with the preheater instead | Cranking top air scorches mask, oxidizes pads, and cooks neighbors before the joint melts |
| Ramp rate | 1-3°C/s | Slower and gentler on the way up | High-CTE aluminum builds thermal gradients and warps under steep ramps |
| Cool-down | ≤4°C/s | Slow and gradual; let the bulk cool with the joint | CTE mismatch between aluminum, copper, and silicon cracks joints if shocked |
| Temperature feedback | Air-tool readout acceptable | Thermocouple on the joint/board is mandatory | The board lags the air tool badly; the nozzle readout is not the joint temperature |
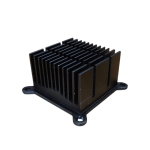
The single most important change is the bottom preheater. A hot plate or IR/quartz preheat bed brings the entire aluminum slab up into the soak band so the localized hot-air tool only has to supply the last 60-80°C to cross liquidus at the target. This is what lets you keep top-air temperature moderate, protect adjacent components, and still reach a clean 240°C joint. The Bible’s bench guidance of a 350-380°C nozzle setpoint for chip removal refers to the air-stream temperature at the tool, not the joint — with a preheated board you can often work at the lower end of that range and still melt cleanly.
Putting it into practice on a hashboard
A workable sequence on an aluminum-substrate Antminer board looks like this. First, remove the heatsink over the work area, clean old thermal interface material, and shield neighbors — Kapton tape over nearby passives and connectors, a heat shield around the target. Second, place the board on the preheater and bring the bulk up into the 150-160°C soak band; hold until a thermocouple confirms the board itself, not just the air, has equalized. Third, apply localized top hot air, ramping the joint across the 217°C liquidus to a 240°C ±5 peak and holding 45-90s above liquidus. Fourth, cut the top air and let the board cool on the still-warm preheater so the descent stays under ~4°C/s rather than crashing.
For chip replacement specifically, the same profile governs the reball and re-seat: 0.4mm SAC spheres melt on the identical curve, and Fujipoly-class thermal gel is reapplied only after the joint has fully solidified and been inspected. Whatever you reflow or replace, the board must be re-validated — a reflowed joint that looks perfect can still read open. Confirm with the methods in D-Central’s notes on voltage-domain measurement, a hashboard tester for chip enumeration, and thermal imaging to catch cold joints and shorts that survived the rework.
Reading reflow defects backward to the profile
Most rework failures map cleanly to a profile error. Use the symptom to correct the curve rather than guessing.
| Symptom after reflow | Most likely profile cause |
|---|---|
| Dull, grainy, cold-looking joint; chip still reads open | Peak too low or time above liquidus too short — heat sank into the aluminum; add bottom preheat and verify joint temp |
| Browned or lifted solder mask, scorching near the work area | Top air cranked too high to overcome heatsinking; lower the nozzle and raise the preheater instead |
| Tombstoned or shifted small passives | Ramp too fast or uneven heating during preheat/soak |
| Joints crack or chip drops out shortly after cooling | Cool-down too fast; CTE shock on the aluminum core — slow the descent below 4°C/s |
| Excessive voiding in the joint | Soak too short or too cool; flux did not fully activate before peak |
When to reflow, when to replace, and when to send it out
Reflow is the right first move for a suspected cold or cracked joint — a board that intermittently drops a chip, or one whose chain breaks after thermal cycling. It is not a cure for a genuinely dead ASIC, a shorted domain, or a failed regulator; in those cases the profile is just the tool you use during a component replacement, not the repair itself. Reflow also has limits: each thermal cycle grows intermetallic compounds and stresses the silicon, so a joint reworked repeatedly is a joint living on borrowed time.
Aluminum-substrate boards raise the stakes because the equipment bar is real — a controllable preheater, a thermocouple on the joint, good masking, and patience. If you do not have a proper preheat bed, attempting full-board rework with a handheld hot-air gun alone is how good boards become scrap. There is no shame in that; this is genuinely skilled work, and the open repair community, paste makers’ data sheets, and standards like J-STD-020 exist precisely because it is hard. When a board is worth saving and the bench is not equipped for it, D-Central’s ASIC repair service handles aluminum-substrate rework on calibrated equipment — you can start a repair and let the profile be our problem instead of yours. For chip identification before you order replacements, the ASIC chip reference maps models to their BM-series silicon.
Frequently asked questions
What is the peak temperature for a SAC305 reflow profile?
Aim for a joint peak of 235-245°C, with about 45-90 seconds above the ~217°C liquidus. A 240°C ±5 target is a healthy default. Component bodies are typically rated to a 260°C-class peak under J-STD-020, but there is no benefit to riding that ceiling and real risk in doing so.
Why does my hashboard joint never melt even though my hot-air tool reads 350°C?
Because the aluminum substrate is wicking that heat away faster than the nozzle can deliver it, and the tool readout is the air temperature, not the joint temperature. The fix is a bottom-side preheater that raises the whole board into the 150-160°C soak band first, plus a thermocouple on the actual joint so you are measuring what matters.
How is reflowing an aluminum Antminer board different from FR4?
Same four stages, different execution. Aluminum’s high conductivity and thermal mass demand a mandatory bottom preheat, a longer soak, gentler ramps, and a slower cool-down. You also keep top-air temperature moderate rather than cranking it — raising the board with the preheater is what gets you to liquidus without scorching the mask or cooking neighbors.
What is the liquidus temperature of SAC305?
SAC305 (Sn96.5/Ag3.0/Cu0.5) begins to melt at about 217°C (solidus) and is fully liquid by roughly 218-220°C (liquidus). All “time above liquidus” measurements are referenced to that ~217°C threshold.
How fast should the cool-down be?
No faster than about 4°C/s, and 2-4°C/s is ideal. Controlled cooling builds a finer, stronger grain structure. On an aluminum board especially, a fast crash-cool shocks the joint and exploits the CTE mismatch between aluminum, copper, and silicon, producing cracks that may not show up until the board is back under load.
Will repeated reflows damage the chip?
Yes, eventually. Every thermal excursion grows brittle intermetallic compounds at the joint and thermally stresses the silicon. Reflow is a legitimate first attempt for a cold or cracked joint, but a connection that needs reworking again and again is signaling a deeper fault — verify with voltage-domain measurement, chip enumeration, and thermal imaging rather than re-cooking the same joint indefinitely.