Your Antminer is a sealed box pulling air through itself 24 hours a day. Inside, dust is packing into the heatsink fins, thermal paste is slowly turning to chalk, and a fan bearing is getting louder by the week. None of that announces itself until your hashrate drops or a temperature fault shuts the unit down. A teardown is how you get ahead of it — and on most Antminer models it’s a job you can do at a kitchen table with hand tools. This is the real procedure, the model-specific gotchas, and the honest line where DIY stops and the repair bench starts.
Last updated: May 2026.
What’s actually inside an Antminer
Before you remove a single screw, know the three subsystems you’re working around — because how you handle each one is different:
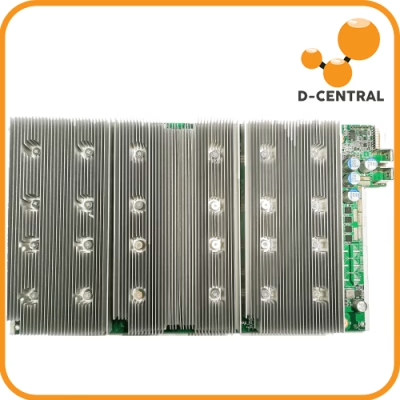
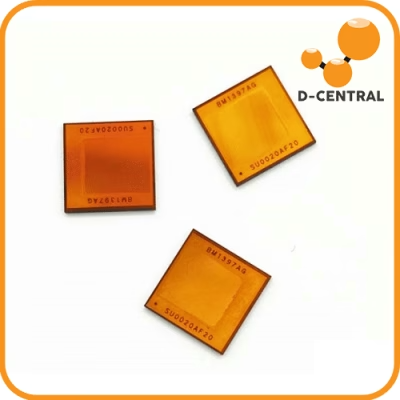
- Hashboards. The boards covered in ASIC chips and heatsinks. These do the actual mining. An Antminer S19 runs 114 BM1362 chips across its boards; an older Antminer S9 packs 189 BM1387 chips. Hashboards are the most fragile and most expensive part. Handle by the edges only.
- Control board. The small board with the network port, the brain that runs the firmware and talks to the pool. Static-sensitive, and the part you’re least likely to need to touch during a cleaning teardown.
- Fans and PSU. The wear items. Fans are consumables — bearings fail, blades crack. The PSU is high-voltage; treat it with respect.
A teardown for maintenance touches the hashboards, fans, and heatsinks. It should not involve poking at the control board or opening the PSU unless you’re chasing a specific fault — and at that point you’re doing repair, not maintenance.
Why bother — the failure modes a teardown actually prevents
“Regular maintenance is good” is a platitude. Here’s the specific list of documented faults that a teardown catches early, every one of them in D-Central’s Antminer error code reference:
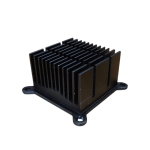
- Overheating shutdowns. Dust-clogged fins and dead thermal paste are the leading cause of a temperature-too-high fault. A cleaning teardown directly removes both causes.
- Thermal paste degradation. Stock paste dries out and stops transferring heat — a named failure mode. Re-pasting during a teardown restores heat transfer to the heatsinks.
- Fan faults and noise. A teardown is when you catch a worn bearing before it throws a fan speed error or starts grinding.
- Chip temperature imbalance. Uneven heatsink contact or paste application shows up as an ASIC chip temperature imbalance — visible in the firmware before it kills a board.
What a teardown will not fix: a hashboard not detected (0 ASIC) or low hashrate from missing chips. Those are board-level electrical failures. Cleaning won’t bring back a dead chip — that’s a chip-level reflow or replacement on a repair bench.
Tools you actually need
- ESD wrist strap. Non-negotiable. Hashboards and the control board are static-sensitive, and a discharge you can’t even feel can kill a chip.
- Phillips screwdrivers (#1 and #2) and a small flathead.
- Compressed air — canned or, better, a low-pressure electric blower. Not a high-pressure shop compressor, which can spin fans hard enough to damage them.
- 99% isopropyl alcohol and lint-free cloths for cleaning old paste.
- Quality non-conductive thermal paste. Arctic, Thermal Grizzly, or equivalent.
- A multimeter if you intend to test anything electrically.
- A magnetic tray and your phone. Photograph every connector before you unplug it. This is the single best habit in the whole process.
The teardown, step by step
1. Power down properly and discharge
Shut the miner down through its web interface first, then pull the power cord from the wall. Wait at least five minutes for capacitors to bleed off. Then put on your ESD strap and clip it to bare metal. Don’t skip the wait — the PSU holds charge.
2. Open the case
Most Antminers — S9, S19 family, S21 — use a similar tube-frame design with the hashboards stacked between two fan ends. Remove the four to six case screws and lift the cover, watching for any wires snagging. Take your reference photo of the interior now, before anything moves.
3. Disconnect fans and hashboard cables
Photograph, then unplug: fan connectors from the control board, the data ribbon cables between hashboards and control board, and the power cables to each hashboard. The Antminer S9 has a critical gotcha here — the hashboards are powered and signaled in a specific order, and the data cables are directional. Label every cable. The S19 family is more forgiving but still benefits from labeling.
4. Remove the hashboards
Locate the screws securing each hashboard to the frame, remove them, and lift each board straight out — by the edges, never touching the chips or the board surface. Set them on a static-safe surface. This is the moment of maximum risk in the whole job. Slow down here.
5. Clean and inspect
With the boards out: blow dust from the heatsink fins and fan housings with low-pressure air. Inspect every board for the things that end a miner — bulging or leaking capacitors, scorched components, corrosion (a tell-tale of water damage or humidity), and lifted or cracked solder joints. A board with obvious electrical damage doesn’t get cleaned and reinstalled; it gets a decision: repair bench, or replace.
6. Re-paste — only if you’re equipped to do it right
This step is where DIY teardowns go wrong most often, so be honest with yourself. On many Antminer hashboards the heatsinks are not just pasted — they’re held with thermal adhesive or clips, and removing them cleanly without lifting a chip pad is genuinely tricky. If your heatsinks come off easily and cleanly: wipe the old paste with isopropyl, apply a small amount of fresh non-conductive paste, and reseat. If they don’t come off easily — stop. Forcing a stuck heatsink is how you turn a maintenance teardown into a hashboard-not-detected fault. Re-pasting is the part most worth handing to professionals if you’re not certain.
7. Reassemble
Reverse the process, using your photos. Hashboards seated and screwed down, all data and power cables reconnected to the right ports, fans reattached in the correct orientation (airflow direction matters — an inverted fan is an instant overheat). Double-check every connector before the cover goes on. Then the classic test: gently tip the unit and listen for anything loose rattling. If something rattles, open it back up.
8. First boot — watch it carefully
Power on and immediately open the web interface. Confirm all hashboards are detected, the chip count is correct (114 for an S19, 189 for an S9), hashrate climbs to spec, and temperatures stabilize in range. A board reading fewer chips than it should, or a temperature climbing past where the others sit, tells you something in the teardown didn’t go right — usually a seating or paste issue. Better to catch it in the first ten minutes than three weeks later.
Model notes: not every Antminer tears down the same
| Model | Chips | Teardown notes |
|---|---|---|
| Antminer S9 | 189× BM1387 | Oldest, simplest frame. Three hashboards, directional data cables — label carefully. Great learning machine; the silicon is cheap if you make a mistake. |
| Antminer S19 / S19 Pro | 114× BM1362 | Denser boards, more heat. Heatsinks are well-bonded — re-pasting is a careful job. Most common home-mining teardown. |
| Antminer S21 | 132× BM1368 | Newest generation, tightest packaging, highest power density. Less DIY-friendly internally — proceed only if confident. |
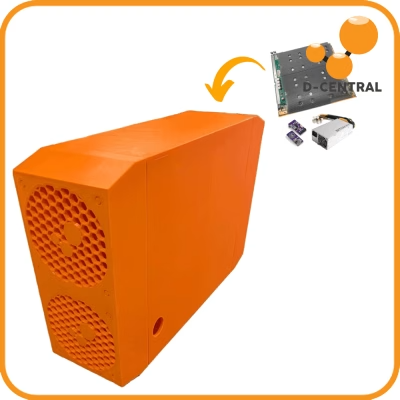
D-Central’s custom builds — the Antminer Slim Edition and Loki Edition — are S9-based and share the S9’s relatively approachable internals, which is part of why they make good hands-on hardware.
Where DIY ends and repair begins
A teardown for cleaning, dust removal, fan replacement, and a clean re-paste is squarely DIY territory. Here’s where you should put the screwdriver down and talk to a bench instead: a hashboard that won’t detect, a board with visible burn or corrosion damage, chip-level faults, anything involving the PSU internals, or a heatsink you can’t remove without forcing it. Our breakdown of professional ASIC repair vs. DIY draws that line in detail, and the control board vs. hashboard guide helps you figure out which subsystem is actually failing. There’s no shame in it — a board you send for repair is a board you can still mine with. A board you force is often a board you’ve lost.
Frequently asked questions
How often should I tear down my Antminer?
A full clean every 6–12 months is a reasonable baseline. But it depends entirely on environment — a miner in a dusty garage or a humid space needs it more often than one in a clean, climate-controlled room. Let the temperatures and fan noise tell you: rising temps or a louder fan are your signal to open it up sooner.
Will a teardown void my warranty?
On a new manufacturer-warrantied unit, opening the case may void coverage — check before you start. On refurbished or out-of-warranty hardware, it’s a non-issue. D-Central’s refurbished and custom-edition miners are built with maintenance in mind.
Can I clean hashboards with water or a compressor?
Never water. For dust, use low-pressure air — canned air or an electric blower — not a high-pressure shop compressor, which can spin the fans fast enough to damage them and can drive moisture and debris into components. Isopropyl alcohol and lint-free cloths are for removing old thermal paste, nothing else.
My Antminer won’t power on after reassembly. What now?
Power down, and recheck every connection against your photos — a missed or half-seated data or power cable is the usual culprit. If it’s a single hashboard not detecting rather than a dead unit, work through the hashboard not detected reference. If the whole unit is dark and connections check out, that’s bench territory.
Open it up — or let the bench handle it
A confident teardown is one of the highest-value skills a home miner can build — it’s the difference between catching a problem and replacing a machine. But know your line. For tools, thermal paste, and replacement fans, browse the D-Central shop. For anything past a cleaning, D-Central’s ASIC repair service is the same bench that prepares our refurbished units — and they’d rather fix a board than watch you force one. If you want a second opinion before you commit, the contact page is open.