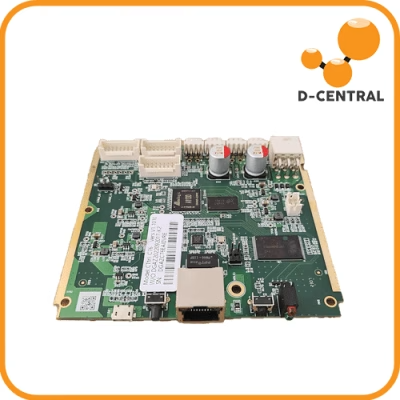
When an Antminer refuses to boot — no web interface, no hashing, sometimes not even a network light — the diagnosis often ends at two words: corrupted NAND. The NAND flash on the control board holds everything the miner needs to become a miner: the bootloader, the FPGA bitstream, the Linux kernel, the root filesystem, and your configuration. When any of those partitions goes bad, the machine is a fan-cooled brick until you rewrite them.
This guide walks through what actually lives on that chip, how the boot chain works stage by stage, which symptoms point at which failed stage, and the recovery route for each control board family — Zynq, BeagleBone, and Amlogic. It draws on our repair bench experience and on the open-source work that mapped these boards, including polprog/antminer_zynq, braiins/zynq-io, and skot/amlogic-cb-tools.
What lives on the NAND: the Zynq partition map
On the Xilinx Zynq control boards (C55/C71 — the classic S9-through-S19-era boards), the NAND is a 256 MB Winbond W29N02GZ (some revisions carry 512 MB), divided into eight MTD partitions:
| Partition | Size | Contents | Integrity check |
|---|---|---|---|
| mtd0 | 40 MB | BOOT.bin (FSBL + FPGA bitstream) + kernel zImage | RSA-verified |
| mtd1 | 32 MB | ramdisk.itb — the root filesystem | SHA256-verified |
| mtd2 | 8 MB | configs/UBI — cgminer.conf, user settings | — |
| mtd3 | 2 MB | Signature partition (SHA256 hashes at offset 1024–1279) | — |
| mtd4 | 14 MB | reserve1 | — |
| mtd5 | 16 MB | upgrade-ramfs (firmware upgrade staging) | — |
| mtd6 | 56 MB | upgrade-files (firmware upgrade payloads) | — |
| mtd7 | 88 MB | reserve2 | — |
Two details in that table decide most recovery jobs. First, the boot-critical partition (mtd0) is RSA-verified against keys burned into the SoC’s eFuses — you cannot substitute your own bootloader or bitstream on a locked board. Second, the root filesystem (mtd1) is only SHA256-verified against hashes stored in mtd3, which is why firmware developers (including our own DCENT_OS work) can replace the ramdisk while leaving the verified boot front-end intact.
The boot chain, stage by stage
Knowing the order of operations turns a dead miner from a mystery into a checklist. On a Zynq board the sequence is:
- BootROM — hardcoded in silicon. Reads the boot-mode pins and decides between NAND and SD card.
- FSBL (First Stage Boot Loader) — loaded from BOOT.bin, RSA-verified, brings up DDR memory and clocks.
- FPGA bitstream (soc_system.rbf) — RSA-verified, programs the FPGA fabric that handles all hash board communication.
- U-Boot — RSA-verified, loads the kernel, device tree, and ramdisk from NAND.
- Linux kernel — verified by U-Boot.
- Ramdisk — SHA256-checked against the mtd3 signature partition, then mounted as the root filesystem.
- Init — loads the two FPGA kernel modules (bitmain_axi.ko and fpga_mem_driver.ko), starts bmminer/cgminer, the lighttpd web interface on port 80, and DHCP.
Matching symptoms to the failed stage
Each stage that fails leaves a different fingerprint:
- Nothing at all — no Ethernet activity, no signs of life beyond fans. Failure is early: BootROM can’t load a valid FSBL from mtd0, or the board has a power problem. If a known-good SD recovery card also does nothing, suspect the board hardware rather than the NAND.
- Boots but never brings up the web interface or DHCP. The early chain worked; the kernel or ramdisk stage is failing. A ramdisk that fails its SHA256 check against mtd3 stops the boot right at stage 7.
- Boots, web UI works, but settings vanish or reset on every reboot. Classic mtd2 (configs/UBI) corruption — the miner runs from its read-only ramdisk but can’t persist your pool settings.
- Firmware upgrades fail repeatedly but the miner otherwise runs. Look at the upgrade staging partitions (mtd5/mtd6) — bad blocks there break the upgrade path while leaving normal operation untouched.
Before blaming the NAND, rule out the cheap suspects: a failing PSU can produce boot loops that mimic flash corruption. Our PSU troubleshooting guide and kernel-log reading guide cover that triage, and the ASIC troubleshooting library maps specific error codes.
Recovery routes by control board family
Zynq (C55/C71) — the friendly one
These boards expose a jumper (J3) that selects the boot source: open boots from NAND (the default), shorted boots from the SD card slot. That makes recovery straightforward: write a recovery image to an SD card, short the jumper, boot, and let the recovery environment rewrite the NAND partitions. For the exact procedure and image sourcing for YOUR board family, our control-board recovery playbook covers Zynq, BeagleBone, Amlogic and more, with per-family boot-pin and reflash notes. Our SD card flashing and recovery guide walks through the procedure, and the same mechanism is how DCENT_OS installs on the S9.
BeagleBone (BBB) — still SD-based
The TI AM335x boards that appeared in late-2021 S19j/S19j Pro units have no FPGA and boot from an SD card that sits inside the enclosure cover. Reflashing means reimaging that card — no jumper hunting required.
Amlogic (C76/C81/C83) — the locked-down one
The Amlogic A113D boards in recent S19-family, S19 XP, S21, and T21 units have no SD card slot at all — the only boot source is the internal NAND. Recovery goes through the micro-USB OTG port with an OTG adapter and a USB drive. On top of that, units shipped after March 2024 carry firmware locks that require a specific unlocking procedure before third-party images will run. If your Amlogic-based miner is boot-looping and the OTG procedure doesn’t take, that’s a bench job, not a field job.
When to stop and send it in
Reflashing fixes corruption; it does not fix a NAND chip that is physically failing, an eFuse-locked board rejecting every image, or a board whose real problem is a dead voltage regulator upstream of the SoC. If a clean recovery image doesn’t stick — or the same partitions keep corrupting — the flash chip or its power delivery needs board-level attention. That’s exactly the work our repair bench in Montreal does daily, control board included. If you’re unsure which failure you’re looking at, send us the symptoms and we’ll tell you straight whether it’s worth the shipping.
Sovereignty over your mining hardware starts with understanding what’s actually on the chip. Map the partitions, follow the boot chain, and most “bricked” Antminers turn out to be one SD card away from hashing again.
Component-level references
This guide is part of a bench-grounded series on the individual components of an Antminer control board and hashboard:
- Hashboard EEPROM reference — what the EEPROM stores by generation and why boards aren’t interchangeable.
- Inside the Zynq FPGA — the CPU-decides/FPGA-transmits division of labour and why the bitstream can’t simply be replaced.
- The hashboard PIC microcontroller — what it does, how it fails, and why S21 boards have none.
- ASIC control-board reference — identify which control board you’re holding.